Latest Post :
Recent Post

How to Photograph Mushrooms

1. Mushrooms, Toad Stool or Fungi - Where to Find Them


Each type of fungi needs slightly different types of habitat to thrive. As a general rule they prefer moist, shady regions to open sunny patches. Best places to look for them are on fallen branches, decaying vegetation and stumps, moss covered logs, dense leaf litter etc. Most mushrooms sprout on the first clear day after the rains, but bear in mind that not all mushrooms sprout during the same time of the year, so it is best to keep looking for them during different seasons.
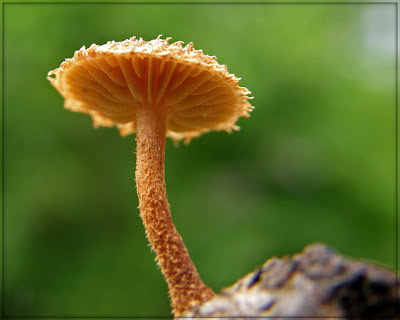
photographing mushrooms
Photo By Kicki Holmen

2. Buy a Good Book on Mushrooms


If you are serious about photographing mushrooms, you will probably need to identify the species that you shoot. Buying a good book on mushrooms will help you identify each species, their habitats, peculiarities, sprouting seasons etc. A good field guide or pocket guide on mushrooms with pictures will be easy to carry with you in the field.

3. Invest in a DSLR and a Dedicated Macro Lens


Most mushrooms are very tiny and are often found in low light conditions which make them hard to capture in photos. Even though you could capture most mushrooms with a point and shoot digital camera having a DSLR and a dedicated Macro Lens which could go up to 1:1 magnification will help you take great pictures in all kinds of tricky situations that the mushrooms would present to you. With a DSLR you have complete control over exposure and it also lets you use accessories like external flash units and triggers for off camera lighting.

photography mushroom
Photo By Arbana

4. Accessories for Stabilizing your Shot - Tripod / Gorilla pod / Beanbags – Remote trigger


Low light shooting conditions in which the mushrooms are often found will call for the use of longer shutter speeds that would rule out hand holding and require some method to stabilize your camera. Having a sturdy tripod, preferably one which legs could be splayed to place camera in very low angles is the best option. If you do not have one you could make do with a gorilla pod or a beanbag.  Wireless remote or cable release could also be very useful in such situations, also enable the mirror lock up feature if your camera has one. You could use the self timer function if you do not have a wireless or cable release and you could shoot in live view mode to bypass having to enable mirror lock up feature.

5. Turn off IS, Use Mirror Lock Up and Manual Focus


When the camera is being used on a tripod it is best to turn off the Image Stabilization feature, enable mirror lock up function if your camera has that feature, put your lens to manual focus and focus manually as auto focus is not that accurate and reliable with very small subjects that are only inches away from the tip of the lens.

photographing fungi
Photo By Le Piment

6. Use a Circular Polarising Filter


Using a polarizing filter will help saturate colours and also remove any unwanted reflections.

7. Useful Accessories – Extension Tubes, Close up Filters, Macro Focusing Rails


If you do not own a dedicated macro lens that could go up to 1:1, and if you are on a budget it is a good idea to get yourselves some extension tubes or a close up filter that will help increase the magnification factor of your existing lens by enabling it to focus closer. A good macro focusing rail is very useful when you require to make minute adjustments, once you have set up your shot with the camera on a tripod. The rail goes in between the camera and the tripod head and will enable you to shift the camera in 4 directions, front – back and side to side.

8. Off Camera Lighting


Mushroom photography is nothing but Macro Photography in low light conditions. So it calls for the use of artificial lighting equipments. Even though the on camera flash when used with the correct amount of compensation could produce acceptable results for study purposes; for the aesthetic minded photographer the image will still look somewhat flat and unattractive. The most effective method to light mushrooms is by the use of multiple off camera flashes. You will need at least two external flashes which could vary their power and some method of triggering them (Ettl cable or wireless triggers) The key light used for the subject (mushroom) will come from a flash which is used with a diffuser and other flash units used to light up the background independently. You will find reflectors and mirrors are very useful in certain situations and are often very easy to employ; but they have a lot of limitations.

mushroom
Photo By Lutz

9. Rain Protection for you and your Camera


Since mushrooms are often found in very moist and wet places, especially during the rainy season, make sure you always go prepared with suitable rain protection gear both for you and your camera.

10. Be prepared to get dirty, get wet


Mushrooms are no more than a couple of inches in size and are often found on the ground, this means to get good pictures of them a photographer who is dedicated enough to get the shot would need to sit on the ground or even lie down to get the desired angle. We have already mentioned earlier about the habitats in which mushrooms are found. So be prepared to get dirty, and get wet while hunting mushrooms. You could expect to stay reasonably dry if you have some kind of ground cloth or a plastic bag or material with you on which you could lie down.

11. Pay attention to your Backgrounds


Pay attention to your backgrounds, observe the subject closely and identify different angles from which it could be shot. Also take notice of what constitutes the background from each angle. Background is as important an element as the main subject in photography. You will require a background that complements your subject, which is not cluttered and which does not have any elements that compete for attention. Since mushrooms are tiny subjects you have much more control over your background. You could either choose to use wide open apertures which would completely blur out the background with only the subject in focus or you could shoot from very low angle and get the sky as your background (a good trick to achieve deep blue sky is to use off camera flash to light the mushroom and underexpose the sky by a couple of stops) or use artificial backgrounds like placing a broad leaf behind the subject at a distance etc.

mushroom photography
Photo By Israel Gutierrez

12. Pick the best Specimen to Shoot


If you have more than one specimen available at the place, make sure you choose the best specimen among them to shoot. While choosing which one to shoot, look for freshness, colour, shape, what constitutes the background etc.

13. Take Record shots


While photographing mushrooms make sure you take record shots of all the species. Record shots are wide angle shots that show the mushrooms along with a good deal of environment or the habitat in which it was found. It serves as a guide as to where and in which conditions could one expect to find the species.

mushroom photography tutorial
Photo By Robert Voors

14. Spend some time Grooming your Fungi


This is an important point, once you are done with taking record shots; it is now time to make the mushroom look as beautiful as possible. Most of the time you will find your specimen covered in sand, moss or other kinds of dirt. Use a light brush to slowly brush off the debris from your mushroom. Always carry a can of water so you could sprinkle a little bit of water over your mushroom which will make it look fresh. Look out for what constitutes the background if there are elements that you would not like to be in the shots remove them, sometimes you will find artificial things like bottle caps, cigarette stubs etc, which won’t be that noticeable when looking directly but will show clearly in the picture.

how to photograph mushrooms
Photo By Dirk Huijssoon

15. Experiment with Shooting Angles


Try shooting your mushroom from every possible angle, from high above to low down in the ground. Some mushrooms have bright colours and great texture on their underside, shooting from low angle makes them look larger in perspective. At times you will find mushrooms growing on tree stumps, a slight rise, etc which allow you to shoot from even lower angle.
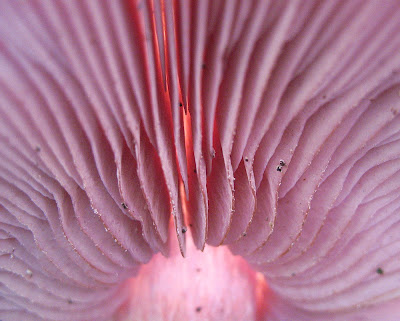
mushroom photography tips
Photo By Rachel

16. Play with Depth of Field


Depth of field determines exactly how much of the subject or scene is in focus. Extremely shallow depth of field when used creatively would render the background in a smooth blur with only the subject being in sharp focus. This could make for pleasing backgrounds and good portrait pictures. But when you wish to show a bit of environment and you need mostly everything in the frame to be in reasonable focus you need to use large Apertures. The depth of field preview button on your camera will be a very useful feature to pre-visualize the effect when using different apertures. It is best to shoot every specimen with varying apertures or if that proves to be a hassle try using the camera in Aperture Priority Mode (AV) with Auto Exposure Bracketing feature. You will never know which frame looks better when viewed in a much larger screen than that of the camera’s LCD.

photographing mushrooms toad stool fungi
Photo By Lee D Baker

17. Be safe


Last but not least when it comes to mushrooms if you are not an expert in mushroom identification then it is better to stay safe and do not touch them with your bare hands. Also make sure they do not come in contact with bare skin. Some mushrooms are completely harmless and are edible. They are served as delicacies in restaurants in different parts of the world. But some members of the family are very poisonous and could cause severe injuries or even death. Remember Death Cap is one of the common names used for mushrooms. So even if you have a pocket guide or mushroom book with you and you are confident that the mushroom you have found is pretty harmless, if it has not been identified by an expert or a naturalist then it is better to stay safe and keep you bare hands off it.
how to photograph toad stools
Photo By Tobias Schlatter

Candid Photography Tips


1. Blend in With the Crowd – Make Yourselves Invisible


The key to successful candid photography lies in the photographer’s ability to blend in with the general people in the crowd. Dress as per the occasion, avoid wearing the photographer’s jacket, keep the equipment you carry with you to the minimum, a DSLR with a general purpose zoom and some spare CF cards would do. The lesser gear you carry the lesser is the chance of attracting attention to you. Be careful with your movements, do not make sudden or jerky movements even if you see the opportunity for a great picture, instead stay calm, slowly lift the camera to your eye and shoot all your movements should be fluid, natural.


Photo By Chris JL

2. Use Long Lens


Although this contradicts with other points we mention in the article, like blend in with the crowd, don’t be very obvious, do not attract attention to you etc. Having a zoom lens with a longer focal length is essential to capture great candid moments. Longer lens lets you put considerable distance between you and your subjects, there by greatly decreasing the chances of you being noticed. General purpose zoom lens like the 18 – 135mm, 55 – 250mm, 70 – 200mm etc works really well for candid photography.

candid photography tutorial
Photo By Chris JL

3. Position Yourselves Strategically


It pays to do a tour of the entire place before the actual event so as to get an idea of things, like where will be the key events happening, where will be the audience, where will the light come from etc. after analysing all the possible scenarios look for places where you could hang out and get the best view of important moments without being an inconvenience to others. Many a times, positioning yourselves strategically before the actual moment makes the difference between getting great shots and getting average ones as you will find it difficult to move from one place to another during the function.

4. Forget about Artificial Lighting


It is best to turn off your flash and forget about it; similarly you can leave your strobes and remote triggers at home. Candid photography is strictly available light territory; as any form of flash will not only grab the attention of the entire crowd, but also will ruin the shot by draining the ambience and making the image look flat and lifeless.

photography candid
Photo By Vineet Radhakrishnan

5. Think Ahead


Try to think ahead and imagine what all situations you will be facing during the big day. Among them which ones have potential to make great pictures? It pays to make a list of shots that you would like to take during the function as it will get you organized and be mentally prepared for the challenge. An example of Must Shoot List could include things like
  • Guests When they Arrive
  • Expression of People During Speech
  • Guests Greeting Each Other
  • Expression During First Dance etc
  • Close up Pictures of Food and Wine

6. Be Ready at All Times


Carry your camera with you at all times and always be ready to shoot when an opportunity presents itself to you. Having your camera with you at all times also has the advantage that after a while people tend to ignore it and then will be your chance to shoot people who are otherwise very shy towards cameras.

candid photography tips
Photo By Simon Ingram

7. Anticipate


Just like in wildlife photography, the skill to anticipate what is going to happen next and being ready to capture the moment is very essential. You will only get a split second from the moment you see it coming to the moment you realize a potentially great shot missed. The trick to avoid it from happening is to be able to predict in advance what is going to happen and clicking at the precise time to successfully grab the shot.

8. Master the Semi Automatic Modes of Your Camera


It is a good idea to completely master the semi automatic modes of your digital camera like Aperture priority mode and Shutter Priority Mode, also how to set exposure compensation and how it does affects the exposure. Mastering these modes makes your metering and clicking much faster than in manual mode and it is also gives you much more control over the fully automatic modes. You will not get second chances so do not hesitate to shoot lots of pictures, it is a good idea to put the camera in continuous shooting mode and shoot in bursts, you will find many interesting frames among the lines.

tutorial on candid photography
Photo By Chris Zerbes

9. Keep your Subject’s Mind off the Camera


Most people won’t act natural when they know that they are being filmed. A kind of nervousness creeps over them and it ruins everything. Every single shot looks artificial, posed. The trick to avoid this from happening is to distract your subject’s mind and make them engaged in some other activity, and shoot them in the process. Position yourselves far from them, pretend that you are engaged in shooting something else, or do engage with them for a while without the camera so they get to relax and once they are completely unaware of you and your camera, silently slip back, grab your camera and shoot.

10. Photograph People when They are Engaged In an Activity or When Interacting With Others


The best chances for candid photography is when people are either engaged in some activity or when are interacting with other people. It is because they will be fully focused on the activity they are engaged in and won’t notice that they are being shot. You could also hope to capture a variety of emotions, expressions and reactions from the people. Moreover people engaged in an activity or interacting with others adds context to the image and narrates a story to the viewer.

11. Take Group Shots


It is easier to get good candid shots of groups of people than individual members. The fact of being in a crowd somehow takes the stress off them. Also when in a group, people tend to interact with each other which could also lighten the mood, and add emotion and drama to the shot.

tips for candid photography
Photo By Javier


Related Reading


Halloween Photography Tips


Jack-o-lanterns, costumed adults and children, spooky decorations, trick-or-treating kids……  Halloween is a night of fantasy and also an opportunity for trying out your photographic skills. It’s the perfect setting to try some low light photography techniques, unique compositions, and lots and lots of fun filled experiments like double exposure, 2nd curtain sync, capturing motion blur, stroboscopic flash, multi coloured gels etc etc. lets discuss how best we could capture the night of spooks and spirits in all its essence.


halloween photography
Photo By Jpellgen

Camera Settings for Halloween Photography


It is best to remember that in Halloween pictures we expect drama, contrast, coloured lights, ghoulish lighting and more. It is essential to make your pictures look spooky and so lots of things that we generally would not do will actually work for Halloween.

Check Battery and Storage Medium


Make sure you have a fully charged battery and lots of space in your memory cards. The low light shooting situations drains the batteries faster than in other conditions, also you would probably click a lot more than you would have initially planned, so do carry enough memory cards with you.

Use Fast Zoom Lenses


Since you will be mostly shooting in low light conditions, use the fastest zoom lens you have. A zoom lens is preferred over prime lenses as it avoids the hassle of changing lenses in such risky conditions. A good lens choice will be in the range of 18 – 135mm, or 24 – 70mm. Fast lenses give faster shutter speeds, provide brighter viewfinders and also improve auto focus performance.

photography halloween
Photo By Jesse Draper

ISO


Generally noise is a dreaded issue in digital photography, but for Halloween pictures it could add to the effect. What a blessing, especially when we are shooting in very low light conditions isn’t it? Yes it is best to bump up your ISO a bit so as to get hand-holdable shutter speeds. Do not fear much about noise, a little noise will only add to the effect.

photographing halloween
Photo By Boogeyman13

Aperture


Choose aperture carefully, in most cases you will be shooting wide open to compensate for the lack of light, in situations where you need greater depth of field, use narrow apertures along with higher ISO speeds rather than compensating with shutter speed.

Shutter Speed


The choice of shutter speed should be made by deciding whether you need to capture motion blur or not. Some scenes a lot livelier when there is a hint of motion, try different settings, if you are not sure you could also try Automatic Exposure Bracketing with the camera set to Shutter Priority Mode (TV). Thus the camera will take three successive shots with varying shutter speeds and you could choose which one is best.

White Balance


As you are purposefully aiming to get spooky pictures, you need not worry about whether the white balance is set to the correct setting or not as per the lighting conditions. All you need to think is whether shifting the white balance will give you a more dramatic effect with more saturated colours or stranger shades of colours. My personal preference is to set the white balance to either the Cloudy or Shade mode, as these modes warm up the images a bit and it kind of works for me.

how to photograph jack o lantern
Photo By Mark JP

Flash


Normally if you use flash in a night scene you will lose the ambience and will only get a flat picture, but during Halloween a flash could prove handy to capture some shots which are otherwise not possible, you could also use your flash as focus assist device, use it on camera to purposefully produce the red eye effect and also gel it to give your pictures the effect of coloured light. It will also be a good idea to try some method of diffusing your flash.

Halloween Photography Tips


Start Shooting Early


Do not wait for it to get dark, in fact you will get better shots during the time when the sun has set but the sky has not become completely dark.

Pay Attention To Detail


Halloween is not only about spooky costumes, there are many more things to photograph if you pay attention to them, kids trying out costumes, people helping each other with costumes (especially funny if they are wearing enemy characters (eg. Joker helping Batman tie his mask), Decorations, carving the pumpkin, tired kids sleeping at the end of parties, bags full of treats, shots of parties both before and after, close ups of food etc. There’s a lot going on out there, just try and capture as much as you can.

Always ask Permission


Make sure you ask permission before taking a photograph of someone, especially if you want to photograph children, do ask permission from their parents beforehand.

halloween
Photo By Peter Prehn

Be Quick


During Halloween everybody will be busy trick or treating or with some other activity and when you find an interesting angle or expression or composition you need to act fast and take your shot, else you will miss the opportunity, be alert always.

Shoot People With and Without Masks


If you are photographing friends or family members, (that includes your children), make sure you take shots of them with and without masks.

Vary Your Perspective


Try shooting from a very high angle or a very low angle, the difference in perspective will make your shot unique. Especially if you shoot characters from a low angle it will give them the appearance of being larger than life, thereby accentuating the effect.

halloween photography tips
Photo By Katie Weilbacher

Shoot a Sequence


Always try to narrate a story through your pictures; it is done best with a sequence of shots, for eg. A sequence starting from preparations of Halloween to Cleaning up the next day.

Photographing Jack-o-Lanterns


Jack O Lanterns is the highlight of most Halloween parties, but getting a decent photograph of one is a bit tricky. The technique to get it right is by lighting the lantern from the inside with 3 or 4 candles instead of just one, so there is more light. Compose your frame and place some lit candles around the jack o lantern just out of the frame so it is not visible in the picture but the light coming from it will help expose the outside of the pumpkin and also capture details of its immediate environment. You could modify the effect by either changing the placement of the candles or by adding or taking away some.

photographing jack o lanterns
Photo By Professor Bop

Zoom In To Capture Details


Zoom in tight to focus on finer details, zoom in on the costumes, buttons, shoes, hats, bags, masks, hats and anything else that you find interesting and that screams Halloweeeeennnnn.

Try to take Action Shots


Most pictures you see of Halloween consist of a kid standing still in their costume. However this is kind of a boring way to photograph. A better method is to go candid, let the children enjoy the show and you capture them in various acts like trick or treating, dancing, being goofy etc.

Capture Expressions and Emotions


If you look closely there are a lot of emotions at play during Halloween, especially with children. You could find a wide array of emotions from joy to sorrow, try to capture the emotion in the context of Halloween and your picture will tell a story to everybody who look at it.

Do not Forget to Shoot Pets


Very often you will find costumed dogs and other pets at the party which could be very interesting too. Try to photograph them at the earliest, since there is no guarantee that their costumes stays for long.

photographing pets during halloween
Photo By Anne Marie

Halloween Lighting Trick – ‘Ghoul Lighting’


We are all used to seeing subjects lit from above, as it happens in nature (sunlight) and in most other lighting situations. But to get that spooky feel to your shots, you need to place your light low so that light comes from below the subject, casting shadows across the faces that are eerie or ghoulish. The simplest method to achieve this effect is by shining a flash light up at the subjects face from below the chin. You could also try it with various other light sources, it’s not the light source, but the angle from which the light falls at the subject that is important.

halloween lighting
Photo By Sammee

If the costume or make-up has special effects like blood dripping down the chin etc., you could add more texture to it by lighting it from the side.

Related Reading


    How to Make Your Subject Stand Out From the Background


    When making a photograph, every photographer looks for ways to give prominence to his main subject; he would want the viewer’s eyes to focus directly on to his main subject without any distraction from other background elements which compete for attention. But this is easier said than done, as in many situations you will find that there are elements in the scene which are distracting and which you cannot control. So here are some tips that help you make your subject stand out from the background.

    1. Vary the Exposures


    If possible try to light your subject in such a way that the subject receives at least a stop or two more light than the background. You could achieve this with natural light by placing your subject in direct sunlight with some shady region as the background.  You could also employ reflectors or additional lights to achieve the same. However make sure you expose for the subject, choosing spot metering and taking the reading from the subject will help, for full control over the effect try manual exposure settings.

    exposure
    Photo By Sean Molin

    2. Use Shallow Depth of Field to Blur the Background


    This is one of the most commonly used techniques by photographers since ages and it works like a charm, in most situations. The techniques involves using a wide aperture setting like f/2.8 or f/4 to achieve shallow depth of field with only the subject in sharp focus and everything else (in both foreground and the background) is rendered in a smooth blur. There are certain things like distance from the camera to the subject and distance from the subject to the background which influence the results, general rule is the more distant the background is from the subject the greater the blur and vice versa. And the closer the camera is to the subject the greater the blur and vice versa.

    depth of field
    Photo By Carlos

    3. Make Use of Contrast


    Photographing your subject in front of a contrasting background is one simple technique that will help you make your subject stand out in your shots. Contrast could be achieved by lighting or by selecting contrasting colours.

    contrast
    Photo By Ian

    4. Use Scale or Perspective


    Make use of scale, you can give the viewer a sense of scale (an idea of how big or small your subject really is) by placing it together with another object which is either much smaller or much larger than your main subject. To give prominence to your subject it is better to shoot it together with another smaller subject.

    You could also make use of perspective distortions caused by ultra wide angle lenses to exaggerate your subject. A wide angle lens makes all elements in your frame appear much smaller, the effect is more pronounced for elements which are at a distance from the camera.  So the trick is to use a wide angle lens, place your subject close to the camera (relative to background) and it will give your subject an exaggerated feel with everything else feeling much smaller and distant.
    .
    wide angle
    Photo By Altus Wilder

    5. Make Available Background…….. Unavailable


    If none of the above techniques works or if you intentionally wish to have your subject shot with a black background (it works quite well for many subjects) there is a quick fix solution to eliminate distracting backgrounds. 

    flower on black background
    Photo By Matthew

    Power up your lights (Speedlights/Strobes), set your camera to its sync speed, and choose a narrow enough aperture to eliminate all trace of ambient light, there by rendering your background a perfect black.

    How to Photograph Rain

    This article is primarily about rain photography in general, how to protect your gear, what to shoot, how best to show the effect of rain etc. If you are looking for specific instructions and camera settings to capture rain drops in photography, refer How to Photograph Rain Drops.

    Photographing rain seems simple enough, but when you actually try to achieve a specific effect, you will realize that it is actually a little bit tricky. The low lighting conditions of an overcast day when combined with the presence of water and strong winds can create a unique set of challenges for any photographer, both professional and amateur. In this article we will discuss about challenges faced while photographing rain and how to overcome them.


    rain photography
    Photo By Samson P Samuel


    First thing any photographer should think of while attempting to photograph rain is;

    How do I protect my camera and gear during rain?


    1. Carry a Raincoat


    There are raincoats available from many different manufacturers specifically designed for cameras. They have adjustable bands that hold on to the front of the lens (hood) and also at the rear allowing your hands access to the camera controls. It is not the availability of rain protection gear that is the real problem but having it with you when it rains is. Real professional rain covers that could effectively protect your camera even from heavy rains and storms could be too bulky and not practical to carry with you at all times, so go for something that is light weight, could be easily folded and takes up only a little amount of space in your camera bag.

    2. Carry an Umbrella


    It is always a good idea to carry an umbrella with you, it could be a standard sized one or a smaller version just for the camera; fold-able umbrellas are very compact and are not very heavy too. The problem with umbrellas is that they are not much help if there are strong winds, and it is also not very safe to use during thunderstorms.

    3. Carry a Plastic Bag


    Always carry a couple of plastic bags in your camera bag. It should be big enough to fit your camera and lens comfortably inside. Better if it is made of clear plastic. It would do a reasonably good job at keeping your camera dry during rains. Pull the bag over your camera, punch a hole for the lens, and use a rubber band at the tip of the lens hood to tightly hold the cover in place.

    4. Shoot from Your Car


    The easiest and most practical solution is to sit in your car, roll down the window (preferably the one opposite to you) and shoot. This technique works flawlessly when the wind is at your back. You might want to use a longer focal length lens while shooting from your vehicle.

    rain photography tips
    Photo By Sinu S Kumar

    5. Look around for Available Shelters


    Look around you for a place where you could stay dry and also have reasonably good chances of getting the desired shots, places like porches, awnings, etc make good shelter during rains.

    No matter how well you tried to protect your gear, there will be certain amount of water or moisture present in your equipment, so make sure that you dry your equipment well as soon as you get back home. A hair dryer is a very handy tool to dry your equipment well.

    What to Shoot during Rains?


    Rain has the ability to change scenes dramatically; first of all it clears the streets of people, creating a feeling of abandon or isolation. It could make very familiar landscapes look completely unfamiliar. There are a number of things that a photographer could aim to capture during rains.

    1. Capture candid shots of people trying to protect themselves from the rain, children playing in puddles, etc.
    2. Capture Reflections especially of street lights, lights from shop windows etc, also look out for entire city scapes reflected in small puddle of water.
    3. Capture the rain itself, and the changes it has on the landscapes.
    4. Capture flowing water, water dripping from roofs, leaves etc, and reflections from water drops hanging on leaves, capture wildlife during rains.
    5. Capture Emotions of people, rain has a mysterious effect on people, it brings joy to some and sorrow to others, it all completely depends on the mindset of the people and the situation they are in. try to capture people’s reactions, expressions, and emotions towards rain.

    photographing rain
    Photo By Saji Jayamohan

    How to Photograph Rain?


    The major reason why rain is difficult to photograph is because of the fact that it is a moving object and if not captured correctly it tends to turn your picture into a dull grey effect which is very boring.

    Shutter Speed


    The first thing to realize is that raindrops are actually moving fast, during heavy downpours it could be as fast as 9 meters per second and during slight drizzles it could be around 2 meters per second.  So the key to capturing rain is to determine the exact amount of blur you would like to be present in your rain drops and set your shutter speed accordingly. A good starting point will be 1/60 and see how much blur it causes, if you need more, further reduce the speed and if you need less increase your shutter speed.

    Aperture


    While photographing rains you would also like to convey the environment, the subject as well as the immediate environment (that includes rain) should be in relative focus, so it is recommended not to use too shallow depth of fields. Start somewhere around f/8 and work your way from there.


    how to photograph rain
    Photo By Sinu S Kumar

    ISO


    It is preferable to shoot at ISO 100. It would not be a problem if you have a tripod or anything else to stabilize your camera. Since capturing rains require the deliberate use of slow shutter it is not recommended to raise your ISO.

    Use Flash


    Yes using the flash with suitable flash exposure compensation could produce very nice results. It should only be used at very low power, only providing a little glimmer to the rain drops.

    Shooting Mode


    I recommend shooting in manual mode for predictable results. The falling rain and the complicated un-even low light situation across the frame could often fool the cameras light meter. And more than anything else you are not trying to capture a perfectly exposed picture, but you are trying to capture the mood of the scene and on many occasions that means deliberately underexposing or overexposing your scenes. Also if you are using flash you will be able to control the effect precisely.

    Focal Length


    Longer focal length lenses compresses the scenes and also has the effect of magnifying rain drops, experiment with different focal lengths for your scene and select the one which gives the best effect.

    Lighting Conditions


    Rain becomes more visible when it is backlit. But if you shoot too directly into the light and it could cause flares and the shots will not turn up well. So find the best angle by changing your shooting position. The best possible scenario to shoot rain is when it is lit from the side and you have a dark background for your subject.

    Related Reading


      Using the Digital Camera Histogram as a Light Meter


      In one of the previous articles – Understanding Histograms, we discussed what histogram is and how to use it. Let us now see how we could make use of the histogram feature in our digital camera as a light meter.

      We have already mentioned in the previous article that there is no such thing as a perfect histogram, only correct histograms representing values for what is in front of the camera. The main purpose of the histogram is to see whether a correct exposure has been achieved or not. The photographer should make sure that there are no clipping occurring at either ends of the histogram (clipping is lost information in either the shadows or the highlights). Since clipped highlights are irrecoverable in digital photography, most camera manufacturers provide an additional feature called Highlight warning (commonly called as blinkies). When the highlight warning feature is turned on, while previewing the image in the camera’s LCD monitor, areas where highlights are clipped will blink, flashing a warning.

      The shape of the histogram reveals many important details like whether the subject is dark or light, whether it has an even or uneven distribution of tones, whether the lighting is hard or soft, whether the dynamic range of the scene is within the capabilities of the camera or not etc. As a general rule a histogram representing a correct exposure should not be clipped and should not be too close to the sides. Ideally the histogram should be biased towards the right to get the most out of your digital camera.

      To fully understand this concept let us see how the digital camera sensor records information. The digital camera sensor which is actually a linear device with over 4000 levels of sensitivity uses the first 2048 (50% or half) of the available 4096 levels to record the first stop where the highlight information is recorded. Each subsequent stop records half the light of the previous stop, always using half of the remaining levels. So the next darker stop gets 1,024 levels, the next gets 512, the next 256 and so on.


      So getting the maximum result out of your digital cameras sensor requires using a technique often referred to as ‘exposing to the right’ where the photographer tries to get his histogram as far to the right as possible without clipping the highlights. This technique ensures that maximum information is captured by the camera and also the noise levels remain low. However the pictures will almost always look a bit overexposed and need to be corrected in post production to get a more natural looking image.

      Modern cameras feature RGB histograms which show separate histogram for the red, green and blue channels, they are extremely useful when you are photographing a scene with a predominant colour. For example when photographing foliage you will be able to tell if clipping is occurring or not in the green channel, this is not possible by looking at luminance histogram.

      If you observe closely the camera histogram has been divided into five equal parts by 4 vertical lines, each line is represents a full stop of light. This is helpful to determine the correct exposure or to calculate exposure compensation (increments or decrements) to get the exposure right.

      Related Reading


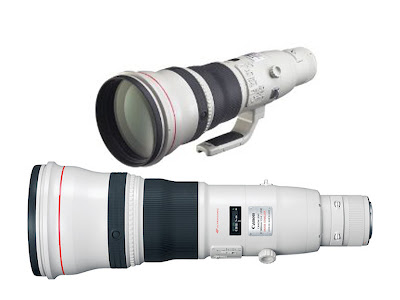
      Quick Tips - Getting the most out of Your Tele Lens


      1. Use Wide Open Apertures


      Wide open apertures (f2.8, f/4, f/5.6) on a tele lens gives very shallow depth of field which renders the background in a smooth blur thereby making the main subject pop off from the frame. This feature could be very useful when you have your subject with a cluttered background and when there are elements in the background which could distract the attention of the viewer from the main subject.

      bird photograph with shallow depth of field
      Photo By John and Fish

      2. Stop down for Landscapes and Architecture


      Yes long tele lenses make great landscapes; they are capable of compressing distance thereby giving the picture a great feel. You will have to stop the lens down to get sufficient depth of field to make both objects in the foreground and background in focus. Narrow apertures often means slower shutter speeds so make use of image stabilization feature if your lens has it, even better if you have access to a monopod or tripod.

      tele lens landscape photograph
      Photo By Storm Crypt

      3. Stack the Focus


      Focus stacking is a common technique used in macro photography. However the same technique could also be used for photographing landscapes, it is extremely useful to get sufficient depth of field in your images especially in situations where stopping down the lens does not produce sufficient depth of field. You could focus stack your images manually using an image editing program like Adobe Photoshop or use specifically designed softwares like Combine ZM (combine zm is a free software).

      4.  Fill The Frame


      One of the major advantages of using a tele lens is the ability to fill the frame with your subject. It is extremely useful as it enables one to exclude some or most parts of the scene from one’s composition. Whether you are shooting wildlife or Landscapes the ability to control what appears in your frame is a huge advantage as you could simply avoid distracting elements and include only those which add visual beauty to your frames.

      wildlife photography
      Photo By Valerie

      5. Try Macro Shots


      A long lens can be used as an excellent macro lens, when choosing a tele lens look for its magnification factor, you could further increase the magnification of a tele lens by adding an extension tube (you can even stack extension tubes); you can get really good magnification from a distance from your subject. This is very convenient when shooting butterflies, dragonflies and other small insects, as you need not startle the insect by getting too close to them, the chances of you getting good pictures are increased many fold by using a tele lens.

      Canon Extension Tube
      Canon Extension Tube

      6. Panning for Action


      Tele lenses are the most suitable lenses available for taking panning shots. The motion blur induced in the background by panning conveys a feeling of motion and the subject which is sharp against the blurred background simply stands out catching the viewer’s full attention. Panning is a perfect technique for both action photographers and wildlife photographers. However mastering the panning technique requires much practice, this article published earlier in our blog could help you master the technique - Panning

      7. Keep Quiet to get the Best Shots


      Tele lenses are primarily used for the reach they provide; especially in situations when you either can’t or could not / should not get close enough to photograph the subject with shorter focal length lenses. In case of wildlife photography tele lenses allows one to photograph the subject without having the need to physically get close, thus enabling the photographer to capture great moments without disturbing the animals. Similarly when trying to take candid photographs of people, a long lens could help you stand a long distance away from the subjects, so they won’t notice you and would not know that they are being photographed. This lets you capture great candid shots of people. However in both the situations the basic strategy to be adopted by the photographer should be to keep a low profile, do not make any quick movements or sounds that could attract attention to him and make the most of the situation.

      8. Adding Teleconverters


      Teleconverters help increase the effective focal length of a lens. They are commonly available in two variants 1.4x and 2x. The 1.4x converter increases the focal length by a factor of 1.4 and a 2x teleconverter actually doubles the lens focal length. Although the added reach of the lens is a good thing to have, it actually comes at a price a 1.4x converter reduces light by 1 full stop (50%) and a 2x teleconverter reduces light by 2 full stops (75%) thereby making the lens slower. Also the presence of added elements affects the picture quality; as a result teleconverters are generally only used in fixed tele photo (prime) lenses which have excellent picture quality.

      Canon Teleconverters 1.4x III and 2x III
      Canon Teleconverters 1.4x III and 2x III

      9. Stacking Teleconverters


      If the subject you are photographing is very co-operative and sits still long enough for you to set up your shot using a tripod then you could consider further extending the reach of your tele lens by stacking teleconverters. It should be noted that image quality will be dependent on the quality of the primary lens and also of the quality of the teleconverters used. A 300mm f/2.8 lens when used along with 1.4x and 2x teleconverters stacked becomes a 840mm f/8 lens. It should be noted that if the lens is mounted on a crop sensor camera you should further add a 1.3x or 1.6x magnification factor to the equation depending on the make of your digital camera. The lens will not only be much slower but also much more susceptible to camera shake. In such situations it is recommended to set up your tripod on a stable ground, tighten up all controls, remove or tie up camera strap so as not to catch wind, use mirror lock-up feature, use remote/cable release, and place a bean bag over the lens for added stability. Also depending on how well your camera handles image noise, slightly bump up the ISO for increased shutter speeds.

      10. Deciding whether to use IS.


      Image stabilization is a great feature to have in a tele photo lens, depending on the technology used image stabilization could add up to 4 stops of stabilization. Some advanced lenses have image stabilization feature that could detect panning motion and automatically switch off image stabilization in that direction. Also some advanced lenses could detect when the camera is set-up on a tripod and adjust settings to suit such conditions, however if your lens is one with only basic image stabilization it is recommended to use it while hand holding the camera and to turn it off when mounting the camera on a tripod as the lens will try to compensate for shake that is not actually present and thus induce shake of its own.

      Canon tele lens
      Canon tele lens

      11. Long lenses and Your Car


      Cars and long tele lenses make excellent pairs, as cars and other vehicles could make excellent hides, birds and other animals are easily scared at the sight of an approaching human, but they are much more tolerant to passing vehicles, as they see these all the time and usually ignore them. So it is a good strategy to use your car as a hide, get as close as possible and use your tele lens from within the car to take your shots, you will not only get good shots, but you will be safe as well. But it is a tricky affair shooting with a tele lens from a vehicle, the following tips would help you master it.
      1. A running car engine could introduce shake so turn off your car engine.
      2. It is my personal observation that unlike birds and other small animals, large mammals like elephants, gaur, bear etc are more comfortable if they hear the engine running and gets alert the moment they sense that the vehicle engine has stopped running and immediately stop whatever it is that they are doing and will stay tense and alert till they hear the car drive away. In such situations, it is best to keep the engine running and do not use the car body to rest the camera instead handhold it.
      3. Air dispersed by passing vehicles could induce shake, so park your vehicle as far off the road as possible.
      4. If you have a bean bag or a pillow (even neck support attachment for the seat or a thick towel would do) drape it over your window and rest the lens on it. A hand draped over the top of the lens will help further reduce camera shake.
      5. If you regularly shoot from your car it is recommended to buy a window mount, they are available from several manufacturers and accept any standard tripod head.
      6. Some photographers set up the tripod inside of the car with its legs extended at unusual angles and wedged between various parts, however I personally do not recommend this method.
      7. One final method is to make use of the cars sunroof (if your car has one large enough) you can stand inside the vehicle; place the camera on a bean bag or a platform with a tripod head and shoot comfortably, however for wildlife photography it is a much more threatening posture than shooting through your window.
       
      Support : Creating Website | Johny Template | Mas Template
      Copyright © 2011. Technology Share - All Rights Reserved
      Template Created by Creating Website Published by Mas Template
      Proudly powered by Blogger