Latest Post :
Recent Post

Back Button Focusing

Most amateur photographers often retort to constantly switching between focus modes and also turning the AF button ON and OFF to adapt to different shooting conditions. However there is one solution that would allow you to achieve the best of both worlds namely One Shot and AI Servo by setting your cameras focus and shutter functions to two different buttons. Let us discuss a little about what is back button focusing and also what purpose does it serve.

Back Button Focus
Back Buton Focus in Canon and Nikon Cameras

What exactly is Back Button Focusing?


By default the focusing and shutter functions are set to the shutter release button. Focusing is activated by half pressing the shutter release button and the shutter is triggered when the button is pressed fully. By setting your camera to back button focusing what you essentially do is to disable the focus function from the shutter release button and assign the function to another button situated at the back of your camera which could be operated by your right hand thumb.

What are the advantages of using Back Button to Focus?


Back button AF as it is often referred to by professional photographers makes AF functions more effective in certain situations. However whether it is suited for you is entirely dependent on your shooting style, the kind of subjects you shoot, focusing mode used, and also your AF drive method namely single mode or servo mode.


Let us discuss some of the advantages of using back button focusing.

Lets you use AI Servo Mode for all Situations


With focus function removed from the shutter release button you could now use AI Servo Mode for all your shooting situations. It is also much easier to lock focus and keep it that way; once you attain focus, just remove your thumb from the AF ON button and focus remains locked, you are now free to recompose your shot and take as many pictures as you want without the camera shifting focus every time you press the shutter.

No Need to Shift the Lens to Manual Focus Mode


Many times photographers are faced with tricky situations that confuse the camera and so the AF function struggles to achieve focus. Also there are situations when the photographer would like to lock focus at a particular point. In these kinds of situations the most common solution adopted by photographers is to switch the lens to manual focus mode. However by using back button focusing there is no need to switch the lens to MF as you are free to focus the lens manually and once you attain focus; if you do not press the AF ON button the focus stays locked.

Most pro grade Canon lenses have a feature called full-time manual focus. The advantage of these lenses is that even if the lens’s AF/MF switch is in the AF position, these lenses allow the shooter to instantly adjust focus manually by simply turning the focus ring on the lens. When combined with back button focusing you need not bother to switch your lens to MF any more, you can always stay in AF.

Better Timing of Shots


Back button focusing allows you to better time your shots. Imagine a situation in which you would like to shoot a stationary subject but at precise moments, ordinarily what you should do is to attain focus, keep your shutter button half pressed to lock focus and keep it that way till the moment arrives. And once you take a shot the camera again should attain focus to click again. Setting focus independently of shutter allows you to lock focus and keep taking pictures at precise moments to capture various expressions, gestures, poses etc. even if the subject shifts position you could easily refocus by gently tapping the AF ON button with your thumb.

Lets You Track Moving Subjects Better


For people who shoot action like sports and wildlife photographers, back button focusing is helpful to track the moving subjects in AI Servo Mode and if the subject suddenly stops the photographer could immediately lock focus by taking his /her thumb off the AF ON button and recompose the frame as required. He/she is free to further fine tune the focus manually if needed without the need to shift the lens to MF mode.

Makes Focusing Easier for Macro Photography


Back button focusing could be a boon for macro photographers. When enabled it allows photographers to quickly attain focus by pressing the AF ON button and then attain precise focus by moving the camera forward and backward until you achieve critical focus. Once focus is achieved you are free to take as many shots as required as the camera does not interfere by trying to re-focus. No more shooting in full MF or shifting from AF to MF once focus is achieved.

Back Button Focus in Canon Cameras


Canon was the first camera manufacturer to incorporate this feature in their cameras in the late 1980s. It was done in response to the demands of sports photographers for some way to start and stop AF without interfering with continuous shooting and almost every DSLR from the canon range has this feature built in. Some advanced cameras from Canon even have a dedicated AF ON button in addition to the AE Lock button (indicated by an asterisk symbol) and as per the users convenience the functions of these two buttons could be interchanged by a custom setting.Refer your cameras user manual to find out how to set back button focus on your camera.

Back Button Focus in Nikon Cameras


In case of Nikon cameras you use the AE-L, AF-L buttons for back button focusing. Follow to guidelines given in your camera user manual to find out how.

Before you actually activate the function go through the user manual and understand what each of the options available does and find out which one will suit your purpose best. Most commonly given options are :-

1. Metering + AF start


Camera default setting – both buttons (shutter & AF ON perform the same functions)

2. Metering + AF start / AF stop


Focus is controlled by shutter button but you could lock focus anytime by pressing the AF ON button.

3. Metering start / Meter + AF start


Focus is activated by AF ON button and not by shutter. Camera takes fresh metering for each shot.

4. AE Lock / Metering + AF start


Focus is activated by AF ON button and not by shutter. If the shutter button is kept half pressed metering is locked and would not change until you release the shutter button.

5. Metering + AF start / Disable


Functions just like the default setting except for the fact that AF – ON button is disabled. This setting is for those photographers who are worried about accidentally pressing the AF ON button.

Option 1 given above is the default setting. A little bit of experimenting with the rest 4 options will help you find the one which suits your needs. It should be remembered that it would take a little time for you to get used to it. So make sure you have familiarized enough with the new settings before you shoot any important event. Of course you could cancel the settings and put your camera back to default settings at any time by using the clear all custom functions option.

Related Reading


One Shot Vs AI Servo - Choosing the right AF Mode for your Shooting Situation


One question frequently asked by beginners to photography is - One Shot Vs AI Servo (AF – S Vs AF – C for Nikon users) which one is right for me?

butterfly

Before answering the question let us first take a look at the basic difference between these focusing modes.

One Shot or AF - S


In the one shot focus mode, when you press the shutter button half way, the camera will focus once. When the camera achieves focus the focus confirmation light for the focus point which achieved focus will flash in red. If the beep is set to on the camera will beep once when focus is achieved.

If your camera is set to evaluative metering mode the camera will also set the exposure when the focus is achieved. If you keep the shutter button half pressed, the focus remains locked and you are free to recompose the shot if needed
without change of focus.

If in case the camera fails to achieve focus, the focus confirmation light in the viewfinder will keep blinking and even if you press the shutter button completely a picture will not be taken. In such situations you need to re-compose your shot and try to focus again.

AI Servo or AF – C


In AI Servo focus mode the camera will keep tracking the subject and focus continuously while you keep the shutter button half pressed.

Even though the camera continuously focuses on the subject, the exposure is set at the time of releasing the shutter.

In AI Servo focus mode the beeper will not beep and the focus confirmation light in the viewfinder will not light even if the focus is achieved.

The camera takes a shot if you press the shutter release button completely irrespective of the fact that whether focus was achieved or not.

Which Focusing Mode to Use?


One-Shot or AF – S is the standard setting for digital cameras and so is the most widely used focusing mode. This mode is well suited for subjects that are stationary but is susceptible to focus errors when shooting fast moving subjects.

AI Servo or AF – C is the preferred focusing mode for shooting moving subjects as the camera will constantly update focus information when the distance between the subject and the camera changes. Most modern digital cameras feature advanced functions like predictive function in AI Servo mode in which the camera observes the movement of the subject and sets the focus predicting where the subject will be at the time of the exposure (practically it is compensating for the shutter lag). 

In case of Canon cameras, One thing to remember while choosing AF modes is that when you are shooting in low light conditions where you would like a little help from the external flash units AF assist infra red beam, this feature will only work when the camera is set to One shot focus mode.

So we have now come to the conclusion that one shot focus mode or still subjects and AI Servo focus mode for moving subjects. But in real life situations especially when shooting action shots (mainly in sports and wildlife photography) photographers would often require the convenience of both the shooting modes. For e.g. They would want to continuously keep the subject in focus, but they’ll require to recompose the shot for better composition at the same time. But sadly Continuously focusing the subject is not possible in One shot mode and Re composing the frame is not possible in AI Servo mode. And as it is difficult to frequently shift from one mode to another there are other ways to achieve the best of both worlds. We will discuss about Setting Back Button Focus and the advantage of using it in the next article.

Related Reading


Types of Photography


Photography is more popular today than it has ever been in the history of mankind. Photography has grown either as a hobby or as a profession through various branches covering diverse fields of application. In this article we will discuss some of the more popular types of photography practised today. Please bear in mind that there are still categories and subcategories to many of the types discussed below but to keep things in perspective we only cover the broad spectrum.

1. Digital Photography


Digital photography makes use of electronic photo detector cells to capture the images as opposed to the traditional method of using photographic film. Traditionally developing of photographic film meant chemical photographic processing. But in digital photography the captured exposure is immediately digitized and stored ready for digital post processing, publishing, printing or sharing.

Digital photography
Photo By John and Fish

2. Candid Photography


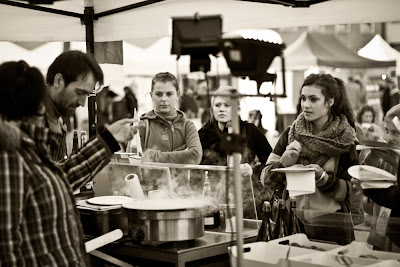
Candid photography does not include any staged or posed situations rather the photograph is made either without the subject's knowledge or explicit permission.

Candid Photography
Photo by Chris JL

3. Nature Photography


Nature photography is one of the major types of photography with a wide range of sub categories like landscapes, wildlife, plants etc. When compared to other genre of photography like photojournalism and documentary photography, nature photography gives more emphasis to the aesthetic value of the photo. Nature photographs are primarily published in scientific journals, travel and cultural magazines and wildlife books. Let us now discuss some of the popular sub categories of nature photography.

Wildlife Photography: wildlife photography aims to capture amazing shots of animals in their natural habitat and is usually done by professionals who are also part naturalists who have a love for nature and wildlife, is conservation oriented, knows how to behave in the wild, and is ready to spend hours or even days in the wilderness to capture the frame he/she desires.

Wildlife Photography
Photo By Kim Seng

Landscape Photography: showcases the natural beauty of a location or place. The subject matter could range from deserts to mountains to wilderness to waterfalls.

Landscape Photography
Photo By Xabier Artola

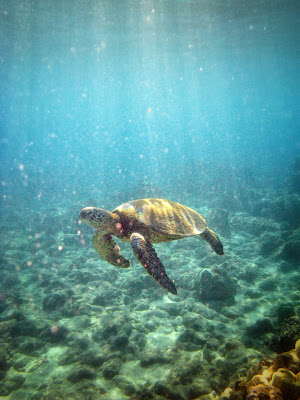
Underwater Photography: explores a whole new world which lies beneath the vast oceans, lakes and rivers. This type of photography requires specialized gear to operate the camera underwater and the photographer also need to be a trained swimmer / diver with great physical strength and endurance to be able to cope to the needs of this demanding field.

Underwater Photography
Photo By Dave Wilson

 Seascape Photography: Seascape photography aims to capture the various moods of the ocean during different times and across seasons. This is one genre of photography that requires a lot of patience as most of the elements are not within the control of the photographer he/she should be willing to visit the same spot over and over to get the right effect (clouds, sky, colour, lighting, waves etc) he/she desires.

Seascape Photography
Photo By Juan Diego Jiménez

Cloudscape Photography: captures the various shapes and images made by cloud formations and light seeping in through. This is one area of photography where creative black and white effects are still used a lot.

Cloudscape Photography
Photo By Chris Gin

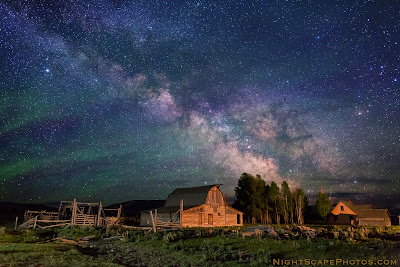
Nightscape Photography: "NightScapes" are exposures of the night sky with a landscape feature included in it. Many times photographers use flash bulbs or light painting to bring out details in the foreground feature they include in the frame.

Nightscape Photography
Photo By Royce Bair

4. Photojournalism


Photojournalism is the type of photography mostly done by professionals. It is all about narrating a story or describing an incident or event through photographs and narration. Mainly employed by news papers and magazines; photojournalism could be further divided into documentary, street and celebrity photography.

Documentary Photography: done mostly by press photographers; in documentary style the photographer aims to capture an image that best captures the essence of the scene in its true form. The work is not permitted to be edited beyond minor corrections and retouches as it could change the entire context of the original image and tell quite a different story.

Documentary Photography
Photo By Clonny

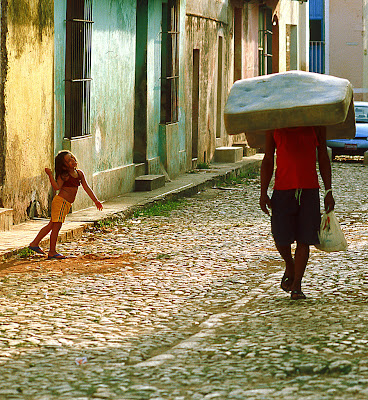
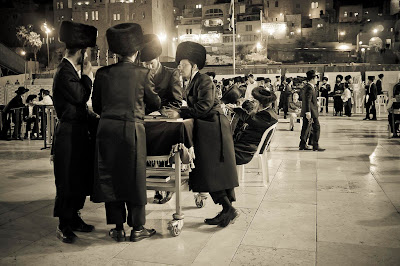
Street Photography: captures candid images of public places or people in their natural environment going about their daily affairs, at work etc. however this is one type of photography that requires a lot of interpersonal skills on the part of the photographer and also the ability to use one’s better judgement. While doing street photography, one should also be aware of places where photography is strictly prohibited e.g. Inside of military establishments, certain temples, churches, mosques, dams, etc. it is also illegal in certain countries to photograph uniformed policemen and other officials even in public places.


Street Photography
Photo By gianluca cozzolino

Celebrity Photography: news papers, magazines, on line publications, event organizers and at times celebrities themselves hire photographers to photograph them. Depending on the nature of the picture and the intended purpose this could either be
  • An arranged photo shoot involving people of different skill levels like a stylist, costumer, organizer etc where in every aspect of the shoot including make-up, clothing, props, themes etc are all planned well in advance and the shoot is conducted either in the studio or outdoors.
  • Photographing celebrities at various functions or press conferences.
  • Paparazzi photographers capture celebrities on camera without their knowledge or consent and are mainly hired by magazines or other media.

Celebrity Photography
Photo By Ana Kelston

5. Black and White Photography


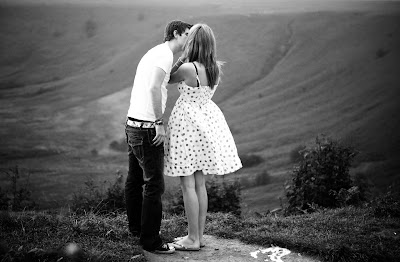
Black and white photography relies on lighting, textures and composition to successfully narrate a story. It has a unique charm that gives a timeless appeal to pictures and many photographers turn to black and white imaging to create drama and variety to their images.

Black and White Photography
Photo By Craig Allen

6.  Fashion Photography


One of the more lucrative types of photography; fashion photography is devoted to focus the attention of the viewer to the clothing or other fashion accessories. Major clients are leading fashion magazines which cater to a niche and affluent crowd who yearns to know the latest and best in fashion. In recent years fashion photography has evolved many styles among them are practices like enhancing the clothing or accessories by portraying them in exotic locations or with exotic accessories.

Fashion Photography
Photo By The Retouch Lab

7. Glamour Photography


Glamour photography is similar to fashion photography, but instead of laying emphasis on clothing and fashion accessories the viewer’s attention is drawn towards the model. The subjects of glamour photography are often professional female models, they may be fully clothed or semi – nude or even nude but it falls short of being pornographic photography. The images may be for commercial uses which include calendars, pinups for men’s magazines etc.

Glamour Photography
Photo By Mike White

8.  Advertising Photography


Advertising photography is basically intended to sell a product or a service. It usually involves team work involving the photographer, an advertising agency, a design firm with their own corporate design team etc. The photographer and the agency work together to come up with ideas or concepts which could help portray the products or services in the best possible way.

Advertising Photography
Photo By Alfonsina Blyde

9. Still Life Photography


Still life photographers photograph commonplace objects either natural or man-made. It is an art in which the photographer may deliberately put together different things to form particular compositions and requires expert knowledge from the photographer in the areas of composition and lighting.

Still Life Photography
Photo By Piero Fissore

10. Portrait Photography


Portrait photography is all about capturing the personality of a person. It could be just a head and shoulders portrait or an environmental portrait. The aim is to photograph a person in such a way so that the photograph captures the character / soul / essence of the person and narrates it to the viewer.

Portrait Photography
Photo By Fernando Ocaña Fernández

11. Headshot Photography


Commonly referred to as mug shots, head shot photographs are intended purely for work purposes and so are plain and simple shots with not much lighting, make up etc to make the picture look aesthetically beautiful and that differentiates it from portraiture.

Headshot Photography
Photo By Carolynn Primeau

12. Child Photography


Photographing children is a speciality in itself calling for great skill on the part of the photographer to build a rapport with the children within a short period and be able to capture their best moods and moments.

Child Photography
Photo By Pete Labrozzi

13. Wedding Photography


Wedding photography is one type of photography in which the end result (photos) is sold directly to the end user of the images. Wedding photographers are mainly hired by clients themselves to capture the most beautiful and memorable moments in their life in the best way possible. There are many styles of wedding photography; some capture the events candidly, some capture glamorous moments in a studio and some do it the traditional posed style. In recent times many people prefer having a themed wedding which opens up a whole new world of creative possibilities for the photographer.

Wedding Photography
Photo By Sean Molin

14. Fine Art Photography


Fine art photography is about creative images with an abstract appeal which are the equivalent of an artist’s expression on canvas. Fine art photography calls for creative thinking from the part of the photographer and the ability to look beyond the obvious.

Fine Art Photography
Photo By Guy on the Streets

15. Nude Photography


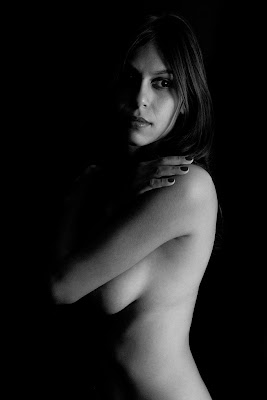
Nude photography is about the depiction of the human body in the nude form. These photographs are not meant for eroticism but purely for the study of the human body. Here, the face is not always the focal point, and the compositions are stylized with experimentation in terms of light and backdrops.

Nude Photography
Photo By Brunno Gastaldo

16. Travel Photography


Done by professionals and amateurs alike, Travel photography involves capturing an area’s people, landscapes, culture, customs and history. As per the Photographic Society of America, a travel photo is an image that expresses the feeling of a time and place, portrays a land, its people, or a culture in its natural state, and has no geographical limitations.

Travel Photography
Photo By Sheree Zielke

17. Architectural Photography


Architectural photographers photograph different styles of architecture in an aesthetically pleasing manner. This is one specialized field of photography where in photographers use special lenses like the ultra wide angle and tilt shift lenses. This type of photography requires a thorough understanding of the various photographic principles and lighting.

Architectural Photography
Photo By Joe Penniston

18. War Photography


War photography captures photographs of armed conflicts, the destruction it causes and its effect on life of people. This is one of the riskier types of photography where photographers are often caught in the conflict and injured or even killed. There have even been instances where photographers were abducted and killed so that the recorded evidence of atrocities committed during war (pictures) will never see light.

War Photography
Photo By Remo Cassella

19. Fire Photography


Mainly useful for investigative purposes, fire photographers equipped with all kinds of protective gear and clothing record the fire fighting operations carried out by professional fire fighters.

Fire Photography
Photo By Los Angeles Fire Department

20. Forensic Photography


Also known as crime scene photography or forensic imaging, forensic photography as a part of evidence collection is the art of capturing accurate representations of a crime or accident scene for the benefit of the investigating agencies or the court to aid in their investigation. Forensic photographers photograph victims, places, items involved in crime and also the crime scene from all possible angles.

Forensic Photography
Photo By Bousure

21. Secret Photography


Also called as covert photography, secret photography done mainly for investigative purposes refers to capturing images of people without their knowledge. Secret photographers often conceal or disguise themselves or their gear and also use hidden cameras and other devices.

 Secret Photography
Photo By Angelina

22. Macro Photography


Macro photography is nothing but extreme close up photography and is all about capturing images of very tiny subjects. It requires the use of dedicated macro lenses. A true macro lens is one which gives 1:1 or life size magnification. There are other specialized lenses available like the Canon MP-E 65 which could go from 1:1 to 5:1 magnification.
Macro Photography
Photo By Marc Soller

23. Aerial Photography


Aerial photography is the art of taking photographs of the ground from an elevated position which includes air crafts, helicopters, hot air balloons, gliders, parachutes, etc. photographs could either be captured by the photographer flying with a camera or from the ground with the camera mounted on to an aircraft or similar device.

Aerial Photography
Photo By Storm Crypt

24. Food Photography


Food photography aims to produce attractive photographs of food to be used for advertisements, menus, cook books etc. professional food photography is often a team effort involving services of an art director, food stylist and a photographer.

Food Photography
Photo By Jason

25. Astrophotography


Astrophotography is the art of capturing images of astronomical objects and of large areas of night sky. Generally the subjects of astrophotography are the Sun, Moon and Planets. But using techniques of long exposure and capturing images over long periods of time, astrophotography has the ability to even record objects which are invisible to the human eye such as very dim stars, nebulae and galaxies. Till recently it was a type of photography mainly done by professionals but with the advent of digital photography, many amateurs have taken it up as a hobby.

Astrophotography
Photo By Bob

26. Night Photography


Night photography refers to photographs taken in the outdoors between dusk to dawn. The low light conditions during the time calls for the creative use of long exposures, wide aperture lenses, and the use of either moon light or artificial lights. Photographers often turn to techniques of light painting to properly expose subjects.

Night Photography
Photo By Christopher

The diverse types of photography are a clear indication of the ever increasing popularity of this art form. Technology has made it possible to try and expand the possibilities to even greater extends. Now days almost anyone has access to a digital camera and with the popularity of internet there is no dearth of information or inspiration. All that is required is a little bit of creativity, observation skills and perseverance to capture images that are beyond ordinary.

Related Reading


How to Photograph Mushrooms

1. Mushrooms, Toad Stool or Fungi - Where to Find Them


Each type of fungi needs slightly different types of habitat to thrive. As a general rule they prefer moist, shady regions to open sunny patches. Best places to look for them are on fallen branches, decaying vegetation and stumps, moss covered logs, dense leaf litter etc. Most mushrooms sprout on the first clear day after the rains, but bear in mind that not all mushrooms sprout during the same time of the year, so it is best to keep looking for them during different seasons.

photographing mushrooms
Photo By Kicki Holmen

2. Buy a Good Book on Mushrooms


If you are serious about photographing mushrooms, you will probably need to identify the species that you shoot. Buying a good book on mushrooms will help you identify each species, their habitats, peculiarities, sprouting seasons etc. A good field guide or pocket guide on mushrooms with pictures will be easy to carry with you in the field.

3. Invest in a DSLR and a Dedicated Macro Lens


Most mushrooms are very tiny and are often found in low light conditions which make them hard to capture in photos. Even though you could capture most mushrooms with a point and shoot digital camera having a DSLR and a dedicated Macro Lens which could go up to 1:1 magnification will help you take great pictures in all kinds of tricky situations that the mushrooms would present to you. With a DSLR you have complete control over exposure and it also lets you use accessories like external flash units and triggers for off camera lighting.

photography mushroom
Photo By Arbana

4. Accessories for Stabilizing your Shot - Tripod / Gorilla pod / Beanbags – Remote trigger


Low light shooting conditions in which the mushrooms are often found will call for the use of longer shutter speeds that would rule out hand holding and require some method to stabilize your camera. Having a sturdy tripod, preferably one which legs could be splayed to place camera in very low angles is the best option. If you do not have one you could make do with a gorilla pod or a beanbag.  Wireless remote or cable release could also be very useful in such situations, also enable the mirror lock up feature if your camera has one. You could use the self timer function if you do not have a wireless or cable release and you could shoot in live view mode to bypass having to enable mirror lock up feature.

5. Turn off IS, Use Mirror Lock Up and Manual Focus


When the camera is being used on a tripod it is best to turn off the Image Stabilization feature, enable mirror lock up function if your camera has that feature, put your lens to manual focus and focus manually as auto focus is not that accurate and reliable with very small subjects that are only inches away from the tip of the lens.

photographing fungi
Photo By Le Piment

6. Use a Circular Polarising Filter


Using a polarizing filter will help saturate colours and also remove any unwanted reflections.

7. Useful Accessories – Extension Tubes, Close up Filters, Macro Focusing Rails


If you do not own a dedicated macro lens that could go up to 1:1, and if you are on a budget it is a good idea to get yourselves some extension tubes or a close up filter that will help increase the magnification factor of your existing lens by enabling it to focus closer. A good macro focusing rail is very useful when you require to make minute adjustments, once you have set up your shot with the camera on a tripod. The rail goes in between the camera and the tripod head and will enable you to shift the camera in 4 directions, front – back and side to side.

8. Off Camera Lighting


Mushroom photography is nothing but Macro Photography in low light conditions. So it calls for the use of artificial lighting equipments. Even though the on camera flash when used with the correct amount of compensation could produce acceptable results for study purposes; for the aesthetic minded photographer the image will still look somewhat flat and unattractive. The most effective method to light mushrooms is by the use of multiple off camera flashes. You will need at least two external flashes which could vary their power and some method of triggering them (Ettl cable or wireless triggers) The key light used for the subject (mushroom) will come from a flash which is used with a diffuser and other flash units used to light up the background independently. You will find reflectors and mirrors are very useful in certain situations and are often very easy to employ; but they have a lot of limitations.

mushroom
Photo By Lutz

9. Rain Protection for you and your Camera


Since mushrooms are often found in very moist and wet places, especially during the rainy season, make sure you always go prepared with suitable rain protection gear both for you and your camera.

10. Be prepared to get dirty, get wet


Mushrooms are no more than a couple of inches in size and are often found on the ground, this means to get good pictures of them a photographer who is dedicated enough to get the shot would need to sit on the ground or even lie down to get the desired angle. We have already mentioned earlier about the habitats in which mushrooms are found. So be prepared to get dirty, and get wet while hunting mushrooms. You could expect to stay reasonably dry if you have some kind of ground cloth or a plastic bag or material with you on which you could lie down.

11. Pay attention to your Backgrounds


Pay attention to your backgrounds, observe the subject closely and identify different angles from which it could be shot. Also take notice of what constitutes the background from each angle. Background is as important an element as the main subject in photography. You will require a background that complements your subject, which is not cluttered and which does not have any elements that compete for attention. Since mushrooms are tiny subjects you have much more control over your background. You could either choose to use wide open apertures which would completely blur out the background with only the subject in focus or you could shoot from very low angle and get the sky as your background (a good trick to achieve deep blue sky is to use off camera flash to light the mushroom and underexpose the sky by a couple of stops) or use artificial backgrounds like placing a broad leaf behind the subject at a distance etc.

mushroom photography
Photo By Israel Gutierrez

12. Pick the best Specimen to Shoot


If you have more than one specimen available at the place, make sure you choose the best specimen among them to shoot. While choosing which one to shoot, look for freshness, colour, shape, what constitutes the background etc.

13. Take Record shots


While photographing mushrooms make sure you take record shots of all the species. Record shots are wide angle shots that show the mushrooms along with a good deal of environment or the habitat in which it was found. It serves as a guide as to where and in which conditions could one expect to find the species.

mushroom photography tutorial
Photo By Robert Voors

14. Spend some time Grooming your Fungi


This is an important point, once you are done with taking record shots; it is now time to make the mushroom look as beautiful as possible. Most of the time you will find your specimen covered in sand, moss or other kinds of dirt. Use a light brush to slowly brush off the debris from your mushroom. Always carry a can of water so you could sprinkle a little bit of water over your mushroom which will make it look fresh. Look out for what constitutes the background if there are elements that you would not like to be in the shots remove them, sometimes you will find artificial things like bottle caps, cigarette stubs etc, which won’t be that noticeable when looking directly but will show clearly in the picture.

how to photograph mushrooms
Photo By Dirk Huijssoon

15. Experiment with Shooting Angles


Try shooting your mushroom from every possible angle, from high above to low down in the ground. Some mushrooms have bright colours and great texture on their underside, shooting from low angle makes them look larger in perspective. At times you will find mushrooms growing on tree stumps, a slight rise, etc which allow you to shoot from even lower angle.

mushroom photography tips
Photo By Rachel

16. Play with Depth of Field


Depth of field determines exactly how much of the subject or scene is in focus. Extremely shallow depth of field when used creatively would render the background in a smooth blur with only the subject being in sharp focus. This could make for pleasing backgrounds and good portrait pictures. But when you wish to show a bit of environment and you need mostly everything in the frame to be in reasonable focus you need to use large Apertures. The depth of field preview button on your camera will be a very useful feature to pre-visualize the effect when using different apertures. It is best to shoot every specimen with varying apertures or if that proves to be a hassle try using the camera in Aperture Priority Mode (AV) with Auto Exposure Bracketing feature. You will never know which frame looks better when viewed in a much larger screen than that of the camera’s LCD.

photographing mushrooms toad stool fungi
Photo By Lee D Baker

17. Be safe


Last but not least when it comes to mushrooms if you are not an expert in mushroom identification then it is better to stay safe and do not touch them with your bare hands. Also make sure they do not come in contact with bare skin. Some mushrooms are completely harmless and are edible. They are served as delicacies in restaurants in different parts of the world. But some members of the family are very poisonous and could cause severe injuries or even death. Remember Death Cap is one of the common names used for mushrooms. So even if you have a pocket guide or mushroom book with you and you are confident that the mushroom you have found is pretty harmless, if it has not been identified by an expert or a naturalist then it is better to stay safe and keep you bare hands off it.
how to photograph toad stools
Photo By Tobias Schlatter

Candid Photography Tips


1. Blend in With the Crowd – Make Yourselves Invisible


The key to successful candid photography lies in the photographer’s ability to blend in with the general people in the crowd. Dress as per the occasion, avoid wearing the photographer’s jacket, keep the equipment you carry with you to the minimum, a DSLR with a general purpose zoom and some spare CF cards would do. The lesser gear you carry the lesser is the chance of attracting attention to you. Be careful with your movements, do not make sudden or jerky movements even if you see the opportunity for a great picture, instead stay calm, slowly lift the camera to your eye and shoot all your movements should be fluid, natural.


Photo By Chris JL

2. Use Long Lens


Although this contradicts with other points we mention in the article, like blend in with the crowd, don’t be very obvious, do not attract attention to you etc. Having a zoom lens with a longer focal length is essential to capture great candid moments. Longer lens lets you put considerable distance between you and your subjects, there by greatly decreasing the chances of you being noticed. General purpose zoom lens like the 18 – 135mm, 55 – 250mm, 70 – 200mm etc works really well for candid photography.

candid photography tutorial
Photo By Chris JL

3. Position Yourselves Strategically


It pays to do a tour of the entire place before the actual event so as to get an idea of things, like where will be the key events happening, where will be the audience, where will the light come from etc. after analysing all the possible scenarios look for places where you could hang out and get the best view of important moments without being an inconvenience to others. Many a times, positioning yourselves strategically before the actual moment makes the difference between getting great shots and getting average ones as you will find it difficult to move from one place to another during the function.

4. Forget about Artificial Lighting


It is best to turn off your flash and forget about it; similarly you can leave your strobes and remote triggers at home. Candid photography is strictly available light territory; as any form of flash will not only grab the attention of the entire crowd, but also will ruin the shot by draining the ambience and making the image look flat and lifeless.

photography candid
Photo By Vineet Radhakrishnan

5. Think Ahead


Try to think ahead and imagine what all situations you will be facing during the big day. Among them which ones have potential to make great pictures? It pays to make a list of shots that you would like to take during the function as it will get you organized and be mentally prepared for the challenge. An example of Must Shoot List could include things like
  • Guests When they Arrive
  • Expression of People During Speech
  • Guests Greeting Each Other
  • Expression During First Dance etc
  • Close up Pictures of Food and Wine

6. Be Ready at All Times


Carry your camera with you at all times and always be ready to shoot when an opportunity presents itself to you. Having your camera with you at all times also has the advantage that after a while people tend to ignore it and then will be your chance to shoot people who are otherwise very shy towards cameras.

candid photography tips
Photo By Simon Ingram

7. Anticipate


Just like in wildlife photography, the skill to anticipate what is going to happen next and being ready to capture the moment is very essential. You will only get a split second from the moment you see it coming to the moment you realize a potentially great shot missed. The trick to avoid it from happening is to be able to predict in advance what is going to happen and clicking at the precise time to successfully grab the shot.

8. Master the Semi Automatic Modes of Your Camera


It is a good idea to completely master the semi automatic modes of your digital camera like Aperture priority mode and Shutter Priority Mode, also how to set exposure compensation and how it does affects the exposure. Mastering these modes makes your metering and clicking much faster than in manual mode and it is also gives you much more control over the fully automatic modes. You will not get second chances so do not hesitate to shoot lots of pictures, it is a good idea to put the camera in continuous shooting mode and shoot in bursts, you will find many interesting frames among the lines.

tutorial on candid photography
Photo By Chris Zerbes

9. Keep your Subject’s Mind off the Camera


Most people won’t act natural when they know that they are being filmed. A kind of nervousness creeps over them and it ruins everything. Every single shot looks artificial, posed. The trick to avoid this from happening is to distract your subject’s mind and make them engaged in some other activity, and shoot them in the process. Position yourselves far from them, pretend that you are engaged in shooting something else, or do engage with them for a while without the camera so they get to relax and once they are completely unaware of you and your camera, silently slip back, grab your camera and shoot.

10. Photograph People when They are Engaged In an Activity or When Interacting With Others


The best chances for candid photography is when people are either engaged in some activity or when are interacting with other people. It is because they will be fully focused on the activity they are engaged in and won’t notice that they are being shot. You could also hope to capture a variety of emotions, expressions and reactions from the people. Moreover people engaged in an activity or interacting with others adds context to the image and narrates a story to the viewer.

11. Take Group Shots


It is easier to get good candid shots of groups of people than individual members. The fact of being in a crowd somehow takes the stress off them. Also when in a group, people tend to interact with each other which could also lighten the mood, and add emotion and drama to the shot.

tips for candid photography
Photo By Javier


Related Reading

 
Support : Creating Website | Johny Template | Mas Template
Copyright © 2011. Technology Share - All Rights Reserved
Template Created by Creating Website Published by Mas Template
Proudly powered by Blogger