Latest Post :
Recent Post

How to Control Aperture and Shutter Speed on an Entry Level Point and Shoot Digital Camera

Point and Shoot Digital Camera


The digital camera I recently purchased (my first digital camera) has only got the following shooting modes; Portrait, sports, landscape, macro and movie. Is there some way by which I could control the aperture and shutter-speed without upgrading my camera?

This is one of the most commonly asked questions among the various emails I get so I thought I’d better put up a post rather than trying to answer each one of the mails individually.

Most point and shoot digital cameras except for the top of the line models does not have the ability to manually set aperture or shutter-speed. As a result precise controlling of depth of field and motion blur is quite difficult to achieve.

Many people don’t even realize the need or importance of such fine control until they have purchased their first camera and have spend a considerable amount of time trying to shoot different subjects.

Only when their skills increase to a particular level and face many creative photographic opportunities they begin to discover their camera’s limitations.

When faced with such a situation one really has two options. First is to upgrade his/her camera to a DSLR or any advanced point and shoot model with manual controls. This really is the ideal solution provided you have the budget and willingness to spend it over camera and various accessories. But since it is apparent from the question itself that for the time being getting a new camera is not an option, let us rule out that possibility and look at the second option.

You might have noticed the various shooting modes your camera has and that when set to different modes the camera behaves differently, or takes pictures of the same subject/scene with different combinations of aperture and shutter speeds when set to different modes.

Shooting modes allow the photographer to tell the camera what is the nature of the subject/scene that you intend to shoot and what the effect you are hoping to get is.

A thorough understanding of how these different modes function will help you trick your camera into selecting the kind of exposure variables that you wish for a subject. However do keep in mind that you will not be able to get exact same settings that you have in mind but will be able to shift the aperture and shutter-speeds more or less towards the desired values.

Turn OFF Auto ISO


Most point and shoot digital cameras are set to auto ISO by default. Set it to a desired value based on the lighting conditions and how well your camera handles high ISO noise.

Portrait Mode for Shallow Depth of Field


If shallow depth of field is what you are trying to achieve set your camera to portrait mode. The camera will choose wide open apertures to render the background blurred and make the subject stand out.

Landscape Mode for Large Depth of Field


If you like the entire scene from foreground to background to be in focus, set your camera to landscape mode, the camera will choose narrow apertures to render the complete scene in focus.

Sports Mode for Fast Shutter Speeds


If freezing action is what you have in mind set your camera to sports mode, in this mode the camera will select faster shutter speeds.

Achieving Slow Shutter Speeds


One thing that is very difficult to do with point and shoot cameras is to achieve very slow shutter speeds, normally there is no preset mode for that, but try night mode/slow sync flash etc, if you don’t need the flash try turning it off or cover it with some opaque material.

The very fact that you are looking for more control over exposure variables and that you know precisely what effect you need in a situation (depth of field, motion blur etc.); means that you have outgrown your point and shoot in photographic skills.

Very soon you will be frustrated with the limitations of your present camera and will be forced to upgrade. Resort to the above tips as stopgap arrangements until you could save enough to buy your next camera.

There is no photographer who could limit his purchase in a single camera all through his career; technology make it impossible by changing fast; making maximum use of the present one alone can be the only remedy. 

Airshow Photography a Beginners Guide - Camera Settings - Shooting Technique - Tips and Tricks

air show
Photo by: Nathan Rupert


Aircrafts are symbols of speed and beauty; they are products of cutting-edge technology in stylish designs and most advanced features. The purrrrrrring sound produced by these metal birds raises adrenalin levels to new highs and people clamor with awe. Citizens feel; it not as a mere aircraft that flies but the prestige of their nation that flies sky high! When the show is over the spectators are as tired as the pilots who flew the crafts!

The airshows are mostly sponsored by aircraft makers to exhibit the capabilities of their ware; they are not only for the public to clamor; we photographers also claim for our share of the pie; in short making hay while sun shines. Perhaps the most important factor that attracts many to air show photography is the fact that air shows are not held in all nook and crannies; they attract high media attention and their visuals can thrill the viewers. All that is required to capture some stunning images is a camera, few lenses and of course some grip on the right technique.

Air Show Photography – Lens Choices


air show photography
Photo by: Jason Mrachina


Airshow photography includes basically two types of images; one is that of airplanes on display on the ground and the other of airplanes doing stunts in midair.

 To photograph airplanes on display on the ground wide angle lens, preferably a zoom in the range of 24mm – 70mm is ideal assuming you are shooting with a full frame camera. For crop sensor DSLR cameras an 18mm – 55mm will be better suited for the job. Do not go still wider lenses due to perspective distortions, but if used creatively; such distortions caused by extreme wide angle lenses can produce some amazing results.

For photographing of aircrafts in flight we’ll need tele photo zoom lenses; preferably in the range of 100mm – 400mm. The ability to zoom allows you the flexibility to use a lens of long focal length to capture an image of a single aircraft or zoom back to capture multiple aircrafts or a display team.

Why Zoom Lenses?


airshow
Photo by: Nathan Rupert


In air show photography zoom lenses are preferred over prime lenses due to a number of reasons. First and foremost using zoom lenses means you need only carry only fewer lenses. Secondly it allows you to shoot uninterrupted across focal lengths without having to change lenses all the time which is awkward at an airshow. Thirdly not having to change lenses in such dusty conditions prevents the problems of dust getting on the camera sensor.

Camera Settings for Air Show Photography


airshow photography
Photo by: Sp8254


Aperture Priority mode (AV) or Shutter Priority (TV)


During an airshow lighting conditions can change quickly, with such fast action taking place, while you are after aspects like focus, framing and composition rather than exposure. So it is best to use semi automatic shooting modes such as aperture priority or shutter priority as the shooting mode.

For photographing planes on display on the ground using wide angle lenses, use f/8 or f/11 at the minimum to attain acceptable depth of field. For shooting air crafts in flight using tele photo lenses,   f/5.6 gives you the best combination of ISO, Shutter Speed and Depth.

AI Servo / AF (C) Focusing Mode


Turn auto focus on and switch to AI Servo (Canon) and AF (c) (Nikon); this mode allows you to track moving subjects and keep them in focus when the shutter is released. For greater control use Back Button Focusing which allows you to use your shutter release button independent of focus.

Shoot RAW


Shooting in RAW will negatively affect your frame rate, but will give you a lot of leeway while correcting any exposure or white balance errors during post processing.

Use Spot or Center Weighted Average Metering


In airshow photography; shooting aircrafts is done against a very bright sky and this could fool your cameras exposure meter and render your aircrafts underexposed. Switching to spot metering or center weighted average metering will help correct exposure to an extent. Take a couple of test shots and apply proper exposure compensation to nail your exposure. Do cross check your LCD and also Histogram to make sure you have the right exposure.

Drive Mode


Set your camera High Speed Continuous mode and fire in bursts, this not only improves your chances of getting the right shots but also reduces the chance of losing images due to camera blur.

Air Show Photography Tips

air show photography techniques
Photo by: Skip Steuart


1. What to Wear


Wear light, breathable clothing; preferably long sleeves that will cover your arms. You’ll be exposed to the sun for long periods of time so do take a hat with you. Also photographing air shows means you’ll be either standing or walking for extended periods so wear some comfortable shoes.

A Photographer’s Vest


A photographer’s vest is a wise investment for air show photography. It not only makes it easy to carry around your stuff but also avoids hassle with security personnel. Some venues do not allow backpacks in and you might have trouble getting your camera bag in. But a vest is always allowed.

Cargo pants/shorts


Post 9/11 security at air shows is strict and there are some seemingly insane rules regarding what you can and cannot take to an air show. When backpacks are not an option cargo pants / shorts with their many large pockets of make carrying all the various bits of this and that a much easier affair.

2.  What to Bring and What Not


shooting air shows
Photo by: Eric Ward


Check in advance the security warnings regarding what are allowed in the venue and what is not. Generally weapons of any sort are not allowed so are umbrellas; most air shows have their websites which clearly state such details.

Memory and batteries


Fast moving subjects, shooting in high speed continuous mode, RAW file format, what does it all tell you… it’s obvious isn’t it carry lots of spare memory, you’ll need it, with prices of memory going down day by day, running out of memory is not an excuse for missing great shots. 

So is the case of batteries; always take at least a fully charged spare battery with you. Image stabilization feature, continuous shooting, reviewing on LCD etc all drain battery quickly.  Shooting in cold weather makes battery drain faster; it is a good idea to keep your spare battery close to your body so it stays warm and does not lose charge.

Ziploc bags


Carry a couple of gallon sized Ziploc bags for covering the gear stuffed into your vest or the pockets of your cargo pants. Lenses, memory cards, batteries etc could all be put into these versatile clear plastic bags for security inspection. Also if the weather takes and unexpected turn and it rains or drizzles these bags could be turned into an ad-hoc rain shield for your camera and accessories.

3. Some places that a lot of action typically occurs during air shows

air show photography tips
Photo by: Jason Mrachina


Air show Center


Air show center is the center ground which is the reference point for the pilots to perform their tricks. Usually the VIP pavilion will be facing this point straight down the runway. Watch this area carefully, if need pre-focus here and wait for the right moment to capture amazing pictures.

Extreme left/right of the crowd line


Extreme left of right of the crowd line is normally less crowded than the center. And those areas present you with the unique opportunity to shoot some very intimate pictures of the performers walking through their routine of inspecting their machines, starting up and final checks etc. and those acts that are not staged at the center will be done to these far sides of the crowd. Extreme corners allow shooting from a different angle to make the best out of lighting conditions during the show.

4. Show up Early and Stay Late


how to take air show pictures
Photo by: Ruben alexander


Do your homework, find out as much of the event as possible, arrive early and you’ll be able to capture airplanes arriving for the event, shoot some in perfect early morning light, move around freely and shoot some planes on the ground without a lot of people near it, meet some pilots or owners, most will love to talk to you if they sense that you are genuinely interested may allow you closer access or even pose for a few shots.

5. Master Proper Hand Held Shooting Technique


Shooting air planes in flight is better done hand held and it pays to learn the right hand held shooting technique especially when using long lenses. When hand holding your camera, use your left hand in a cupped position with the lens resting in your palm, bring both elbows into your sides and keep the camera viewfinder, firmly pressed against your face.

6. Change Cameras not Lenses


air show photography tutorial
Photo by: Nathan Rupert


When photographing air shows it is much more practical to use two camera bodies; one with a wide angle lens mounted and another with a tele photo zoom lens mounted. When need to go wide or tele photo simply swap cameras. This is faster and often the only practical solution as there really isn't time to keep changing lenses on a single camera body during a display.

7. Lighting is Important


photographing airshows
Photo by: Stefan Presslein


When shooting  air crafts on display on the ground which is the same as shooting portraits of people, pay attention to where your light is coming from, whether it is hard or soft etc. Choose shooting angles wisely. Everything we learned about golden hour and the light during the time is applicable here too.

8. Practice Makes Perfect


Shooting air planes in flight is tricky and to get great results one must practice the skills; As homework practice on other fast moving objects like cars or visit an airfield and try shooting airplanes that are landing and taking off before the main event. The more the practice the better you’ll get at it and you will find significant increase in your keeper rates.

9. Shoot Planes on the Ground


air show photography tips
Photo by: Don


Don’t get caught up in all the action unfolding up above in the skies and forget taking some pretty portraits of the beautiful planes on the ground. Try to photograph them from unique angles, during early morning and later evening when you have dramatic lighting. Also chances are there won’t be many people hanging around the planes during those times.

10. Master Panning Technique


Panning is a very effective technique to show motion in still photographs. But as any other technique it also requires much practice to get right. Do refer this article to Master Panning Technique.

11. Use Slower Shutter Speeds for Propeller Planes and Faster ones for Jets


When photographing planes with propellers or helicopters in flight, using slow shutter speeds in the range of 1/25 to 1/125 of a second to show motion in the propeller blades while the air craft is rendered sharp. However with such slow shutter speeds expect many shots to be wasted due to camera shake, so shoot a lot of pictures and turn on Image Stabilization / Vibration Reduction if you lens has the feature.

12. Travel light


Do travel light and take only those things that are actually needed, think of the hot sun, heat and dust while hauling heaving equipment that could be avoided.

13. Seize the moment


air show camera
Photo by: Adam Pniak


Timing your shots perfectly is the key to get stunning air show pictures. You should be able to anticipate what is going to happen before the action actually unfolds so that you’ll be ready when it does. Generally, aviation photography is much more interesting with planes flying towards you than away from you, and when they’re banking so that the cockpit, the pilots in it and top of the wings are visible rather than the underneath.

14. Stay sharp


airshow photography
Photo by: Mario Cutroneo


Even the continuous focus modes on the latest cameras would at times fail and lose track of the air planes, especially when shooting fast jets flying directly towards you. Stay sharp and override focus by focusing manually to save the shot.

15. Get close


Get as close to your subject as possible, both physically and by using long focal length lenses. Get yourselves nicely positioned to capture the action and also use tele photo lenses to close in on the aircrafts.

16. Take Lots of Pictures


Prices of memory is falling by the day and on top there are no processing charges, so you literally have no excuse for missing shots. On the same note, occasionally put your camera down, sit down, relax and enjoy the show, this also helps your body recoup and prevents hands from shaking due to fatigue.

17. Runway Shots


air show photography settings
Photo by: José Luis Celada Euba


Find a spot at the end of the runway to take runway shots of aircrafts taking off and landing. Choose shooting angle wisely so as to get a neat, uncluttered background. Also make sure that camera is held horizontal so that the runway does not appear to slop.

18. Lens Hoods


Lens hood could be very useful in air show photography since you will be mostly shooting up into the sky. It will help prevent flare and also afford some protection to the front element of the lens.

19. Don’t forget to shoot the people


tips for photographing air shows
Photo by: Beverly


Include a human element in your shots to add some more viewer interest. Shoot the crowd’s reaction especially that of children, shoot the pilots, the support staff etc performing various duties etc.

20. Stay Hydrated


Always carry a bottle of water with you and sip regularly to keep your body well hydrated.

21. Location, location, location


canon air show
Photo by: Dvidshub


Get to the show early and scout the location for the best vantage point. Usually it will be where the Television Crews have all set their equipment and also the show center. Getting their early will allow you to be their right on the fence. Pay attention to any distractions that are present in the background and also the direction of light. If you plan on going to the show on multiple days, consider changing locations on different days. You might want to have a look at the weather forecast for the days as well

22. Composition


air show photography ideas
Photo by: Don


Composition guidelines like the golden mean or the rule of thirds are very much applicable in air show photography too. So try to place your air craft’s off center; keep your horizons level, make sure there is no clutter in the background, compose your planes as flying into the frame rather than flying out of it and you’re on the right track to making some great air show photographs.

23. Aviation Photography IS NOT A CRIME!!!


In post 9/11 era some people have a wrong perception of aviation photography, they think of taking pictures of airplanes and airports as illegal. This idea might have come from some scenes that we see in the movies. As a result aviation photographers are viewed with suspicion. But the truth is that it is not illegal to take pictures of 99% of aircrafts, the remaining 1% will usually fall under military installations which are off limits and photography (a strict no no). But you will see clear signs and barricades which precludes any confusion.

24. Rent Lenses


If you feel limited by the equipment you have and do not plan to invest in those pricey lenses. There are always online companies which specialize in renting lenses for photographers. This way you could get to use those pricey lenses that are otherwise way out of your budget.

25. HAVE FUN


how to take air show photos
Photo by: Burg Tender


Air shows are great fun, don’t get too caught up in trying to produce great pictures and miss out on the fun part. The most important thing is for you to enjoy the day and have plenty of fun, stunning pictures should only be a byproduct.

Aircrafts have revolutionized transportation of people and cargo; their role in warfare has been established since world war II. These flying machines are the pride of the nation which own and made them. All these have made airshows great events and subject to big media hype; as their popularity grows; the worth of the images shot on them surges; only that has something new and innovative catches viewers eyeballs; it must be your images; some hard work can make it happen; wishing good shows and better images! 


Charm of Wildlife Photography – A Sweet Trap?

Guest Post by: Captain Suresh Sharma
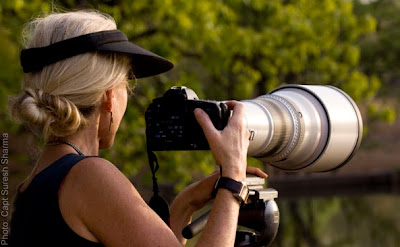
Wildlife Photographer


WILDLIFE PHOTOGRAPHY is certainly that stream of photography which has no match for the excitement, thrill and action it renders to one’s heart and sense of satisfaction for one’s soul ! And wildlife photographers are ambassadors of `nature conservation’, play a major role as a crucial link between research and common man. Probably, these are the broad reasons wildlife photography entices almost everyone, even the ones who just hang one camera around their neck. And with the advent of digital cameras, the clan has grown multi-folds in last few years and growing by the day. Almost every photographer’s dream is to do wildlife photography, even if one’s primary profession is other branches of photography or a completely different profession. Why not? For it has glamour of its own! It surely has steep challenges, which many people love negotiating in real life and that is why it has earned that a tag of `niche glamour’. Wildlife photography is like wooing a beautiful woman! Not all will be lucky to get her, in spite of the best chase. Not everyone’s cup of tea..in nut-shell. 

There are many factors. One more reason for every man to love wildlife photography – instinctively just like every man worth his salt chases the most beautiful woman, same hormones drive every man equipped with camera and photography skill to test his luck chasing animal world. And a strong instinctive desire to live closer to nature and the spirit to explore life around has always coaxed man to record the natural history wonders, now with cameras. Some use it as a means of recording the nature and its phenomenons and some create soul-stirring art with it and some lucky ones make their living. Wildlife photography earns ardent admirers for those who perform and achieve. Also, nature has always wheedled most of us into its lap, where it has many wonders to unfold to those who care and dare to explore. This breed of photographers unfold the sensational mysteries of natural history as well. In fact wildlife photographers are ambassadors of wildlife conservation in true sense. Its the concoction of various instincts, desires, skills, hormones, etc.  that makes most photographers  drone all the time around wildlife photography.
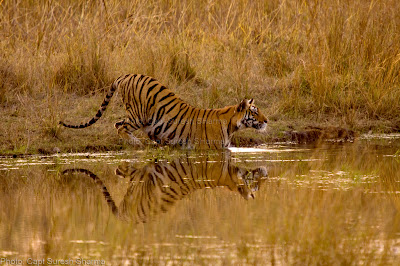

Tiger is homing on to its pray, which is across water stream.


My purpose of writing here is to erode the illusions of most young budding photographers about wildlife photography. I keep getting requests and variety of questions about wildlife photography and related issues everyday. Most do not realize what makes a good wildlife photographer, how to go about it. The first and foremost thing is one has to assess one’s own potential first or develop i.e. one has to have easy access to wildlife, develop some natural history knowledge, minimum average physical fitness, not to mention suitable camera equipment (what one has and what one will need), financial strength to bear with its tall demands, etc. In spite of all this, all are not so lucky to make good wildlife photographs. Many get stuck with the compulsions of life (job and family), many can not decide which way to go and most are slaves of personal habits i.e. poor discipline, mixing it with pleasure, sleep, attitude, etc. I also feel many get fascinated by these long lenses, the fan club which wildlife photographers enjoy on internet forums, and it has macho tag for many.

And then one can say some are born lucky who have eye of a good artist and have good discipline, are in the habit of getting up early, the ones who don’t love anything other than wildlife photography, focused. Above all, fortunate to have enough money to support this expensive hobby.  So, that is how one makes few steps forward to one’s own niche, as one moves up one gets admirers too. Who won’t like it?
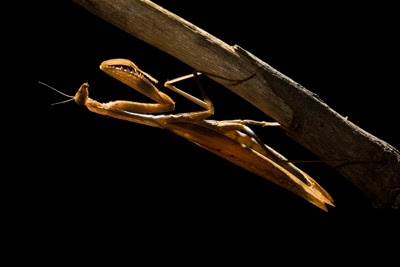

Praying Mantis
Praying Mantis


Also, we need to come out of another self-spun illusion that wildlife photography is all about tigers, elephants, rhinos and leopards. Most of us, at infancy stage, think that the treasure trove of wildlife photographs is only inside national parks and wildlife sanctuaries. Though, I do not deny this fact that most of the wildlife today is in protected areas and thus flourishes only inside these heavens. The beauty and mysterious life the smaller creatures have is amazing and makes them a much better subject in my views. There is another perspective to it, viewers love to see what they haven’t seen or do not get to see as a routine in life. So, one can shoot smaller animals like insects in one’s backyard, nearest public garden, agricultural fields, bushes, road side trees, etc. It costs no money, no big effort of packing and driving to national parks, only needs inexpensive equipment (one camera body, macro lens, a tripod), to shoot beetles, butterflies, moths, praying mantis, etc. Other than this –  one just needs plenty of time and patience! Not to forget some cookies and a water-bottle, on a bicycle.


Python
Python


If you are looking at the bigger game for serious photography, then first of all, muster good money to buy you a good set of camera equipment i.e. two camera bodies with high speed of `fps’ and higher mega pixels, professional lenses which are in the range of US$ 10,000 each, the best tripods (legs only will cost US$ 1000 or more) ball heads (US$ 1000 or more), not to mention numerous expensive accessories one needs all the time. Next comes, expensive traveling which may be by air, train or road to reach (long distances) the well protected wildlife areas which have good wildlife to photograph and worth your camera. One needs advance bookings to check into a good lodge on arrival, which is safe for your equipment and looks after you well to ensure your comfort (you need that after day’s hard work), costing Rs 2500 and above per day. While you start unpacking your camera boxes, someone has to check the condition of your vehicle for the jungle safari, which will cost you Rs 2000 per day (must have gone up much more by now). If you are serious about wildlife photography and have suitable camera gear, then I would strongly suggest that there should be only one person in one vehicle, with one well trained assistant, at the maximum. O, I forgot to mention the entry fees for the vehicle, photographer, assistant, driver, camera equipment (this can vary park to park), hiring of a guide for each trip, etc. All this adds up to minimum Rs 5000 plus to do wildlife photography per day in any Indian national parks and sanctuaries, including the cost of your stay in a lodge. Not to forget all the `red-tape’ and petty skirmishes of the park staff and locals, you will face in this field, most of you may not even notice everything, but it happens. Then you may face some unpleasantness at the gate, just at the start of your safari and then those noisy unruly tourists from Delhi, for home its just like another circus.
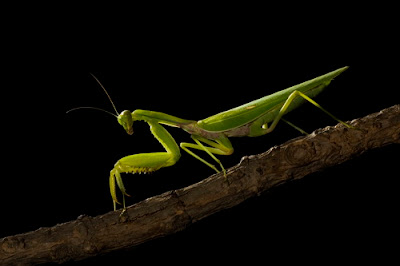

Praying Mantis
Praying Mantis


If you really wish to do serious wildlife photography then you should be able to pull some `powerful strings’ for special entry and then everything works very well and like a well oiled gearbox … no noises. There shall be no restrictions on your entry, no limit on timings, areas or zones you will be allowed to explore, get the forest department guides to lead you, etc.  I am writing this out of own my personal experience. But that doesn’t mean that one can not do good photography without these `strings’. But when photographers from BBC and Nat Geo want to do photography they pull the best strings and get those results which set new standards in the field.

I am sure, you all will ask one question that if wildlife photography is so tough and the rewards are so meager and that too not many are lucky, then why there are still some wildlife photographers who invest so much of money and efforts for this. You must see what all has gone into making them as big wildlife photographers of name and fame, why they buy that equipment, try to take a peek at the hidden things `behind curtains’. Some of these few are lucky to have their well paying businesses, jobs and having time too, some have been lucky to be around wildlife areas, some own lodges, some are paid to become a lucky one. Nothing has come into being overnight and so easily as you all think, they all have worked very hard to their way up the ladder.
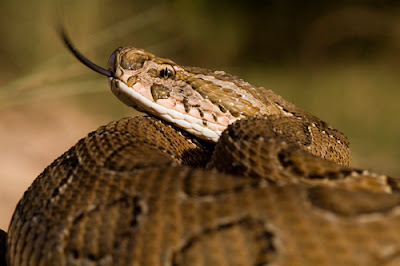

Russels Viper
Russels Viper


REMEMBER : Ideally, one should pursue that activity first which is within one’s reach easily, which means select a subject that is not far from your base (this way you cut cost on logistics, travel and no leave required from your job), your basic equipment can deliver good photos, etc. First brush up the basics of photography this way and reach a level when you do not make basic mistakes. One should be able to handle any tricky exposure situation in the field; I have seen people whispering about what settings I should use. If one is doing so, there is no bigger fool than the one who is paying to grope in darkness like a blind man. Everyone, makes mistakes and a humble start with basic equipment and makes one’s way up as per one’s own capabilities, efforts, patience and perseverance. Nothing comes free in this world !

Some are lucky to be working in the jungle lodges and resorts around national parks and wildlife areas, that means easy access to wildlife areas as a paid naturalist and most costs are reduced this way. Others have moved ahead like a turtle  slowly and steadily, through the standard grind of this passion/ profession. They all have toiled very hard patiently to reach where you see them shining like a star or sun.  Not realizing what made them shine,  we keep trying to emulate them aimlessly. One of the important things, one must have some basic knowledge of natural history, most important assets one needs to have, to make a significant dent in this field. Otherwise, you shall remain one of the insignificant ones in the crowd.
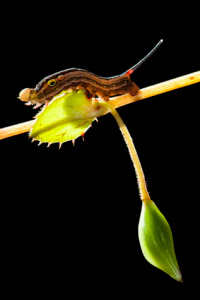

Caterpillar
Caterpillar


Now, if you are a basic photographer like me (with limited resources), then turn around and peep into your backyard, balconies, city gardens, bushes, agricultural fields, there is plenty of wildlife, i.e. birds, insects, lizards, butterflies, vegetation, etc. Let me remind you, this way, you will need equipment which will cost you only one twentieth of that which is mentioned above, even if you buy pro equipment (professional macro lens, 300mm lens with 2X, suitable tripod with ballhead, a flash, two camera bodies, etc.). If you are worth your salt, and everyone can not be, you will crawl up and the speed will commensurate to the size of your sincere efforts only. At the end of the day, I mean at some point of time, we all love to be rewarded which could be in terms of money (to support your expensive equipment and on-going upgradation all the time), publications for name, stock photos for sales, etc. In case of wildlife photography, I find that the sale is too less when we compare it to other branches of photography i.e. life style, travel, fashion, etc. BEWARE :: SUPPLY IS MORE THAN DEMAND !
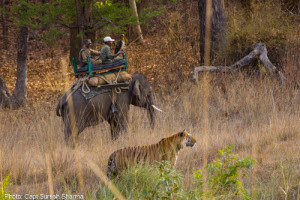

Tiger Show at Bandhavgarh


My aim here is NOT to discourage you, its to throw some light on the path which most of you wish to tread in the years to come and you seek some guidance from the ones who have been there. You need an external support to sustain, if you wish to start working as wildlife photographer right from the beginning and nothing else.There are numerous examples, whose `first love’ is wildlife photography, but are fashion photographers which is so paying that it can buy them good equipment and can afford access to wildlife areas and can afford to take time off their primary profession. They do get rewarded well, as they have all that which helps them to get good wildlife photos.

Life is too short to do experiments, but some love experimenting like me. But then I am very clear what I want in life, happiness, not by achieving big goals, but by doing what I like doing the most. I drifted into travel photography, as its so easy, take one wide angle lens and walk in the streets or a fair or cultural event, go around a monument, etc. and shoot to your fill. I do nature photography which you can see as cactus photography, flower photography, snake photography, insects, etc. on my website and blogs.
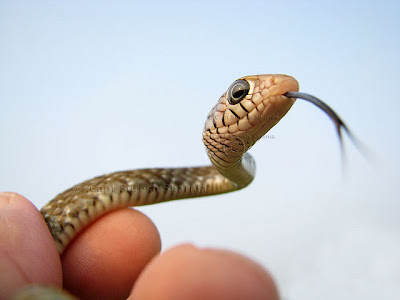

Snake Photography
Snake Photography


Do you know one can do wildlife photography with wide angle lens as well? That means there is no specified camera gear for wildlife photography. But at the same time I pity the rookies with designer hats on head with no gray matter to reckon with (it seems) and cocky tails up skywards, scuttling around like headless chickens, zipping around the national parks having SLRS with 70-200 mm lenses, pushing and flogging their drivers and guides to get them a tiger yawning on the road and into their camera straight and nothing less. Trying to decipher the code of the `hidden world of nature’ with no knowledge at all, even the crackling noise of each dry leaf probably having a beetle underneath croaking for its mate, as if there is tiger around and these rookies raise their their tails up.  Every scream of any four footed is an alarm call for a tiger, guides and drivers of their safari vehicle giggle behind the woolen scarfs. It takes them just a wink of an eye to wean out `grain from husk’ and their effort to get you a tiger depends on where you stand in their list of photographers who are rated as worth their salt.


Tiger Spotted
Tiger Spotted


You must hear the gossip and the expert comments on these whooshing jungle safari vehicles by these `expert wildlife photographers’, fake spirits are sky high and if there is adrenalin in the world then its only their veins with plenty, leaving the world dry by even a drop of it. But then what happens to these `experts’ – I see them gasping in Delhi (read cities) and having not even one single shot for years which fills their soul and makes their friends envy them. Alas, if they had woken at some point, they would have enjoyed the `symphony of the nature’ at least, which is at its best in the jungle. Neither they recorded (for want of gray matter and gear, which could make them see the right path to follow), nor they witnessed or enjoyed it.

My sincere advice here is that do not fool yourself, make an assessment and see what you can do under the given circumstances and how to move ahead. Best is to work with a seasoned wildlife photographer, as an apprentice and take a closer peek at this charming hobby/ passion. Do not move around like a headless chicken. Otherwise, you will face harsh reality after being a looser. Enjoy photography and do it for your soul and not to capture everything on this earth for competitions and exhibitions. If you are clear about why you wish to do it, you must. Nothing can stop a willing mind. Do not pursue wildlife photography just for its macho!

One must know what your present equipment can deliver and what it can’t, exploit that fully, first.

Before you jump on to expensive wildlife photography workshops and tours/ safaris,  prepare yourself as a photographer. And then next promotion should be as a wildlife photographer.
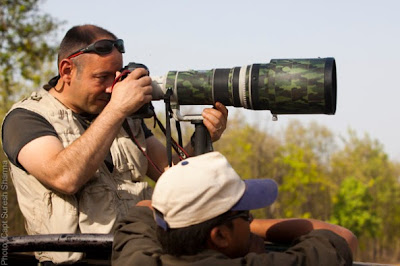

Wildlife Photographer


DO NOT JUMP THE GUN … And do not ape others …First, grind your photography skills and tame the camera!!!

Captain Suresh Sharma is one of the leading wildlife photographers in India. He also runs one of a kind photo tours and expeditions under the banner Green Dot Expeditions, Connect with him via Facebook or Visit his amazing Photostream on Flickr.

Related Reading


Quick Tips for Photographing Forests


forest photography
Photo by: Trey Ratcliff


Ever tried photographing forests, if not it is one subject that one should definitely give a try. It’s a real challenge especially for a beginner, one perfect to put one’s photographic skills to test. From a distance forests look very attractive or shall we say photogenic, but once you enter the forest you will be lost, suddenly you’ll find lacking in ideas as to how to frame the scene so as to capture its beauty, its vastness, the lush green, the humidity, and the overall ambiance. Here are some quick fix solutions to help you save the day. 

Exclude the Ground


photographing forests
Photo by: Moyan Brenn


More often than not forest floors are a mess, dead leaves, fruits, branches, fallen tree trunks, animal droppings and what not; such a clutter seldom contributes to a fine image. So when photographing forests, if you have a cluttered, unattractive forest floor, exclude it from your frame, shoot from a low angle with the camera slightly tilted upwards, voila…. Better forest shots right off the bat.

forest photography tips
Photo by: Ken Douglas


On the contrary if you have a very attractive forest floor, by all means feel free to include it in your shots.

Shoot Early in the Morning


how to photograph forests
Photo by: Morbcn


Shooting early in the morning has many advantages, chances are more that you will get some fog or mist which would vastly improve the ambiance of the shot, light during those times will be soft, and when the sun comes up if you have mist, fog or smoke in the scene chances are you’ll get some cool light streaks which in itself could make a beautiful shot.

Use a Polarizing Filter


forest photography technique
Photo by: Reto Fetz


Using a polarizing filter will vastly improve your forest shots as it will help you get more saturated colours and also capture more detail by eliminating surface reflections from the leaves.

The Golden Rule of Landscape Photography


landscape photography
Photo by: Jeff S. PhotoArt


If there is one single trick that will vastly improve your landscape photography skills then this is it. Follow the golden rule of landscape photography and get amazing results every single time. You’ll be wondering what this golden rule is.

The golden rule of landscape photography states that landscapes should only be shot during two times in a day.

One is from an hour before sunrise to up to an hour after it. Second is an hour before sunset till the sky goes completely black which will be an hour or two from sunset.


landscape photography tips
Photo by: Jeff S. PhotoArt


It is no surprise that these times of the day are called the golden hours. Why golden hour? Because the light during these times have a slightly golden tint to it, it occurs because the sun is at an angle to the earth during these hours and so sun’s rays need to travel farther through the atmosphere to reach the earth’s surface. As a result shorter wave lengths are filtered out and more of the longer wave lengths come through.  Read Wave Lengths and Colours for more on this.

Quality of Light during Golden Hours


landscape photography tutorial
Photo by: Jeff S. PhotoArt


Sunlight during midday is very harsh producing harsh unpleasant shadows, but during golden hours the light falls at an angle to the earth producing longer shadows, also majority of light reaches the earth by being reflected back by the clouds above and these clouds act as a giant diffuser, producing soft light that causes soft shadows that give professional quality lighting for landscapes.  Read more on Quality of Light.

How strict is this rule?


landscape photography technique
Photo by: Jeff S. PhotoArt


Well most professional landscape photographers only shoot at those two times of day, and if what you want is a professional touch in your landscape pictures, you should also be shooting only during these times too. The only exception to this rule is when shooting on overcast days when the lighting is quite soft even during midday.

Related Reading


Support : Creating Website | Johny Template | Mas Template
Copyright © 2011. Technology Share - All Rights Reserved
Template Created by Creating Website Published by Mas Template
Proudly powered by Blogger