Latest Post :
Recent Post

Multiplicity Photography or Sequence Photography


Multiplicity photography is the photographic technique of merging multiple images into one with the help of post processing softwares like Adobe Photoshop. This trick is also known as Sequence Photography.

Multiplicity Photography or Sequence Photography

How to do Multiplicity Photography?


In order to combine different exposures into one, you need to carefully plan and take the individual pictures.

Step by Step Tutorial – How to Take the Shots


  1. Mount your Camera on a Solid Tripod
  2. Focus on your scene and shift to manual focus: - if your camera re focus every time you will have slightly misaligned pictures, it’s possible to make multiplicity photograph with those but it requires a lot more effort in Photoshop.
  3. Put your camera in Manual mode and dial in the exposure manually:- this is critical so as to get consistent exposures throughout.
  4. Use a Narrow Aperture: - you will need your subject to be reasonably sharp in every instance so it is recommended to use a narrow aperture, f/11 or greater should work just fine.
  5. Shoot through the sequence quickly:- lighting conditions could change significantly when you are shooting outdoors and might cause problems, so it is always better to pre-plan your poses and go through the sequence in as little time as possible.
Below are some of the shots used to create the final picture, i have not included all the pictures, and it is always a good idea to shoot a couple of more instances of your subject than you actually need, so you will have options to choose from while post processing. You only need to use the one's you wish.


Multiplicity Photography or Sequence Photography


Multiplicity Photography or Sequence Photography

Multiplicity Photography or Sequence Photography


Multiplicity Photography or Sequence Photography

Photoshop Tutorial


  • Import all your files into Photoshop:- Click File > Scripts > Load Files into Stack. If you are using an older version of Photoshop which does not have the load files into stack option, you need to manually copy paste the pictures as layers into the same document.
Multiplicity Photography or Sequence Photography
This is how your layer palette looks like when you have all your shots stacked as layers in a  single document.
  • Using Layer Masks:- once you have all your shots in different layers, click on the top layer to activate it. Click New Layer Mask icon (at the bottom of the layers window).
  • Press B, then D to select the brush tool with black as the foreground colour.
  • Now paint over the person in that layer, the figure will be erased, now press Ctrl + I (to invert the mask), now you will be able to see two instances of the person. 
  • Now you need to repeat what we did to the top layer to all the layers and you have your very own multiplicity photo. You need not apply mask to the bottom layer.

Multiplicity Photography or Sequence Photography
This is how the layers palette looks like once you have applied layer masks to all but the bottom layer.

Here's another one.... Have Fun.

Multiplicity Photography or Sequence Photography

Bug Eyes Photography Trick


This is one fast trick which is very easy to do.

Bug Eyes Photography Trick

All you need to do is to mount your camera on a stable tripod and take two pictures; one in which both eyes of your model are looking up and another one in which both eyes of your model are looking down. 

Bug Eyes Photography Trick

You need to make sure that the model keeps his/her head still till you complete both the shots, only the pupils should move.

Bug Eyes Photography Trick

Now that you have both the pictures, open them both in Photoshop  drag one over the other to have them both in two different layers in a single document.

Bug Eyes Photography Trick

Now apply layer mask to the first layer and just erase one of the eyes and you are done. Easy...... isn't it?

Here is one more example 

First shot with both eyes looking up

Bug Eyes Photography Trick

Second shot with both eyes looking down

Bug Eyes Photography Trick

And this here is our finished picture

Bug Eyes Photography Trick

Now these are the two wonderful ladies who accepted my invitation to volunteer for the project. Many thanks to Mirjam &Serina.

Bug Eyes Photography Trick
Mirjam

Bug Eyes Photography Trick
Serina

It should look cool if you try a variant of this with both eyes looking to one direction first and then both eyes looking to the other direction and then combine them. Have Fun.

Related Reading


Harris Shutter Effect

Harris Shutter Effect can be done directly in DSLRs as a camera trick, but it can also be done much easier in Photoshop. In this article we will see how to achieve it using Photoshop. 

Harris Shutter Effect

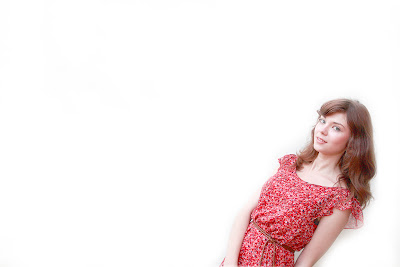
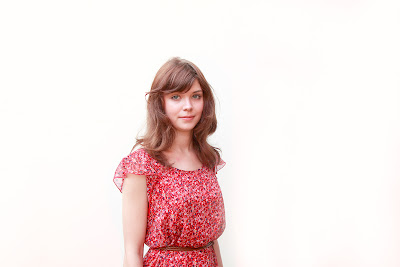
In order to to this trick you need to take three separate pictures of your subject. Make sure you have your camera mounted on a stable tripod or it is kept somewhere stable so the framing does not change from shot to shot.

Step by Step Tutorial


Step 1 :- Keep your camera somewhere stable.

Step 2 :- Take three separate shots of your subject
Harris Shutter Effect Photoshop Tutorial - Trick Photography

Harris Shutter Effect Photoshop Tutorial - Trick Photography

Harris Shutter Effect Photoshop Tutorial - Trick Photography

Now that we have our three shots needed to create Harris shutter effect let us see how to combine them together in Photoshop.

Step 3 :- Open all three images in Photoshop.

Step 4 :- Create a new document with the same file sizes as the base images. for example if your three shots are of 800px by 600px @ 100 resolution; create a new file with the same dimensions. This is not essential but its a lot simpler this way.

Step 5 :- Select the first picture, Click Window > Channels to display the channels palette, click on the red palette to have it selected, Ctrl A (to select all) Ctrl C ( to copy to clipboard).

Now you have the information in the red channel from the first image copied to your clipboard. So we will now paste the same to the corresponding channel (in this case Red) of our new document.

Step 6 :- Select the new document, in the channels palette click Red, then Shift + Ctrl + V (paste in place).

So now we have successfully copied the red channel information of the first file to the red channel of our new document.

Step 7 :-  Select the second picture, Click Window > Channels to display the channels palette, click on the Green palette to have it selected, Ctrl A (to select all) Ctrl C ( to copy to clipboard).


Now you have the information in the Green channel from the second image copied to your clipboard. So we will now paste the same to the corresponding channel (in this case Green) of our new document.

Step 8 :- Select the new document, in the channels palette click Green, then Shift + Ctrl + V (paste in place).

So now we have successfully copied the Red channel information of the first file and Green channel information from the second file to the corresponding channels of our new document.


Step 9 :-  Select the third picture, Click Window > Channels to display the channels palette, click on the Blue palette to have it selected, Ctrl A (to select all) Ctrl C ( to copy to clipboard).


Now you have the information in the Blue channel from the third image copied to your clipboard. So we will now paste the same to the corresponding channel (in this case Blue) of our new document.

Step 10 :- Select the new document, in the channels palette click Blue, then Shift + Ctrl + V (paste in place).

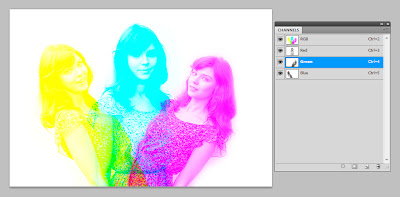
So now we have successfully copied the Red channel information of the first file, Green channel information from the second file, and Blue channel information from the third file to the corresponding channels of our new document. Now crop the file if needed and you have successfully created your own Harris shutter effect.


This is how your channels palette should look like once you have finished pasting all three channels.
Harris Shutter Effect Photoshop Tutorial - Trick Photography

One thing to keep in mind while doing the Harris shutter effect is that the photograph will render normal colours in areas that remain stationary throughout each of the three photos. So it will be fun to try this effect on scenes which have some stationary subjects and some subjects that move. Have Fun. 

Related Reading


Shadow illusion photography trick


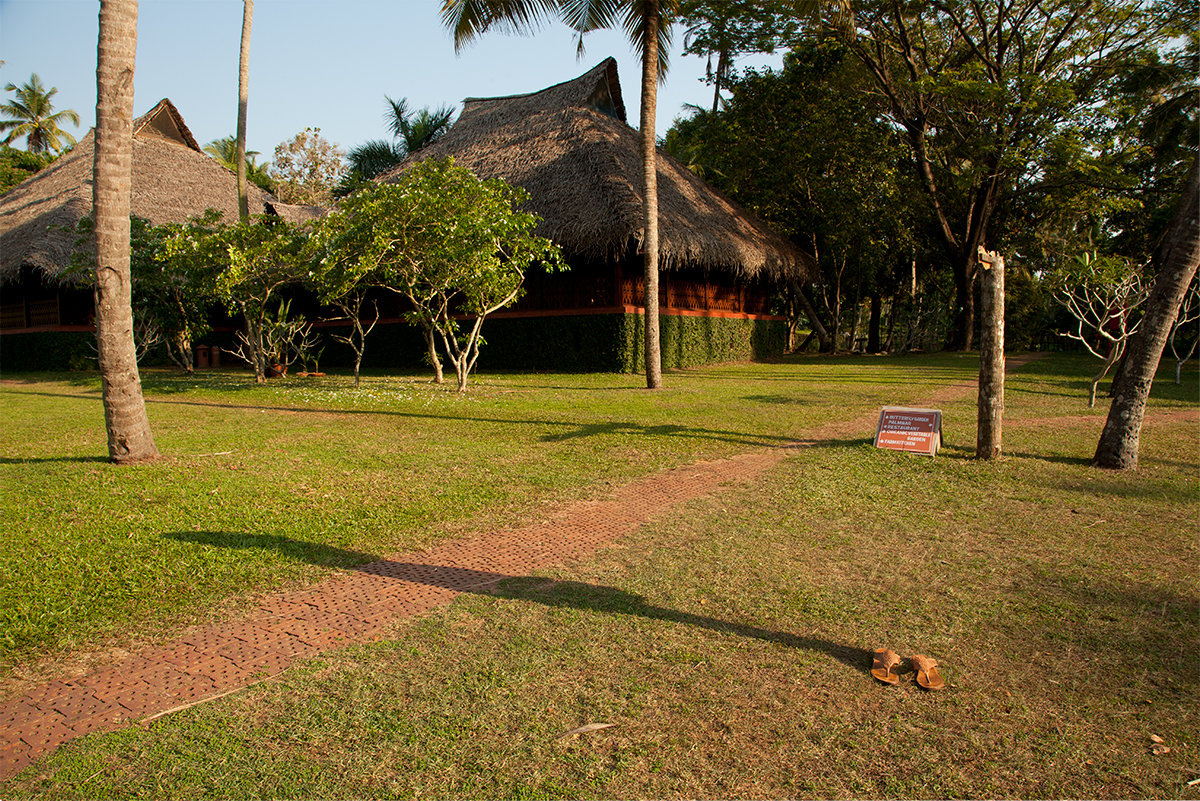
This is one simple photography trick or more of a photoshop trick. For this trick to work well you need to get long shadows of your subject and so it is preferable to try this during the morning or evening hours when the sun is at an angle which casts long shadows.

Shadow illusion - Trick Photography

To make this shot happen it is better to have your camera on a stable tripod. Simply take one shot of your model standing with his / her shoes on and then another with just the shoes. It is necessary to make sure that your model keeps the shoes as stationary as possible so that both the pictures align properly when you later combine them in Photoshop.

Shadow illusion - Trick Photography

Shadow illusion - Trick Photography

In Photoshop import the two pictures as layers into one; the picture with the model in it should be your top layer and the picture with just the shoes should be beneath it. If you are not using a tripod and get slightly misaligned pictures you could use Edit > Auto Align Layers function to make Photoshop align your layers for you. Once everything is properly aligned just mask out the person from the picture and you have your very own shadow illusion photograph.

Once i posted this article, i got quite a few mails asking for exact instruction on doing it in Photoshop  So here's a step by step guide.

1. Open both images in Photoshop
2. Select the move tool ( Keyboard shortcut V )
3. Click and drag the picture with the person in it on top of the other.

Now you have both the images as layers in a single file

4. In the Layers panel, Shift + Click on both layers to select both layers.
5. Click Edit > Auto Align Layers

Now both layers are properly aligned

6. Select the top layer. Now click the Add Vector Masks button to add a layer mask to the top layer.

Add Layer Mask to the top layer

7. Press D and then X and then B and you will have the Paint brush tool selected with black as the paint colour.
8. Now paint over the model to mask her out and you are done.
9. Select both layers in the layers palette, right click > Merge Layers and you are ready to save the picture.

Here is different view, just one of few we experimented with.

Photography Trick
Photography Trick
 And here's the source files.

Photography Trick
Photography Trick

Trick Photography Long Exposure Ghost Eyes

This is another trick that could be done by using a long shutter speed. If you have an ND filter at hand and a stable tripod and cable / remote release it would be helpful, but could manage without any of these. Only real requirement is a digital camera that allows manual controls.

The subject remains still during the length of the 2 second exposure but her eyes were constantly moving from side to side. I asked her to give a slight pause at the extreme ends to get this specific effect. Else you will get even blur without the pupil registering on both sides. 

Trick photography - Long exposure - Ghost eyes

Camera: Canon 5dmkii
Lens: Canon 100mm f/2.8 L IS USM Macro
Mode: Manual
Shutter Speed: 2"
Aperture: f/11
ISO: 100
White balance: Daylight

Spooky ha. :- No Adobe Photoshop software was used!

Related Reading


Trick Photography Long Exposure Eyes Open and Closed in Same Picture

Here's one cool trick in which you see the eyes of the subject open and closed at the same time. This trick is done in camera and no Photoshop is used.

Trick Photography Long Exposure Eyes Open and Closed in Same Picture
Trick Photography - Long Exposure - Eyes Open and Closed in Same Picture

Camera: Canon 5dmkii
Lens: Canon 24-105 f/4 L IS USM
Shooting Mode: Manual
Aperture: f/11
Shutter Speed: 2"
ISO: 100
White Balance: Daylight
An ND filter, a sturdy tripod and a cable / remote release will help even though its not absolutely essential. The eyes of the subject were open during the first half of the exposure and closed for the second half.

Trick photography ideas

Another variation of the same concept this time the length of time the eyes were open was reduced  so they were open only for a split second at the start of the exposure and then the eyes were closed. You will be able to generate varying degrees of the same effect by varying the duration and also experimenting with starting the exposure with the eyes closed and then opening them.

It is important that the subject remains perfectly still during the length of the exposure.

Related Reading

How to Turn Your Google Voice Number Into Cheap Landline

A home phone that literally does not cost anything to use besides the initial cost of the OBi unit!

Important update: Although ObiTALK initially announced that Google Voice would no longer work with OBi devices after May 15, 2014, they continued to work as intended, and now OBiTALK has officially announced continued support for Google Voice.


I recently switched mobile carriers from an expensive unlimited plan to a smaller MVNO service called Ting. Since Ting charges according to usage, I have made an effort to reduce my usage. To do that I have been using my Google Voice number more frequently and have found ways to utilize it so that the majority of my texts and calls are essentially free.

Depending on the Android device GrooveIP call quality varied quite a bit - even on the same high quality WiFi network, so I decided to spend a little money and buy an OBi100 VoIP device to try it out for my home. Since Amazon has such a good return policy I figured I would try it and worse case scenario, if I didn't like it, I would just return it for my money back. That way when I know I am going to make or receive a lengthy call I can do so from home on a land-line (old-school) phone.

The OBi100 device I bought cost just under $40. You can read all about the features on the product page, so I won't go into detail here, but essentially it is a little box that can turn a regular land line phone into a full-featured VOIP phone with easy set-up for Google Voice. After initial setup making and receiving Google Voice calls is just like having a land line. There are 3 different models that can turn Google Voice into a VOIP, but for most people the basic model shown here will probably suffice.

Call quality has been excellent. I imagine this could vary depending on the quality of your internet connection and your router, but considering the overwhelming majority of positive reviews on Amazon, it seems that this little device works well for most people. The OBi comes with a pamphlet that on how to set up Google Voice, but it is really pretty intuitive and they even have a video and step-by-step tutorial if you need it.

The OBi device works great as an inexpensive landline with Google Voice. It also can send and receive faxes if hooked up to a fax machine or an older computer that has a modem in it. I have used it to send and receive faxes from my ancient Power Mac G5 and it works perfectly.
 
Support : Creating Website | Johny Template | Mas Template
Copyright © 2011. Technology Share - All Rights Reserved
Template Created by Creating Website Published by Mas Template
Proudly powered by Blogger