Latest Post :
Recent Post

HDR Photography Tips


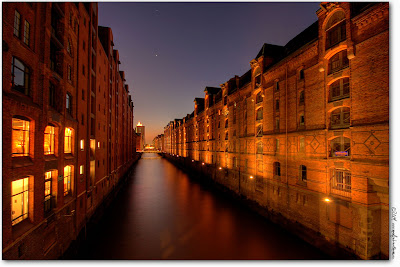
HDR is the acronym for High Dynamic Range and is the technique used by photographers to capture scenes which has extremes of contrast in them. Due to the limitations of our cameras they are not capable to capture images as our eye sees them. Our eyes have far more dynamic range than our digital cameras. HDR solves this issue by taking multiple shots of the same scene with different exposures (to capture details in both the highlights and shadows) and then combining them all together to create a single image in post processing using various image editing programs.


HDR Photography Tips
Photo By Bartku


Without HDR it is impossible to capture a wide range of contrast in a single picture. HDR images handles high contrast situations really well by revealing details in both the highlight and shadow regions, they are also good at revealing texture.

The amount of contrast in a scene (how bright the brightest areas are and how dark the darkest areas are) is the important factor that decides the number of exposures needed to create an HDR image. If there is only limited contrast in a scene it is even possible to render and HDR image out of a single RAW file. Else Depending upon the contrast level the number of exposures needed could be anywhere from 2 to as much as 9 or more. Usually 7 exposures bracketed in 1 stop increments should be enough to cover most situations.

HDR Photography Tips
Photo By Skynet_04

Equipment Requirements for HDR Photography

  1. A digital camera – either a DSLR or a point and shoot which allows you to manually set exposures or one which allows exposure compensation settings.
  2. A sturdy tripod – although it is possible to shoot handled using automatic exposure bracketing and continuous shooting mode and then auto aligning in Photoshop; using a tripod greatly helps.

HDR Photography Tips
Photo By Joshunter

Camera Settings for HDR Photography


  1. Shoot in RAW format
  2. White balance – manually set white balance or use any of the preset modes that match the scene like shade or cloudy, it is better not to use auto white balance.
  3. ISO sensitivity – set your camera to its lowest ISO settings to get clean images.
  4. Manual Mode – put your camera into fully manual mode if you are planning to manually bracket the shots.
  5. Aperture  Priority (AV) Mode– if you are planning to use Automatic exposure bracketing use this mode. When using A.E.B it is better to use continuous shooting mode so as to shoot fast.
  6. Focus – Focus in the right area and then shift to manual focus so as not to change focus between exposures.

HDR Photography Tips
Photo By Aybalaostia

Bracketing Your Shots


Bracketing is the starting point of HDR. While bracketing always remember that it is the shutterspeed that changes with every exposure and the aperture remains the same. For most situations you will need to capture the correct exposure that the camera meter calculates. Then capture exposures from -2ev to +2 ev.

So in effect you will have the dynamic range from -2ev, -1ev 0 +1 ev, +2 ev that makes it a total of 5 pictures. This should do for most scenes but if you find your particular subject or scene requires more feel free.

HDR Photography Tips
Photo By Petergorges

Post Processing – Combining your shots


For creating HDR you have many software options but the most commonly used ones and the ones that give high quality output consistently are Photomatrix and Photoshop. Let us discuss the process of creating HDR with Adobe Photoshop.

  1. Open Adobe Photoshop
  2. Click File > Automate > Merge to HDR pro
  3. Click browse and select your files. If you have put all your raw images needed to make the HDR in one folder you could simple select the folder.
  4. Click ok and wait while photoshop automatically runs the script, aligning all pictures, selecting the correctly exposed areas from each, render a final out put etc.
  5. Once photoshop is done with your pictures you will get the dialogue box where in you could control, contrast, gamma, detail and a host of other settings to create your desired image.
HDR Photography Tips
Photo By Wennekath

We will discuss about the various functions of the sliders in photomatrix and photoshop and their effect on the image in detail in another article. Remember, to do a good HDR shot you need to have good lighting to start with. Just because you know how to do HDR does not mean that you need to apply it to every image that you click. There are situations that demand HDR and situations in which using HDR actually spoils the shot. So use your judgement and be wise so as not to overdo this effect as overdoing HDR will cause the image to lose its sense of realism.

Creating Panoramic Landscapes


Many a times it so happens that you are in a beautiful location with dramatic lighting and the elements are just so perfect that you decide to capture it in your digital camera. But it is when you actually look through your camera’s viewfinder that you realize your lens can only see a small portion of the entire landscape (missing the bigger picture), resulting in an ordinary looking picture that’s nowhere near as beautiful as you had envisioned. The subject matter for a panoramic shot could be anything from a natural scene, a cityscape, or just your immediate neighborhood.

Creating Panoramic Landscapes
Photo By Sinu S Kumar

To make the viewer feel like he or she has actually been there you need to capture the entire scene. If it is not possible in one shot why not capture it in a series of shots and then use your post production software to combine them all into a single big panoramic photo. A panoramic picture is the closest you could get to re-create the experience of actually being there.

There are many types of panoramas (like virtual-reality (VR) panoramas, also referred to as immersive images, which provide a navigable 360-degree view of a scene) and many methods of creating them, also there are specialized accessories (panoramic tripod heads) for getting the job done, however we will cover those aspects in detail in future articles. In this one we will discuss the easiest way of creating panoramic images.

Tips for Shooting Panoramas


The most important point to remember while attempting to create stitched panoramas is that if you do everything right while you are actually shooting it then it could be a very easy process with little or no input from your side; else it could be a very tiresome process involving hours spent in front of the computer monitor.

Creating Panoramic Landscapes
Photo By Sylvain_latouche

Camera settings for Panoramic Photography


Select the lowest possible ISO settings that your camera allows (ISO 100 for most cameras).

Creating Panoramic Landscapes
Photo By Good_day

Either manually set your white balance (in Kelvin) or chose shade or cloudy or any other preset that better suits the scene, but do not use Auto White Balance. If you choose Auto White Balance there is a chance that your white balance settings will change when shooting different segments which will later create issues while post processing.

Select the Manual Mode in your camera and dial in your exposure settings, if you are not sure about the right settings, shift the camera to Aperture Priority (AV) mode, dial in the required aperture, half press the shutter button, note the shutterspeed values, shift back to Manual mode and dial in the values.

Creating Panoramic Landscapes
Photo By Chanc

Where do you fix your focus for a landscape photo is actually determined by the scene at hand (consider theories like the Hyper Focal Distance), if you are using Auto Focus then focus on the right area in your first segment and then shift to manual focus. Else manually focus on the desired area in the first element and leave it that way. You would want consistent focal distance across all segments in your panoramic shots.

It is recommended that you turn off the Image Stabilization feature if your lens has one, as anyways you will be using a tripod eliminating camera shake and you don’t want the IS to compensate for camera shake which is not present and thus creating its own in the process.

Shooting Panoramas


Set up your camera on a sturdy tripod, to get the full utility you must use a proper panoramic head (we will be discussing about Nodal Points and DIY panoramic heads in detail in future articles), else use a professional quality head that could hold your camera and lens steady.

Creating Panoramic Landscapes
Photo By Sinu S Kumar

Shift your camera to portrait orientation (vertical shooting position), this way your panoramic shots will have more height and also it will take more shots to cover the same scene. That leaves you enough room to crop (to remove ragged edges caused by the software while stitching the pictures) and also larger file size of the final image.

Make sure the camera is level to the horizon; else you will have trouble with shifting horizon levels making it difficult to get good seams. Also make sure that camera is not tilted up or down as this will cause convergence errors.

Creating Panoramic Landscapes
Photo By Corneveaux

Use either a cable release or a remote release to further eliminate the chances of camera shake, if you don’t have any of these, use the camera’s timer function set to its lowest value.

Overlap each segment by 1/3rd or 30% i.e. make sure that about 1/3rd of your first frame also appear in the second shot. It is very important as it helps Photoshop or any other image editing software that you use to combine the shots into panoramas to match things up.

The actual shooting process should be completed in as little time as possible (from the first segment to the last - , lighting may change, clouds may shift etc.) do watch out for any movement inside the frame. If there is a moving object like a cyclist or a car in several non overlapping frames, it will eventually appear multiple times in your stitched panorama.

Post Processing – Creating Stitched Panoramas in Photoshop


You could either open all the segments in Photoshop - then select File > Automate > Photo merge or just click File > Automate > Photo merge and select the pictures that you want to stitch together.

Creating Panoramic Landscapes
Photo By Expressmonorail

In the Photo merge dialogue box make sure Auto is selected under layout on the left side and blend images together is ticked (center – below files display) and click ok.

Photoshop will automatically compare all slices and align everything perfectly and stitch all the shots together to create a seamless panorama. Sometimes slight irregularities are found in the top and bottom portion of the images, you could either crop the image or use other tools like the clone stamp tool or patch tool to fix those errors.

In the next article we will discuss about Photography - Photography Techniques - HDR - High Dynamic Range Photography

Related Reading


High Key Photography


In the previous post, we discussed Low Key Photography where in shadows were one of the prime elements in the composition and high contrast was the name of the game. Low key photographs are often very dramatic and do convey a lot of atmosphere and tension. Now let us take a look at the alternative, or the opposite technique to low key photography.

High Key Photography
Photo By Jo_vh

High key photography has its origins rooted in the technological limitations of film and television in their earlier stages of development. Early film and television sets had trouble dealing with high contrast situations and in order to overcome this, filmmakers came up with high key lighting techniques. This later evolved into more of a stylistic choice and is extensively used mainly to suggest an upbeat mood.

Looking at a high key picture, one would immediately notice certain things;

  • The picture looks bright
  • Lack of contrast
  • Lack of shadows


High Key Photography
Photo By Russrobinson

High key pictures look bright as exposure levels are usually set to high values bordering overexposure. Low contrast is achieved by the lighting setup and shadows are either suppressed or completely eliminated by fill lights.

High key photography is most commonly used when one desires to convey a positive or upbeat tone. It is perfect for subjects such as model photography, flowers and other subjects that are relatively lighthearted, beautiful or feminine in nature. But it can also be manipulated to communicate a number of other moods, emotions and concepts such as in product photography. High key images really highlight the product being shot and thus helps grab the consumer’s attention. Psychologically products shot on white suggest high quality and an upscale nature.

High Key Lighting


When compared to low key lighting, high key lighting is a bit more complex, usually involving more studio gear and employing more number of lights than it is often used for low key work.

High Key Photography
Photo By Dragon762w

High key lighting is achieved by providing flat lighting with little or no shadows and that includes the background too. In order to make high key photographs one need to take special care of lighting the background. Exposure levels are increased taking care just not to overexpose so as to burn highlight areas. It is to be noted that flat lighting combined with high exposures tend to decrease saturation and so colors appear paler than normal.

High Key Photography
Photo By Davidclow

It is recommended to avoid deep shadows and dark tones while attempting high key photography, work with generous lighting fill in the shadows with light, making use of overall shape and contours rather than textures and fine details.

High Key Photography
Photo By Aleximages

The major advantage of high key lighting over other lighting methods is that in high key setup constant adjustments to light ratios between exposures is seldom required. And on the downside one cannot highlight certain portions of the image to draw attention to it and to add drama as in case of low key lighting setups.

Low Key Photography


Photographic lighting is broadly classified into two High Key lighting and Low Key lighting. The classification is made based on the amount of contrast in an image i.e. the difference in light levels between the shadows areas and highlights. This is achieved by varying the power of the key light and the fill light; otherwise known as the light ratio. Low key lighting has a higher lighting ratio, e.g. 8:1, than high-key lighting, which could even be 1:1.

Low Key Photography
Low Key Photography


In low key lighting setup the shape and contours of the subject appears more pronounced. Due to the presence of shadows, Low key portraits are often very dramatic and do convey a lot of atmosphere and tension.

The two lighting methods discussed above also affects the mood of the photograph. Pictures taken with high key lighting conveys a happy mood perfect for a rich and lively setting and those taken in low key lighting convey more drama and intensity perfect setting for a horror film kind of scene.

Low Key Lighting for Photography


Of the two methods discussed above low key lighting effect is the easiest to achieve. The equipments needed are also bare minimum. It could even be achieved with just one strobe or an off camera flash. It is also possible to take perfect low key images using available light, only make sure that you place your subject in such a way that the subject gets at least a couple of stops more light that its surroundings.

Low Key Photography
Photo By Sibi

The picture above was taken inside of a small coffee shop, the subject was mad to stand in front of a door leading to the inner room which was considerably darker thus making a pure black background.

One could easily master this lighting technique, only remember that your final image will consist of predominantly shadow regions and only the main subject either in full or part will be illuminated.

So the idea is to control the spread of your light source so that it only illuminates the areas you desire. That brings various photographic light modifiers like barn doors, snoots, grid spots, cutters, flags etc to use.

A point to note is that you will either need a professional studio or a considerably dark room or area to work, if you do not have access to such facilities you could just find a relatively dark space and it will suffice. Low key shots could be taken outdoors when the amount of sunlight available is relatively low, like in early morning and late evening. The larger the room the easier it will be to work, you could put some distance between the subject and your background and thus it becomes easier to light your subject without the fear of light reaching the background (light contamination).

Low Key Photography
Photo By Russrobinson

Lighting could be achieved even with a single light. What is important is the direction and strength of your light source; it is what determines the mood of the picture. You could also use a reflector or a second light source to control the amount of shadows. A second light source gives you more control over light ratios than a reflector does. Use any light modifier that suits your purpose to control the spread of light. Remember in low key lighting setup the primary element of composition is the shadows. Make sure no light is spilling especially on to the background.

Low Key Photography
Photo By Seanmolin

If you have a fairly large dark room to work with you could do without a black background, else having a black background is very convenient, especially if the level of ambient light is high and there is some light spill happening from your light sources.

Camera Settings for Low Key Lighting


To get clean noise free images and to eliminate chances of ambient light contamination set your camera to the lowest ISO setting.

It is recommended to shoot in RAW format as it gives you much more control in adjusting highlights and shadows during post processing.

Low Key Photography
Low Key Photography

If you are using ETTL or ITTL compatible lights then you could easily shift your camera to Aperture Priority (AV) mode, set the desired aperture and do a test shot, examine it in your LCD screen, check the histogram and add exposure compensation if necessary.

The other approach is to go the manual way, set the camera to manual mode, since you need no ambient light to register set your shutterspeed at your camera’s sync speed, set the desired aperture value (configure light power accordingly) and shoot.

Black and White is the most widely used mode for low key photography but when the lighting is right even color photographs could be just as effective.

Low Key Photography
Low Key Photography

Since your picture consists predominantly shadows, all the attention of the viewer is immediately directed to the portion of the frame that is illuminated. It takes good knowledge of light, shadows and tones and skill to control shadow detail to make a good low key photograph. Do experiment with your lighting (strength, direction and light ratios) and subject placement till you get the shadows to fall exactly where you want them.

Photography Zoom Effect


Zoom effect is used in photography to add drama or tension to an image. When zoomed; the subject appears to be either moving towards or away from you.


Photography Zoom Effect
Photo By Maistora

The zoom effect is also known as Racking the Lens technique and is a fairly simple process of zooming the lens in the middle of an exposure. In order to be able to zoom the exposure times used will be longer, often a few seconds.

Although it sounds simple it actually takes some practice to master this technique. As the co-ordination between the clicking and zooming is a bit hard to master and could be perfected only with practice.

Photography Zoom Effect
Photo By Anitakhart

Photography Gear for Zoom Effect


To successfully create great zoom shots you will need a DSLR, a sturdy Tripod and a Zoom Lens.

Photography Zoom Technique


  1. Mount your camera on a tripod
  2. Set it to Shutter Priority (TV) mode and dial in a slow shutter speed.
  3. Compose your shot
  4. Focus on your subject
  5. Release the shutter and Zoom your lens


The most important factors that affect the outcome of a zoomed shot are;


  1. Intensity of Available Light in the scene
  2. Type of lens used – Focal Length and Zoom Factor.
  3. Amount of movement – either of camera or subject


Tips to get better results with Zooming


It is to be noted that once you press the shutter, the mirror goes up and you will not see anything through the cameras viewfinder.

It is easier to achieve good results with zooming effect if you keep your subject centered in your frame.

We will actually need more time than we think we do to be able to zoom during exposure. So we are talking about exposure times in the range of a second or more. In bright light conditions it would not be possible to achieve such slow shutterspeeds even with the lowest ISO settings and smallest apertures. So either make use of ND filters to cut down the amount of available light or choose a low light scene that permits slow shutter speeds.

Photography Zoom Effect
Photo By Leigheast

The zooming process should be fluid or smooth to obtain nice, smooth motion lines. Take special care to keep it at constant pace i.e. do not speed up or slow down at any point while zooming.

Zooming in at your subject and Zooming out of your subject produces very different results. So experiment with both and select the effect that better suits your subject or scene.

How fast or slow you do the zooming will also affect your final result. Images shot while zooming fast will have weaker trails while images shot with slow zooming will have much stronger trails and patterns.

During zooming, if at any point you either pause or slow down, then that area will be more strongly exposed in your shot. So generally photographers try to give more time at the beginning and end of their exposures.

Photography Zoom Effect
Photo By Chavals

You could also try panning or changing the orientation of your camera from landscape to portrait or vice versa in combination with zooming. But remember not the shake or change camera position while doing this as it will render your images blurry.

Light sources that are near and far could produce really spectacular effects when zoomed. You could also experiment by firing your flash in mid exposure so that some of your frame is in sharp focus while movement is registered all around it.

Panning


Panning is a technique used in photography to suggest motion. It makes the main subject stand out from the rest of the scene emphasizing movement.

Panning Photography Technique
Photo By Chaval Brasil


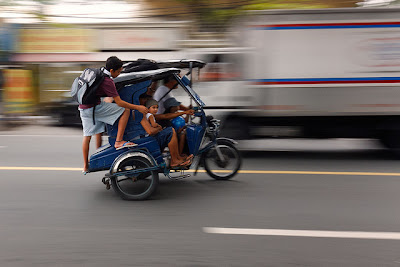
In panning the main subject will appear frozen but the background will be streaked in the opposite direction of the subject’s movement.

Panning Photography Technique
Photo By Contrasto_gp

Tips, Tricks and Techniques to Master Panning

Panning Photography Technique
Photo By Sinu S Kumar

  1. Although it is possible to take panning shots with a point and shoot it is a lot of hassle. So it is recommended that you use a DSLR to take panning shots.
  2. Set your camera to Shutter Priority Mode (TV).
  3. The shutter speed required to create the illusion of movement (amount of blur) actually depends on the speed at which the subject is moving. It is possible to successfully take panning shots of very fast moving objects with shutter speeds as high as 1/200 but for slower moving subjects you will have to use slower shutter speeds in the range of 1/60, 1/30 and even 1/15. A fast moving object such as a Motor cycle or a car on a race track could be easily shot at 1/200 while a cyclist cruising the streets could only be panned with speeds below 1/60.
  4. Keep your subject in the exact same position in your frame.
  5. Either use continuous focus (AI servo) mode or pre focus to avoid focus delays.
  6. Start tracking your subject even before it reaches your desired area to shoot and continue panning even after you have taken your shots. It helps to get into a fluid panning motion with a follow through.
  7. Once you start panning lock on to your subject by half pressing the shutter; pan along, keeping it half pressed and only triggering the shutter when it reaches the desired area, follow the subject a little more after you have taken your shots.
  8. Use the Continuous Shooting mode and take a series of shots in quick succession, that way the chances of getting a usable frame are quite high.
  9. In order to create great panning photographs, your camera should only move in the horizontal axis. Although it is quite possible to get great panning photographs hand-holding the camera; A monopod or a tripod with a swivel head would make your life a whole lot easier.
  10. If you are panning while hand-holding your camera, get into a comfortable stance; keep your feet still and only rotate your upper body to track your subject.
  11. Panning at the same speed at which your subject is travelling will ensure that the subject stays sharp.

Panning Photography Technique
Photo By Spreketek

Like any other technique panning also requires a little bit of practice before you could truly master the art. Start out with panning on faster moving subjects, as it allows the use of higher shutter speeds with which it is relatively easy to achieve acceptable results.

Panning Photography Technique
Photo By Scott Ableman

As you advance in your skills, you could try slower subjects. But remember it is a tricky thing to keep slow moving subjects in the same position of the frame for longer periods without inducing jerk. A great place to practice is somewhere along the highway where you will have endless supply of subjects to work with.

In the next article we will discuss about Photography - Photography Techniques - Zooming

Related Reading


Bokeh


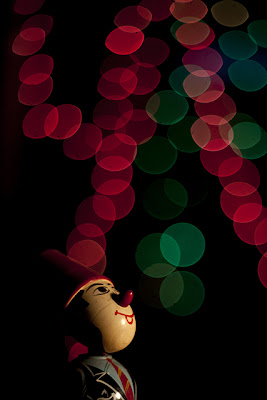
Bokeh refers to the quality of out of focus areas or how aesthetically pleasing the blur in the out of focus areas in an image are. A good bokeh is very important for large aperture lenses which are often used for shallow depth of field images. The word bokeh is derived from the Japanese word ‘boke’ meaning fuzzy.


Bokeh Photography
Bokeh Photography


It was made popular in the photography world in 1997 by Mike Johnston the editor of the Photo Techniques magazine through a series of articles which appeared in the March/April 1997 issue.

Bokeh Photography
Bokeh Photography

Although a good bokeh is important for most shots using shallow depth of field it is an extremely important factor for macro and telephoto lenses.

Bokeh Photography
Bokeh Photography

Bokeh Tips and Techniques – How to create pleasing bokeh effect.


  1. Use your fastest lens at its widest aperture. So if your fastest lens is the 50mm 1.8, that that is what we will be using for the bokeh project. It is to be noted that in order to create great bokeh you will need a lens with an aperture ≤ f/4.
  2. Set your camera to Aperture priority mode (AV) and choose the widest aperture your lens permits. Let the camera determine the correct shutter speed.
  3. You will need a shutter speed faster than 1/30 th of a second. Any slower and all your background lights will appear to be merged together. So if you find the lights too dim to get faster shutter speeds increase your ISO.
  4. If you are using a zoom lens for your bokeh set it to its longest focal length.
  5. In order to render perfect bokeh you will need small light sources in your background, street lamps, Christmas lights, traffic lights etc all work just fine. During daytime light coming through the canopy of trees also render good bokeh. Important point is many small sources of light instead of a consistently lit background as that would only create an even blur.
  6. Ideally you will want some distance between your subject and your background lights as it makes the job of creating bokeh very easier.
  7. It is recommended that you set your lens to manual focus and focus manually on your subject else use focus lock to focus on your subject and then re-compose your shot.

Bokeh Photography
Bokeh Photography

Not all lens produce good bokeh. It depends on the lens construction. Among my lenses I find that the canon 50mm 1.8, 10mm f2.8 L IS USM, and 75 – 300 f3.5 – 5.6 produce good quality bokeh. Try out all your lenses and find out which among them has the best quality bokeh effect.

Group Photography - Ideas, Tips and Techniques

Taking photos of groups of people is something that we have all done right from our school days, during excursions, family get-tog ethers etc. Most shots come out ordinary, they don’t look just as good as the ones you see made by professionals.


Group Photography
Photo By Fensterbme


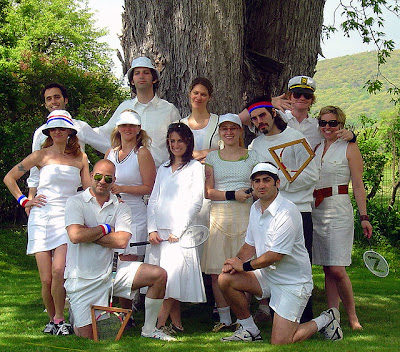
Group photography offers many challenges to the photographer. It is more of an advanced skill in photography as the complexities of every element such as lighting, posing, framing etc are all increased multi fold than when photographing individuals. In this article we will discuss some tips and tricks to improve your group photography skills.

1. Depth of Field


Depth of field is a very important element when photographing groups. You will need sufficient depth of field so as to have all your subjects within acceptable range of sharpness, meaning every single individual in the picture needs to be in focus. Often times photographs of groups where people were arranged in multiple lines come up with only faces in the front rows being in focus and the rest are all blurred. Such a thing could completely ruin the picture. Be sure to use a minimum aperture value of f/11 and to set your focus to the Hyper Focal Distance to get all your subjects sharp.

Group Photography
Photo By Teddy Rised

2. Lighting for Groups


Lighting for groups is a much more complex affair than lighting for portraits and other subjects. In group photography the key is consistent illumination. Make sure each and every one of your subjects receive the same quantity and quality of light without creating hot spots or shadows on faces. It appears simple but in reality is a much more complicated affair especially when you are photographing a group which consists of people of both light and dark skin tones. Having a thorough understanding of photographic principles like the Inverse Square Law of light will help you solve a number of lighting related issues.

Group Photography tips
Photo By Aditya Mopur

3. Posing for Group Photos


Posing a group of people for a photograph is a challenging affair, when you get someone’s expression and pose right, someone else will have it all wrong, it takes skill and a bit of patience to master the art of posing people for group photos. One thing I would recommend is to experiment with different creative ideas rather than following the tried and trusted method of making people stand in straight lines, counting to 3 and click. If for the sake of having a safety net do take one this way but then do something creative, go candid, break the rules, let your imagination run wild, go with the flow, be spontaneous and later you would be happy you did experiment.

Group Photography tips
Photo By Kenzi Punzalan

4. Clothing and Colours


When photographing groups you would not have control over what people are wearing, but you have control over where to place them in the group. Take a note of the type of dress, its colour, brightness, reflective property etc and arrange them all in a aesthetically pleasing way.

photographing groups
Photo By Hysterical Bertha

5. Choose an Interesting Background


Pay attention not only to your subjects, but to the background as well. Backgrounds are as important as your subjects, if not more. They give a mood, feel and context to your images. Changing the background could drastically change the look of the picture. So choose your backgrounds wisely, consider the occasion and choose one that complements the scene it will be much more attractive than the plain backgrounds in your studio.

group photography tutorial
Photo By Peter Davis

6. Alter your Perspective


Ever wondered why most group photos look the same. The major reason is that they were all taken by someone who was standing with a camera in hand, meaning most group pictures are taken from more or less the same height from the ground. If you wish your group photographs to stand out from the crowd try altering your perspective, shoot from down below, shoot from the high above and thus vary the angle from which you view your subject there by giving them a new perspective.

group photography tutorial
Photo By Julian Schungel

7. Shoot in Bursts


When photographing a number of people, chances are high that something or the other might go wrong, someone might have blinked, someone might have yawned, had the wrong expression, might have looked elsewhere etc. you could never tell if everything went right by looking at your camera’s LCD. The best solution to these is to put the camera in continuous shooting mode and shoot in bursts. This way even if something goes wrong in one shot, you might have it right in the next one. And with Photoshop to your aid you could easily make things right.

photographing groups
Photo By Ben Eenhoorn

Depth of Field in Portrait Photography

How to Control Depth of Field in Camera


Creative use of depth of field is one of the critical elements that could make or break a good portrait. How much of the subject or the surroundings should be in focus is determined by what the photographer aims to convey through the image. If the shot is just a picture of a person then using shallow depth of field will help blur the background and make the subject stand out; but if you are planning to do an environmental portrait then using a narrow aperture is recommended to get most of the elements in the surroundings to be in focus. A good knowledge about depth of field and how to control it to suit the various situations is very essential in portrait photography.


 Portrait Photography
Photo By Edgar Barany

Photography is also a process of elimination; many times you will find objects in your frame you wish were not there. There are many ways to get those items out of the frame; one other alternative is a controlled depth of field.

Depth of field in a shot is determined by many factors, it is to be understood that the more the crop factor of your digital camera’s sensor, the larger the depth of field. That is a point and shoot camera will have more depth of field than a DSLR with a crop sensor which in turn will have more depth of field than a DSLR with a full frame sensor. When distance from subject to the lens increases so does the depth of field and vice versa.

Depth of Field in Portrait Photography
Photo By Len Radin
.

Equipment for Portrait Photography


A DSLR and a portrait lens is the ideal equipment for portraiture. A DSLR gives you complete control over the three variables that control Exposure namely Aperture, Shutter Speed and ISO there by allowing you to control each element precisely to bring about the desired effect in your photographs.

depth of field in portraiture
Photo By Andy Leddy

By portrait lens photographers generally means lens in the focal range of 50mm to 135mm, 85mm being the most preferred focal length for portraiture. Apart from the focal length the most important requirement for a portrait lens is its widest aperture; the wider the aperture the better as it offers more scope for creatively controlling depth of field. Any lens with an aperture wider than or equal to f/2.8 is ideal for portraits of individuals.

portraiture
Photo By Martin Muller

In the earlier days of photography, prime lenses were considered the ultimate in image quality and sharpness. But now a day most major camera manufacturers have high quality zoom lenses in their lineup that could match the performance of prime lenses in the same focal length. A zoom lens enables the photographer to compose easily without physically moving around much. It also reduces the need to change lenses frequently there by making the photo taking process much more enjoyable.

Depth of Field
Photo By Andy Leddy

Having said this it is also very much possible to create great portraits using a simple point and shoot camera. Although you will not have at your disposal a lot of creative controls, you have what is required to take good pictures. The situations which calls for the advanced features of the DSLR’s and their Lenses and actually rare, most of the time you could get away with a point and shoot. However when you have limitations in terms of gear, you need to compensate for it in terms of photographic knowledge, know the elements and also know your gear, its strengths and weaknesses, then you will know how best you could use them in any given situation.

How to Control Depth of Field in Camera


The easiest method to control depth of field in a shot is to put the camera to Aperture Priority mode. In Aperture priority mode you decide the aperture value and the camera fills in the shutter speed required for the lighting conditions present.

 Portrait Photography
Photo By Kaan Kiran

It is to be noted that when photographers say wider apertures or say larger apertures they are referring to smaller f numbers like f/1.4 and f/2.8 and when they say smaller or narrower aperture they are referring to numbers like f/16 and f/22. So a larger aperture is denoted by a smaller number and a smaller aperture is denoted by a larger number. The larger the aperture (smaller f number, f/1.4, f/2.8) the shallower the depth of field and the smaller the aperture (larger f number, f/16, f/22) the greater the depth of field.

Depth of Field in Portrait Photography
Photo By Amir Kuckovic

Now that you know what is depth of field and how to set it in your camera it’s time to practice. Find a subject, put your camera to aperture priority mode and take shots with varying aperture values. Study those images in your computer and observe the difference in each shot caused by changes in aperture values. With a few more trials like this you will easily get a hang of things and will be able to guess the aperture value required when you encounter similar scenes in future.

In the next article we will discuss about Photography - Portrait Photography - Group Photography - Ideas, Tips and Techniques

Related Reading


Support : Creating Website | Johny Template | Mas Template
Copyright © 2011. Technology Share - All Rights Reserved
Template Created by Creating Website Published by Mas Template
Proudly powered by Blogger