1. Use Wide Open Apertures
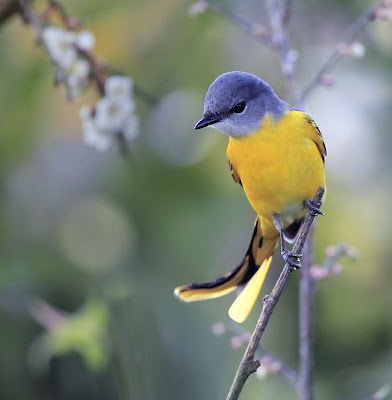
Wide open apertures (f2.8, f/4, f/5.6) on a tele lens gives very shallow depth of field which renders the background in a smooth blur thereby making the main subject pop off from the frame. This feature could be very useful when you have your subject with a cluttered background and when there are elements in the background which could distract the attention of the viewer from the main subject.
 |
| Photo By John and Fish |
2. Stop down for Landscapes and Architecture
Yes long tele lenses make great landscapes; they are capable of compressing distance thereby giving the picture a great feel. You will have to stop the lens down to get sufficient depth of field to make both objects in the foreground and background in focus. Narrow apertures often means slower shutter speeds so make use of image stabilization feature if your lens has it, even better if you have access to a monopod or tripod.
 |
| Photo By Storm Crypt |
3. Stack the Focus
Focus stacking is a common technique used in macro photography. However the same technique could also be used for photographing landscapes, it is extremely useful to get sufficient depth of field in your images especially in situations where stopping down the lens does not produce sufficient depth of field. You could focus stack your images manually using an image editing program like Adobe Photoshop or use specifically designed softwares like Combine ZM (combine zm is a free software).
4. Fill The Frame
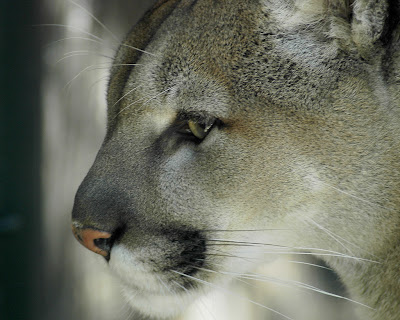
One of the major advantages of using a tele lens is the ability to fill the frame with your subject. It is extremely useful as it enables one to exclude some or most parts of the scene from one’s composition. Whether you are shooting wildlife or Landscapes the ability to control what appears in your frame is a huge advantage as you could simply avoid distracting elements and include only those which add visual beauty to your frames.
 |
| Photo By Valerie |
5. Try Macro Shots
A long lens can be used as an excellent macro lens, when choosing a tele lens look for its magnification factor, you could further increase the magnification of a tele lens by adding an extension tube (you can even stack extension tubes); you can get really good magnification from a distance from your subject. This is very convenient when shooting butterflies, dragonflies and other small insects, as you need not startle the insect by getting too close to them, the chances of you getting good pictures are increased many fold by using a tele lens.
 |
| Canon Extension Tube |
6. Panning for Action
Tele lenses are the most suitable lenses available for taking panning shots. The motion blur induced in the background by panning conveys a feeling of motion and the subject which is sharp against the blurred background simply stands out catching the viewer’s full attention. Panning is a perfect technique for both action photographers and wildlife photographers. However mastering the panning technique requires much practice, this article published earlier in our blog could help you master the technique - Panning
7. Keep Quiet to get the Best Shots
Tele lenses are primarily used for the reach they provide; especially in situations when you either can’t or could not / should not get close enough to photograph the subject with shorter focal length lenses. In case of wildlife photography tele lenses allows one to photograph the subject without having the need to physically get close, thus enabling the photographer to capture great moments without disturbing the animals. Similarly when trying to take candid photographs of people, a long lens could help you stand a long distance away from the subjects, so they won’t notice you and would not know that they are being photographed. This lets you capture great candid shots of people. However in both the situations the basic strategy to be adopted by the photographer should be to keep a low profile, do not make any quick movements or sounds that could attract attention to him and make the most of the situation.
8. Adding Teleconverters
Teleconverters help increase the effective focal length of a lens. They are commonly available in two variants 1.4x and 2x. The 1.4x converter increases the focal length by a factor of 1.4 and a 2x teleconverter actually doubles the lens focal length. Although the added reach of the lens is a good thing to have, it actually comes at a price a 1.4x converter reduces light by 1 full stop (50%) and a 2x teleconverter reduces light by 2 full stops (75%) thereby making the lens slower. Also the presence of added elements affects the picture quality; as a result teleconverters are generally only used in fixed tele photo (prime) lenses which have excellent picture quality.
 |
| Canon Teleconverters 1.4x III and 2x III |
9. Stacking Teleconverters
If the subject you are photographing is very co-operative and sits still long enough for you to set up your shot using a tripod then you could consider further extending the reach of your tele lens by stacking teleconverters. It should be noted that image quality will be dependent on the quality of the primary lens and also of the quality of the teleconverters used. A 300mm f/2.8 lens when used along with 1.4x and 2x teleconverters stacked becomes a 840mm f/8 lens. It should be noted that if the lens is mounted on a crop sensor camera you should further add a 1.3x or 1.6x magnification factor to the equation depending on the make of your digital camera. The lens will not only be much slower but also much more susceptible to camera shake. In such situations it is recommended to set up your tripod on a stable ground, tighten up all controls, remove or tie up camera strap so as not to catch wind, use mirror lock-up feature, use remote/cable release, and place a bean bag over the lens for added stability. Also depending on how well your camera handles image noise, slightly bump up the ISO for increased shutter speeds.
10. Deciding whether to use IS.
Image stabilization is a great feature to have in a tele photo lens, depending on the technology used image stabilization could add up to 4 stops of stabilization. Some advanced lenses have image stabilization feature that could detect panning motion and automatically switch off image stabilization in that direction. Also some advanced lenses could detect when the camera is set-up on a tripod and adjust settings to suit such conditions, however if your lens is one with only basic image stabilization it is recommended to use it while hand holding the camera and to turn it off when mounting the camera on a tripod as the lens will try to compensate for shake that is not actually present and thus induce shake of its own.
 |
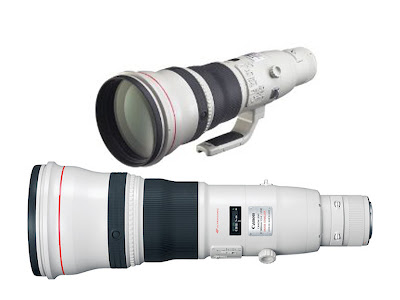
| Canon tele lens |
11. Long lenses and Your Car
Cars and long tele lenses make excellent pairs, as cars and other vehicles could make excellent hides, birds and other animals are easily scared at the sight of an approaching human, but they are much more tolerant to passing vehicles, as they see these all the time and usually ignore them. So it is a good strategy to use your car as a hide, get as close as possible and use your tele lens from within the car to take your shots, you will not only get good shots, but you will be safe as well. But it is a tricky affair shooting with a tele lens from a vehicle, the following tips would help you master it.
- A running car engine could introduce shake so turn off your car engine.
- It is my personal observation that unlike birds and other small animals, large mammals like elephants, gaur, bear etc are more comfortable if they hear the engine running and gets alert the moment they sense that the vehicle engine has stopped running and immediately stop whatever it is that they are doing and will stay tense and alert till they hear the car drive away. In such situations, it is best to keep the engine running and do not use the car body to rest the camera instead handhold it.
- Air dispersed by passing vehicles could induce shake, so park your vehicle as far off the road as possible.
- If you have a bean bag or a pillow (even neck support attachment for the seat or a thick towel would do) drape it over your window and rest the lens on it. A hand draped over the top of the lens will help further reduce camera shake.
- If you regularly shoot from your car it is recommended to buy a window mount, they are available from several manufacturers and accept any standard tripod head.
- Some photographers set up the tripod inside of the car with its legs extended at unusual angles and wedged between various parts, however I personally do not recommend this method.
- One final method is to make use of the cars sunroof (if your car has one large enough) you can stand inside the vehicle; place the camera on a bean bag or a platform with a tripod head and shoot comfortably, however for wildlife photography it is a much more threatening posture than shooting through your window.
Post a Comment