A simple yet elegant softbox made of a plastic Muram (18 inch Square). Smaller and larger versions of Murams are also available.
 |
| DIY Homemade Softbox |
Muram is basically a sieve to clean grains and cereals like wheat, rice, barley etc (separating the grain from the husk). It is also useful for drying various items in sunlight like dry chillies and coriander for powdering, dry mango and other delicious items.
Muram has been in use in kerala for many years it is found in various shapes and sizes and in different names across India. For example a slightly different version of Muram is called “gholna” in Marathi. Traditionally Muram was made of reed but now a day’s its available mostly in plastic.
Supplies for Softbox Project
- Muram 1 (19 inch Square)
- Aluminium Sheet (1 square feet)
- Aluminium Piece 1 inch wide
- Aluminium Foil
- Butter Paper
- Rivets / Screws / Nuts & Bolts
- Adhesive
Tools Required for the Softbox Project
Steel Scale, Metal Cutting Scissors, Permanent Marker, Rivet Gun, Combination Plier
 |
| DIY Homemade Softbox |
First step in converting a kitchen appliance into professional looking photographic equipment is to lose it’s tell tale features. In our case the edge of the muram; the edge makes it easily identifiable as a muram so even though our project could do with the edge, for sake of aesthetics we decided to trim it.
 |
| DIY Homemade Softbox |
 |
| DIY Homemade Softbox |
A quick work with a sand paper folded onto a piece of wood makes the edges look neat.
 |
| DIY Homemade Softbox |
Note that we have marked and made a hole in the center of our to be softbox. Next we will fix black color matt finish rexin (commonly used for automobile seats) to the rear portion of our homemade softbox. Take care to fix it without any wrinkles.
 |
| DIY Homemade Softbox |
 |
| DIY Homemade Softbox |
Quick tip :- Before attaching rexin on to the surface, heat it gently using a hair drier. Treating it so makes it very flexible and thereby making your job (attaching it without wrinkles) much easier.
 |
| DIY Homemade Softbox |
 |
| DIY Homemade Softbox |
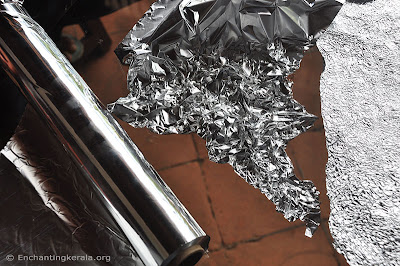
Next step is to prepare the inside of our homemade softbox. We are using aluminium foil to prepare our reflective surface. The foil is first folded and then straightened to make it act as many small reflectors instead of one big one there by creating softer light.
 |
| DIY Homemade Softbox |
 |
| DIY Homemade Softbox |
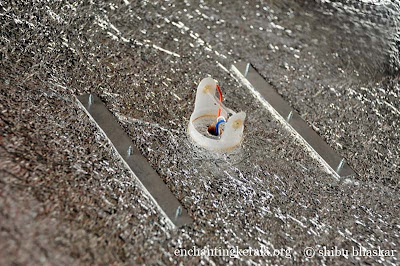
One big hurdle of working with such shallow softbox is to attain an even distribution of light without any hotspots. The base of our softbox only has a depth of 3.5 inches and so conventional methods of reflecting light using primary reflectors are not very practical. So as we have done earlier in our diy beauty dish project we pried open the discharge tube from our speed light there by creating an omnidirectional light source for our softbox.
Before attempting it make sure that you have properly discharged the flash unit. It has high voltages and could be hazardous. The main thing to remember is that the capacitors of flash units holds charge even though it has not been used for some time. So properly discharge the flash before removing the discharge tube.
 |
| DIY Homemade Softbox |
 |
| DIY Homemade Softbox |
The holder for our discharge tube is made out of a 35mm film can. Once you attach the discharge tube to the holder, make sure you insulate both the soldering ends properly. You may use epoxy, hot glue or even plastic sleeves for this purpose.
 |
| DIY Homemade Softbox |
 |
| DIY Homemade Softbox |
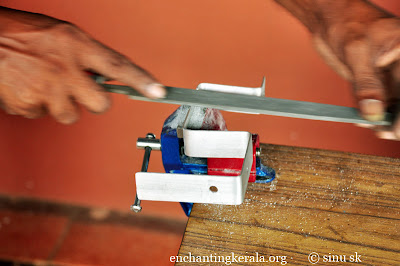
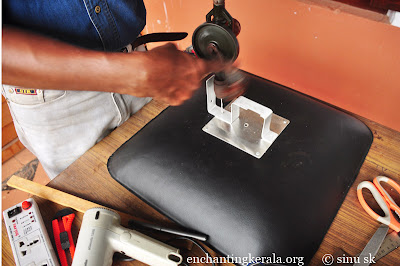
Our diy home-made softbox is now almost ready and next we need to make a handle to hold the flash unit to the softbox and also to attach the softbox to its stand / tripod. We made our using aluminium plate of 1 inch width. As aluminium is a very malleable metal you could easily bend it using a combination pliers. Drill holes for all attachments before actually bending the plate.
 |
| DIY Homemade Softbox |
We cut out a 5 inch square from the aluminium sheet and attached the holder to it using steel screws. You could see two half inch wide aluminium plates on to which the whole thing is screwed in previous pictures showing the inside of the softbox.
 |
DIY Homemade Softbox
|
 |
| DIY Homemade Softbox |
The final stage of our diy home-made softbox project is adding the diffusion panel to the front of the softbox. We used butter paper for our diffusion panel. You may also use satin or polyester cloth instead. You may control the amount of diffusion by either increasing or decreasing the number of layers of your diffusion panel.
 |
| DIY Homemade Softbox |
Here is our diy home-made softbox ready for action and given below are some sample images shot using it.
 |
| DIY Homemade Softbox |
.
 |
| DIY Homemade Softbox |
In the next article we will discuss about Photography - DIY -
DIY Soft boxRelated Reading


Post a Comment