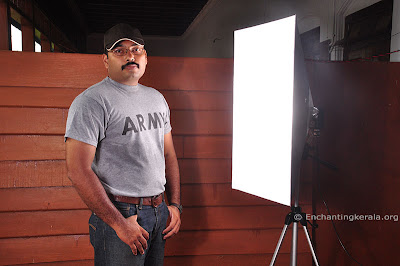
A softbox is a light modifier used in photography to achieve a softer feel with reduced shadow definition. It achieves the result by softening or diffusing the light coming through it either by directing light through some diffusing material or by bouncing it off a primary reflector to a secondary reflector which in turn redirects the light to illuminate the subject.
 |
| DIY Softbox |
To put it simply a softbox is a box with a light source at the rear and a diffusion material at the front. A softbox could use either a flash or a strobe or even any continuous lighting device as the light source. In this project we are building a softbox which is effective in use, economic to build and professional in looks.
Supplies required for Softbox Project
- Corrugated Plastic Sheet
- Aluminium Sheet
- Aluminium Piece 1 inch wide
- Aluminium Foil
- Butter Paper
- Rivets / Screws / Nuts & Bolts
- Adhesive
Tools Required for the Softbox Project
Steel Scale, Paper Cutter, Permanent Marker, Scissors, Rivet Gun, Combination Pliers
The dimensions of our diy softbox are 20 inches in width, 30 inches in height and 15 inches in depth. As I am afraid of math instead of doing all the calculations, I cut out dimensions on paper and made adjustments till it met my requirements.
 |
| DIY Softbox |
 |
| DIY Softbox |
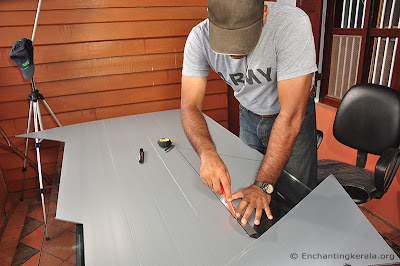
Corrugated plastic sheets are mainly used for advertising boards and are available in most hardware stores. It is available in different colours. I would have preferred a black sheet but it was not available so got grey instead. The sheet we got was 6 feet by 4 feet and cost us Rs. 140/- (approx $3).
 |
| DIY Softbox |
 |
| DIY Softbox |
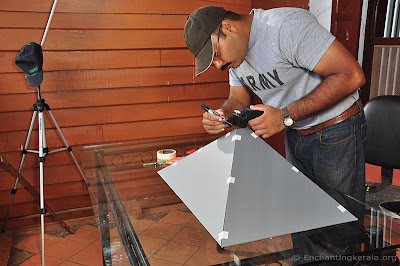
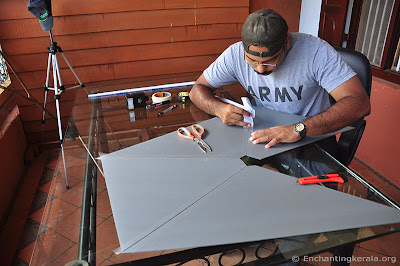
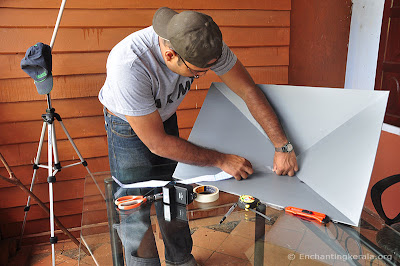
Once I finished cutting all four sides of the softbox I joined them using pieces of masking tape to check the shape, make sure everything was in order and to cut the hole in the rear to house my flash. The reason I used masking tape was because I did not want the adhesive to be left behind on the sheets once I remove it.
 |
| DIY Softbox |
 |
| DIY Softbox |
Now that we are sure that everything is just as we want, we will do the actual joining. I used pressure sensitive lamination sheet to join the sides. It has many advantages, it is strong, it has more adhesive strength and it has matt finish. I first did the outside and then the inside. If you have a hair drier you could gently apply some hot air so that the lamination sheet sticks perfectly. Remember to leave a gap of 3 to 5 mm between the sheets on all four sides to enable the pieces to bend. First finish all four sides on the outside so that you now have your pyramid shape, then apply tape on the inside so it becomes strong and would hold the angle.
 |
| DIY Softbox |
 |
| DIY Softbox |
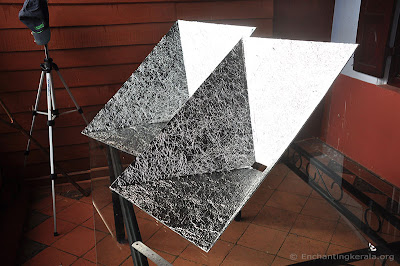
Next we need to line the inside of our softbox with aluminium foil in order to get a reflective surface. To maximize the reflection we first folded the foil paper so that it has many wrinkles in it and then straightened it and glued it to all four sides on the inside. Aluminium foil cost us Rs 80/- (approx $1.50).
 |
| DIY Softbox |
Now that the inside of our softbox is ready; it is time to think of attaching the flash to its rear and also about attaching the softbox to its stand / tripod.
 |
| DIY Softbox |
 |
| DIY Softbox |
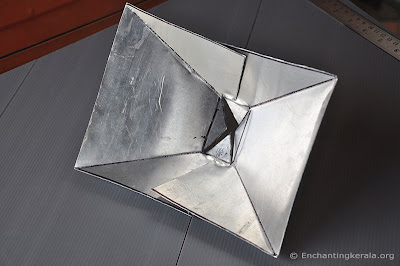
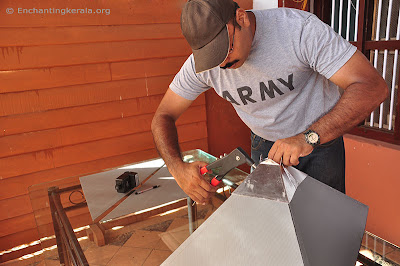
First I cut out the different shapes on paper and through trial and error reached this design. It is cut out from an aluminium sheet and the measurements are 11 inches by 9.5 inches. Cut through the red lines and fold it to get the shape.
 |
| DIY Softbox |
 |
| DIY Softbox |
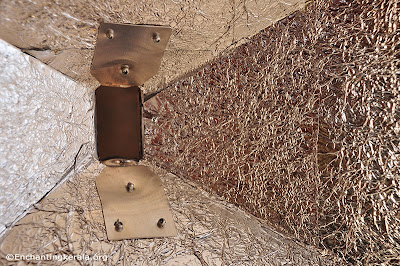
Now we need to attach our aluminium structure to our softbox. I placed small aluminium piece on the inside and riveted the shape. Before riveting, I also applied some glue to the inside of the aluminium structure for added strength.
 |
| DIY Softbox |
 |
| DIY Softbox |
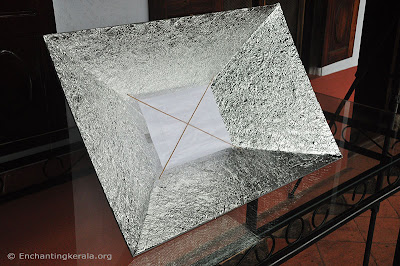
Next I did some testing and found out that my softbox needed a primary diffusion panel in addition to the front diffusion panel to ensure even spread of light from the flash. I am using butter paper / tracing sheet as material for diffusion as that paper produces pure white light and does not make a yellow shade when light passes through it.
What you see is two sticks crossed on to which butter paper is attached. The frame is intended to keep the primary diffuser in shape; you may as well use aluminium rods or anything for the purpose or even do away with the sticks and just paste the paper on to the surface. But in my trials I achieved the best result when the centre portion had more diffusion material (2 layers) then intermediate portion a bit less diffusion (1 layer) and when the edges were left blank (no primary diffusion).
Remember the distance and size of the primary reflector is very important so experiment with both to find the best solution. The one I used is 8 inches in width and 10 inches in height placed about one third distance from the rear of the softbox.
 |
| DIY Softbox |
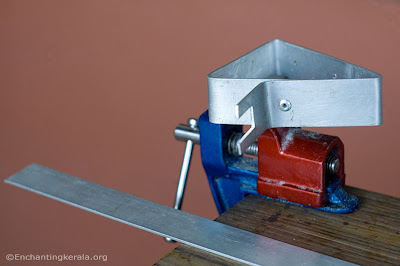
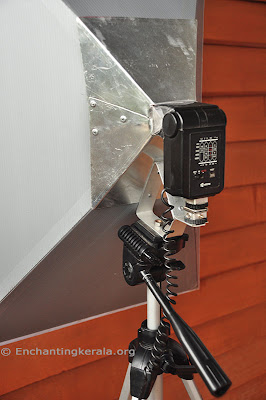
Now we need a clamp to hold the flash unit in place and to attach our softbox to its stand or a tripod. I used 1 inch wide aluminium piece. The piece was bent to shape using a combination pliers.
 |
| DIY Softbox |
 |
| DIY Softbox |
I fixed the front diffusion panel (butter paper). It is kept in shape by a strip of lamination tape. And here is our finished softbox with all elements in place and ready for action.
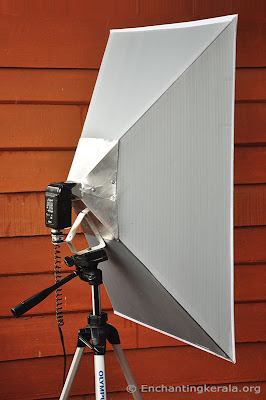 |
| DIY Softbox |
 |
| DIY Softbox |
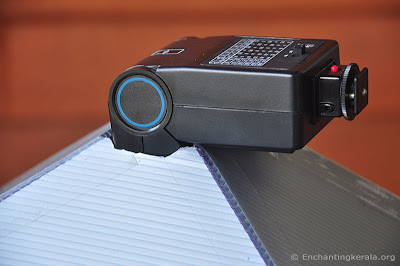
A closer look at our diy softbox. You could see the shape of the clamp, the flash unit attached and its head is also kept in place using some lamination sheet. Lamination sheet does not leave glue behind when you remove it and also has more strength and adhesive power than other tapes.
 |
| DIY Softbox |
And finally a test shot using our diy softbox.


Post a Comment