 |
| Insomnia – Trick Photography |
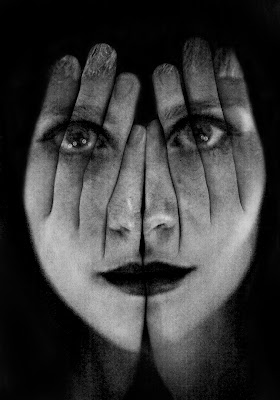
How to get this kind of shot.
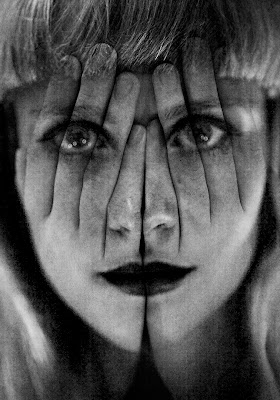
Insomnia is a Photoshop work where you first take a picture of your subject’s face, and then another one with the subject covering his/her face with hands. Later you include both the pictures as layers in a single document in Photoshop. Picture with just the face as bottom layer, and the one with hands on top. You then change the top layers blending mode to overlay (try other blending modes too, sometimes they give better results), experiment a bit with opacity settings, try changing to black and white, adding some texture etc.
How I Did It
The pictures were shot with a Canon 5D MKII and Canon 100mm f/2.8L IS USM Macro. Set to f/2.8. ISO 800, speed 1/25.
Use a Solid Tripod
Place your camera on a tripod; it helps when aligning layers if you have not shifted much between exposures.
Use a Portrait Lens
Use a portrait lens (focal length from 85mm – 135mm). It is not mandatory but it will surely make your subject look good by not distorting perspectives.
Shoot Manual
I recommend you shoot in manual mode so that your exposure does not change between shots.
It is better if you could ask your subject to sit somewhere, and not shift too much between shots, ask to sit straight, take a picture, ask to place hands on the face gently, it is important that the hands are centered else it will look odd in the results. Now take the second picture and you are done with the shooting part. Just to be sure repeat the process once or twice more, some pictures just won’t align.
None of the above mentioned things, tripod, portrait lens, using manual mode etc are mandatory, you could easily get the shots shooting handheld in aperture priority mode, but taking the extra effort to set up and perfectly frame the shot, making sure that you use the right equipment for the job and that your subject stays still, exposures are consistent etc helps get better results. The pictures used in this article were shot in a garden restaurant; only light available was coming from a couple of candles and serial lights used for decoration. In spite of raising the ISO to 800 I was only getting speeds of 1/25. Having a tripod helped get sharp pictures without raising ISO any further.
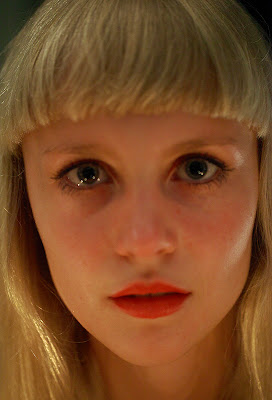
Here’s our first shot
 |
| Insomnia – Trick Photography |
And the second one with hands covering her face
 |
| Insomnia – Trick Photography |
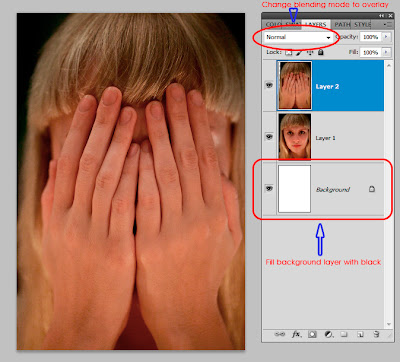
Open a document in Photoshop, add both images as different layers on to the document, the picuture with hands covering her face should be the top layer.
Click edit > auto align layers to align both layers perfectly.
 |
| Insomnia – Trick Photography |
Now that you have both images as layers, change the blending mode of the top layer to overlay, do try other blending modes too, sometimes they give better results depending on the base pictures.
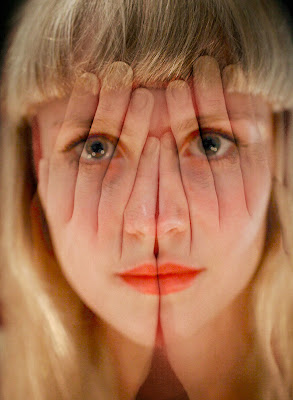
So this is how our picture now looks once I changed the blending mode to overlay and adjusted the opacity a bit.
 |
| Insomnia – Trick Photography |
Click Layer > Flatten Image to merge the layers into one.
Now we will see how the image looks in black and white.
In Photoshop, either press Alt+Shift+Ctrl+B or click image > adjustments > black and white.
 |
| Insomnia – Trick Photography |
Try adjusting the sliders or contrast settings to get the right balance between black and white areas in your picture. Now all I did was to use the eraser tool to clean up a bit and the result is the image on top of this page. You could also try to add some texture or using any other filters on the image for different effects.
Post a Comment