Latest Post :
Recent Post

Trick Photography Long Exposure Ghost Eyes

This is another trick that could be done by using a long shutter speed. If you have an ND filter at hand and a stable tripod and cable / remote release it would be helpful, but could manage without any of these. Only real requirement is a digital camera that allows manual controls.

The subject remains still during the length of the 2 second exposure but her eyes were constantly moving from side to side. I asked her to give a slight pause at the extreme ends to get this specific effect. Else you will get even blur without the pupil registering on both sides. 

Trick photography - Long exposure - Ghost eyes

Camera: Canon 5dmkii
Lens: Canon 100mm f/2.8 L IS USM Macro
Mode: Manual
Shutter Speed: 2"
Aperture: f/11
ISO: 100
White balance: Daylight

Spooky ha. :- No Adobe Photoshop software was used!

Related Reading


Trick Photography Long Exposure Eyes Open and Closed in Same Picture

Here's one cool trick in which you see the eyes of the subject open and closed at the same time. This trick is done in camera and no Photoshop is used.

Trick Photography Long Exposure Eyes Open and Closed in Same Picture
Trick Photography - Long Exposure - Eyes Open and Closed in Same Picture

Camera: Canon 5dmkii
Lens: Canon 24-105 f/4 L IS USM
Shooting Mode: Manual
Aperture: f/11
Shutter Speed: 2"
ISO: 100
White Balance: Daylight
An ND filter, a sturdy tripod and a cable / remote release will help even though its not absolutely essential. The eyes of the subject were open during the first half of the exposure and closed for the second half.

Trick photography ideas

Another variation of the same concept this time the length of time the eyes were open was reduced  so they were open only for a split second at the start of the exposure and then the eyes were closed. You will be able to generate varying degrees of the same effect by varying the duration and also experimenting with starting the exposure with the eyes closed and then opening them.

It is important that the subject remains perfectly still during the length of the exposure.

Related Reading


How to Turn Your Google Voice Number Into Cheap Landline

A home phone that literally does not cost anything to use besides the initial cost of the OBi unit!

Important update: Although ObiTALK initially announced that Google Voice would no longer work with OBi devices after May 15, 2014, they continued to work as intended, and now OBiTALK has officially announced continued support for Google Voice.


I recently switched mobile carriers from an expensive unlimited plan to a smaller MVNO service called Ting. Since Ting charges according to usage, I have made an effort to reduce my usage. To do that I have been using my Google Voice number more frequently and have found ways to utilize it so that the majority of my texts and calls are essentially free.

Depending on the Android device GrooveIP call quality varied quite a bit - even on the same high quality WiFi network, so I decided to spend a little money and buy an OBi100 VoIP device to try it out for my home. Since Amazon has such a good return policy I figured I would try it and worse case scenario, if I didn't like it, I would just return it for my money back. That way when I know I am going to make or receive a lengthy call I can do so from home on a land-line (old-school) phone.

The OBi100 device I bought cost just under $40. You can read all about the features on the product page, so I won't go into detail here, but essentially it is a little box that can turn a regular land line phone into a full-featured VOIP phone with easy set-up for Google Voice. After initial setup making and receiving Google Voice calls is just like having a land line. There are 3 different models that can turn Google Voice into a VOIP, but for most people the basic model shown here will probably suffice.

Call quality has been excellent. I imagine this could vary depending on the quality of your internet connection and your router, but considering the overwhelming majority of positive reviews on Amazon, it seems that this little device works well for most people. The OBi comes with a pamphlet that on how to set up Google Voice, but it is really pretty intuitive and they even have a video and step-by-step tutorial if you need it.

The OBi device works great as an inexpensive landline with Google Voice. It also can send and receive faxes if hooked up to a fax machine or an older computer that has a modem in it. I have used it to send and receive faxes from my ancient Power Mac G5 and it works perfectly.

Trick Photography - Levitation Photography


Levitation photography is a great photography trick. The best thing about levitation photography is that it all looks so real.

Levitation Photography

This is not exactly a photography trick but instead more of a Photoshop trick. 

Levitation Photography

Basically you take two different pictures one with the subject and one of just the background. The camera will be secured on a tripod so that the scene and the angle of view do not change.

Levitation Photography

This is the setup shot for the first picture, Yasmine is lying on a table holding on to the door handle as if she is  been blown away. We took one more picture of the empty scene (without the subject and the table) which is given below.

Levitation Photography

In this shot Yasmine is actually standing on a chair, which we had covered with black cloth to make our job easier in post production. The same shot of the empty scene given below is also used for this picture.

Levitation Photography

Shot of the scene without the subject, as the camera was on a tripod we need not worry about  the angle of view and relative subject placement and all.

Once you have the two shots which are essential, it is time to open them up in Photoshop, Put both of the images into the same document (different layers) by dragging and dropping or copying and pasting them in.
We had the image with the subject on the top layer and the one without the subject as the bottom layer. 

Now select the top layer and then erase the stool by using an eraser tool or by using a layer mask. Ta-da! The chair is gone, and it looks like your subject is floating in mid-air.

Trick Photography - Stroboscopic Photography Effect


A cool trick that you can do with an external flash is to take a long exposure shot, preferably in the dark (basically your aim is to light only the subject with the flash, there should not be anything else in the background to catch the light) and fire the flash multiple times on your subject while the exposure is taking place. You will end up with multiple instances of your subject.


Stroboscopic Photography Effect

Camera Settings

Manual Mode
Colour Space: Adobe  RGB
File Format: RAW
The exposure was  15 seconds at f/6.3 @ 100 ISO, 
White balance was set to flash 

Flash settings

Mode: Multi
No of flashes: 14
Frequency: 1Hz
Flash Power 1/8

Most modern flash units have a mode called Multi or Repeating Flash mode in which you have options to adjust variables such as the output level, how many Times it flashes, and the Frequency rate in Hertz. 

Stroboscopic Photography Effect

The same picture as above, converted to Black and White

For a detailed tutorial on how to do stroboscopic flash shots refer this post which we published earlier in our website. Stroboscopic Flash Photography .

How to Use Fewer Mobile Minutes & Texts with GrooveIP or Talkatone VOIP and Google Voice

Update 2: Third party clients (like GrooveIP and Talkatone) that use Google voice will no longer work after May 15, 2014. It is likely that Google+ Hangouts will take on Google Voice's functions, as it has with SMS. Hopefully, 3rd party applications will no longer be required to make VOIP calls through Google voice - it should be built-in to Hangouts.

Update 1: I have tried this on a few different Android devices and the call quality seems to vary greatly between devices. Some devices, even on the same high quality wireless N network, sounded so poorly it was next to impossible to cary on a conversation, while others sounded perfect. Therefore I cannot fully recommend this method to everyone. But, you should try it, and if it works for you, great! If not then stay tuned as my next post will be about how to turn your Google Voice number into a VOIP landline for cheap.  You may also try the same thing with another app, called Talkatone, which works the same as GrooveIP.


I recently switched to a no-contract mobile phone service, called Ting, that has adjustable monthly rates according to your usage so that on low-usage months I pay less. So, coming from an unlimited (expensive) plan I needed to figure out a way to use fewer minutes, texts, and data to best to keep my bills as low as possible. The following is what I discovered and can be exceedingly helpful if you typically talk on the phone in areas where there is WiFi coverage. This method can even be used to make calls on many Android tablets. In my testing so far the call quality has been excellent and once everything is set up, it is easy to use.

What will you need?
  1. Gmail account - if you are using Android I assume you already have one... if not get one.
  2. Google Voice number.
  3. Google Voice App.
  4. GrooveIP app (Android).
Get a Google Voice number
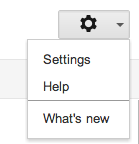
If you do not already have one, go to https://www.google.com/voice and sign up for a new Google Voice number (do not port your current number). Choose your current phone number to verify your new number (an automated system will call you and you will enter the number code provided during the sign-up process).

Once you have logged into Google Voice go to settings (the gear shaped icon as shown to the right). Then, under the "phones" tab check the boxes to "forward calls to" Google Chat and your current phone number as shown below.

Install GrooveIP & Google Voice on you Android Device

Go to the Google Play store and install GrooveIP or Talkatone - I would recommend trying out the free version first, figuring out if it works well for you, then consider buying the full version if necessary. You need this app (or a similar app) because Google Voice is not a VOIP (voice over IP) client by itself - it just forwards calls from your Google Voice number to other phone numbers or Google Chat.

Also, install the Google Voice app so you can easily listen to voicemails and text from your Google Voice number. If your mobile carrier charges for texts, you can easily decrease the amount you have to pay for by texting through the Google Voice app.

Make Sure WiFi Stays On
On your Android device go to Settings → WiFi → Menu button → Advanced → Keep WiFi on during sleep → Always. This will likely decrease battery life somewhat, but will ensure that whenever you are within WiFi coverage calls to your Google Voice number will be connected through GrooveIP instead of calling your mobile number and using minutes.

Tell all your contacts you switched your number
Give them your new Google Voice number and from now on only give out your Google Voice number. You still have your old number, so do not worry, if someone calls your old number you will still receive the call, it just will be using up your minutes. Also, if you are not in a WiFi coverage area and someone calls your new Google Voice number it will get forwarded to your mobile number as well so you will not miss any calls.

Now you can make and receive calls through GrooveIP via WiFi and not use any minutes or data from your mobile plan. Use the Google Voice app for texting and if you are using a carrier that charges according to your usage, like Ting, you can save a lot of money.

If you have any more questions about using GrooveIP check out their User Guide here.
 
Support : Creating Website | Johny Template | Mas Template
Copyright © 2011. Technology Share - All Rights Reserved
Template Created by Creating Website Published by Mas Template
Proudly powered by Blogger