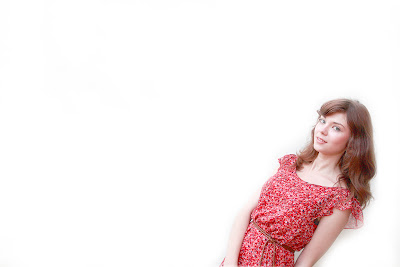
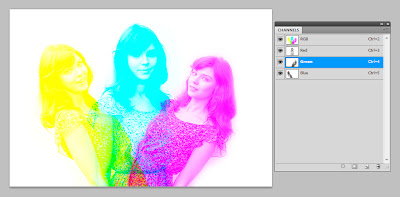
Harris Shutter Effect can be done directly in DSLRs as a camera trick, but it can also be done much easier in Photoshop. In this article we will see how to achieve it using Photoshop.
 |
| Harris Shutter Effect |
In order to to this trick you need to take three separate pictures of your subject. Make sure you have your camera mounted on a stable tripod or it is kept somewhere stable so the framing does not change from shot to shot.
Step by Step Tutorial
Step 1 :- Keep your camera somewhere stable.
Step 2 :- Take three separate shots of your subject
 |
| Harris Shutter Effect Photoshop Tutorial - Trick Photography |
 |
| Harris Shutter Effect Photoshop Tutorial - Trick Photography |
 |
| Harris Shutter Effect Photoshop Tutorial - Trick Photography |
Now that we have our three shots needed to create Harris shutter effect let us see how to combine them together in Photoshop.
Step 3 :- Open all three images in Photoshop.
Step 4 :- Create a new document with the same file sizes as the base images. for example if your three shots are of 800px by 600px @ 100 resolution; create a new file with the same dimensions. This is not essential but its a lot simpler this way.
Step 5 :- Select the first picture, Click Window > Channels to display the channels palette, click on the red palette to have it selected, Ctrl A (to select all) Ctrl C ( to copy to clipboard).
Now you have the information in the red channel from the first image copied to your clipboard. So we will now paste the same to the corresponding channel (in this case Red) of our new document.
Step 6 :- Select the new document, in the channels palette click Red, then Shift + Ctrl + V (paste in place).
So now we have successfully copied the red channel information of the first file to the red channel of our new document.
Step 7 :- Select the second picture, Click Window > Channels to display the channels palette, click on the Green palette to have it selected, Ctrl A (to select all) Ctrl C ( to copy to clipboard).
Now you have the information in the Green channel from the second image copied to your clipboard. So we will now paste the same to the corresponding channel (in this case Green) of our new document.
Step 8 :- Select the new document, in the channels palette click Green, then Shift + Ctrl + V (paste in place).
So now we have successfully copied the Red channel information of the first file and Green channel information from the second file to the corresponding channels of our new document.
Step 9 :- Select the third picture, Click Window > Channels to display the channels palette, click on the Blue palette to have it selected, Ctrl A (to select all) Ctrl C ( to copy to clipboard).
Now you have the information in the Blue channel from the third image copied to your clipboard. So we will now paste the same to the corresponding channel (in this case Blue) of our new document.
Step 10 :- Select the new document, in the channels palette click Blue, then Shift + Ctrl + V (paste in place).
So now we have successfully copied the Red channel information of the first file, Green channel information from the second file, and Blue channel information from the third file to the corresponding channels of our new document. Now crop the file if needed and you have successfully created your own Harris shutter effect.
This is how your channels palette should look like once you have finished pasting all three channels.
 |
| Harris Shutter Effect Photoshop Tutorial - Trick Photography |
One thing to keep in mind while doing the Harris shutter effect is that the photograph will render normal colours in areas that remain stationary throughout each of the three photos. So it will be fun to try this effect on scenes which have some stationary subjects and some subjects that move. Have Fun.
Post a Comment