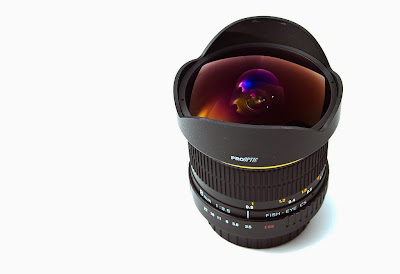
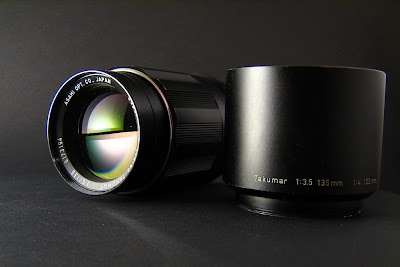
Buying lenses second hand is a great way to save money. You could get some very good glass for a fraction of the cost you would end up paying if you were buying it new. Lenses are very durable and they could last a life time if handled with care. This article will help you avoid some potential pitfalls when buying used lenses.
 |
| Photo by: Kevin O Mara |
Used lenses can be bought from a used camera dealer, a friend, family member, auction houses, and also online. In some cases it is possible to inspect and try out the lens on your camera before purchase and in some cases like online purchase it is not possible. It is highly recommended that whenever possible do try out the lens on your camera before making a purchase decision.
1. Do a Background Check on the Seller
Do a background check and find out as much about the seller as possible, cross check their reviews, statistics, ratings etc. another important thing is the return policies and what they are willing to do in the event the lens does not stand up to your expectations or if it was faulty or not of the correct specifications.
2. Be Clear on all Aspects, if you have any doubt Ask
Go through the seller’s description of the lens and if you have any questions feel free to ask. Some points that you might need to clarify are.
 |
| Photo by: Josu González |
- Reason for selling the lens. (Most people who care about their reputation will give you a honest reply).
- What is the physical condition of the lens?
- Are there scratches on the front or reverse elements?
- Has the lens been dropped or bumped and are there any nicks or dents?
- Is there fungus on any lens elements?
- Does the aperture and focus work smoothly?
- Is there oil on the aperture blades?
- Is there dust inside the lens?
- Does the lens come along with the lens hood, front and rear lens caps, user’s manual, original box etc?
- The mode of shipment and costs involved. Is it insured against damages?
How the seller responds to your queries will give you a fair idea about what could be expected from them, never buy if you feel your questions are not properly answered, and evasive unclear answers to direct questions should be reason enough to let it go.
Also if not already provided ask for photos of the lens from several angles, also close up shots of important parts. Never commit yourselves to a purchase without at least seeing a decent picture of the product.
3. Thoroughly Check the Physical Condition of the Lens
 |
| Photo by: Juehua Yin |
- When conditions permit you to inspect the lens before purchase and in case of online purchase immediately upon receiving the lens, check the lens for any physical damages like scratches, dents, nicks or cracks. Look for evidence that suggests that it has been dropped or badly bumped. Inspect how the paint is; in case of high end lenses with metal bodies even the paint won’t scratch easily. So if there are scratches on the paint then it’s a clear indicated that the lens has received some rough treatment.
- Check the filter threads. It doesn't take much for those threads to lose their usability; a small ding and you can't get a filter on, or off, your lens.
- Check the condition of the screws in the mount; if you look carefully (in some cases there might even be screw driver marks) you will know whether it has been tampered with. Check the mount for any signs of damage. Also make sure that it is the right kind of mount for your camera.
- Check the front element thoroughly in direct sunlight, move it around to observe light bouncing up and down in different angles look for scratches or damage to the lens coating.
- Take both front and rear lens caps off and look through the lens both ways. Shine a light through the lens from different angles. You should be looking for dust inside the lens, signs of fungus, presence of oil on the aperture blades etc.
- Check the zoom and focus, does it work smoothly throughout the range or is it tight or jerky. Also, make sure that it doesn't 'telescope' itself out on its own.
- Lenses that have been knocked or dropped a lot may not extend to their full range anymore. Check by twisting the zoom ring back and forth repair costs for the zoom lenses can be costly.
- Test all of the switches; If any of them are loose, ensure that they still work as they are supposed to.
- Check the electrical contacts of the lens (only applicable for newer lenses) check for any signs of wear or damages; it should fit snuggly on your camera.
- Shake the lens gently, listen for any rattling noises caused by any loose parts, this could be a clear indication that something is wrong with the lens.
4. Check the Working Condition of the Lens
 |
| Photo by: Marc Kubischta |
Now that we have finished with our visual examination and found the lens to be satisfactory in all aspects so far it is time to mount the lens on our camera and do certain tests.
- Take test shots in all aperture settings from wide open to the narrowest aperture possible with the lens; make sure aperture blades function smoothly in all cases. Another test of aperture blades could be to set the camera to either manual or aperture priority mode, set an aperture and press the depth of field preview button; this way you can examine whether the aperture mechanism is working smoothly or not.
- Take test shots with the lens in all focal lengths (for zoom lenses) take test shots with the lens fully zoomed in, with middle focus, fully zoomed out etc and check focus. It is better to take shots in little increments starting with the lens either zoomed in or out completely and going all the way to the other end. Make sure the lens focuses smoothly in all settings.
- Another test is to focus on an object at the minimum focusing distance of the lens and then trying to focus on something very far. Repeat it several times, this makes the lens to move thorough its entire zoom range; watch out for any noises or rattles or jerks.
- Another test to do is zoom out your lens completely, focus on any object, now zoom in and check focus again (zooming in or out should not alter focus) now do the opposite.
- After the aperture and focus it is time to check if the stabilizer works (if the lens you are planning to buy has image stabilization). Turn off stabilization, set the lens to its max zoom (narrowest viewing angle) and look through the lens notice how the image bumps around, now turn on image stabilization; you should be able to feel the image appearing as if its floating, rather than jerking. You could also listen for the slow hizz ( the sound produced by the image stabilization mechanism). If the stabilization feature is faulty or not working you won’t feel any noticeable difference with stabilization turned on and off.
- Examine your test images at 100%.
- Take a sheet of grid paper with you and take photos of that. Grid has lines that are all square and parallel. Open those photos in Photoshop and using guides you can tell if the lens has any distortion issues, you see that the lines curve and does not match up with the guides in Photoshop.
- Take a photo of some object with some bright patches and some detail at both the widest and the narrowest apertures. You should be shooting either in RAW or JPEG with highest resolution. Now open the pictures in your computer and look for blemishes; severe lens flare, odd flare spots, overall haze / lack of contrast / unusual softness etc. only decide to buy if the results are satisfactory according to your standards / expectations.
5. Pricing
 |
| Photo by: Zoltán Kelemen |
Once you are 100% satisfied with your tests and decide to go ahead with the purchase now it’s time to consider the right price for the lens. In this age this is very easy to do, compare prices of similar lenses (in similar condition) online; ebay and craigslist are great places to do just that and would give you an idea of what could be a fair price for the lens. Happy Buying.
Post a Comment