My Ghetto Flash Modifier
In my quest to get light onto macro subjects without carrying a lot of gear in the field or spending a bundle on a macro flash setup, I have come up with this, which I call MuzzBounce™ because I'm silly like that.
The main problem with using an ordinary on camera external flash and macros is you can't get the flash to hit the subject.The working distances with this macro lens are very close, so even if I could get the flash aimed at the subject without the lens casting a shadow (I can't: the flash doesn't point down that far) it would be way too bright at any setting.
Here is my first try at a cheap solution.
Step 1
 |
| DIY Flash Modifier |
First, I found an ordinary translucent white plastic jug. This one used to contain windshield wiper fluid.
Step 2
 |
| DIY Flash Diffuser |
I cut off the top, leaving a cylinder with a closed bottom. In the very center I placed the flash, marked the 4 corners with a pen, and cut an "X" slightly larger than the flash dimensions for an easy fit, and stuffed in the flash. The fit is firm... no wobbling. Take care when removing the flash not to break the retractable diffuser screen if your flash has one.
Step 2: Another View
 |
| DIY Flash Diffuser |
An alternate view. The plastic on the bottom of the jug is quite firm and the device fits snugly on the flash.
Step 3
 |
| DIY Flash Diffuser |
Next, I cut down the cylinder at about a 45 degree angle. The angle is important... eyeball it with it mounted on the camera. in my case, I cut it 90 degrees off axis by mistake. Luckily, my flash unit swivels horizontally, so I'll get my light from above and to the right, which might be useful sometimes. Next time I make one of these, I will cut the 45 degree angle correctly so that the light will bounce from above. (You'll understand when you see the final product picture)
Take the cut cylinder and trace around it on a piece of corrugated cardboard. Cut out the cardboard and glue some white paper on one side to make a reflective surface.
Attach the cardboard to the end of the cylinder with the paper side inside, of course. I used duct tape to preserve the ghetto appeal
 |
| DIY Flash Diffuser |
As you can see, I messed up the 45 degree cut off by a quarter turn. Fortunately my flash swivels. Rotate the cut counterclockwise (in this image) 90 degrees and you won't have to swivel the flash to aim the light on the subject.
What you end up with is a lot of relatively diffuse light very close to the front of the lens... perfect for very close focus distances.
(Oh, and sorry about the white balance on this point and shoot picture.)
How well does it work? It works very well indeed, considering the cost. The following two images are just my first tries, just to show an couple of examples, not for any attempt at art.
 |
| DIY Flash Diffuser Review |
My dog's iris with home made flash modifier.
1/80th sec f/13 ISO 100 in a darkened living room
 |
| DIY Flash Diffuser Review |
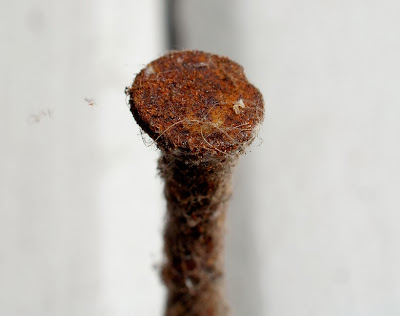
Icky nail shot with home made flash modifier. Note the lack of harsh shadows and specular highlights.
1/80th sec f/16 ISO 100 in fading afternoon light
Have you tried something similar, if not do give it a try and if yes post yours in the comments below, we would all love to see them.
Post a Comment