Latest Post :
Recent Post
Showing posts with label How To Photograph. Show all posts

How to Photograph Glass Bottles


This is one of my "How to ad" series where I pick a photograph which appeared as an advertisement and try to figure out how to light it up + post processing. I'm trying to get there as close as I can and will show you the whole process to the final image.


Is it possible to get this with a small equipment and do it like the "pros"?

Mock Up


tips for photographing glass bottles


(The original ad-image is not taken by me! It's only used to show)

Gear


- 5D II @ 1/160, ISO100
- 24-70 ƒ2,8 @ ƒ/11

Lighting Setup

Here's the lighting setup, please excuse the poor quality as it is taken with my mobile camera.

setup shot of how to photograph glass bottles

lighting setup photographing glass bottles


Key light - Quadra into Softbox, front of bottle
Rim light - D-Lite into Softbox, left of bottle

Post Processing

Here's a video of my post processing technique.


How to Photograph Wine Bottles Using Dark Field Lighting

Article by: Trevor Dennis

This was done as part of a poster project for Chris. The glass is pure dark field. The bottle is a bit of a mishmash using the dark field setup I had in place for the glass, but with a manual blend of three exposures and finally an exposure with my largest white reflector each side of the camera.


how to photograph wine bottles


I have taken to using the largest scrim I can manage behind the subject to maximize the wrap round. You can see this worked better camera right than camera left, and that's because I was holding a two meter high reflector while pressing the shutter release, and I could not reach on the left side, so had to improvise. (I was set up in the corner of our bedroom because it’s too cold to work in the garage)

Post Processing


The BG is Photoshop, as are the shadows. The texture was placed behind the glass by:

  1. Ctrl click the Glass layer to select it.
  2. Select the BG layer with texture, and press “Ctrl + j” to copy the glass shape.
  3. Move the new layer above the glass layer, and set its blend mode to Lighter Color.
  4. Ctrl click the new layer to select it.
  5. Contract and feather the selection (enough to shrink it back from the glass edges)
  6. Add a layer mask to the new layer. (I think I have that the right way round, but if not, just invert the mask – Ctrl i)
  7. I also reduced opacity a bit as you would not see the full texture behind a real glass.


BTW When you add noise to a gradient to produce texture, it lightens it. There’s no way round it if you already started with full black, so you need to use curves or levels on the texture layer. The smart way is to do it with a linked adjustment layer so you can run a gradient down the mask to control where and how much.

Lighting for the Shot


Bowens Gemini, (triggered Pocket Wizard Plus 2s), with 1.2 meter octobox, fired into 1.5 meter scrim behind subjects, with dark card between subject and scrim (dark field - as in Fil Hunter's 'Light Science & Magic' book)


Related Reading


How to Photograph the Milky Way in Ten Easy Steps

Capturing the Milky way by Sapna Reddy


how do we take pictures of the milky way


This is in response to all the questions I have been asked about how to capture Milky way.

1. Timing : June/July are the best months. Clear nights with little or no moon.

2. Location : Rural areas far from city lights.

3. Equipment : Camera with decent high ISO capability, tripod, f 2.8 wide angle lens.

4. Settings : ISO 3200 or higher, f 2.8, 25-30 seconds exposure. Run test shots and fine tune ISO and exposure.

5. Shoot in Manual mode and RAW images.

6. Exposure : Do not exceed 30 seconds for exposure. ( will generate star trails)

7. Focussing : Turn your lens to infinity, then dial back just a little bit. Lock in manual focus.

8. Noise reduction : Remember to turn on Long exposure/high ISO noise reduction in camera.

9. Composition : Try to incorporate foreground components to make the shots more interesting.

10. Postprocess using lightroom or PS. Make adjustments to exposure, color, contrast, noise reduction and lens corrections in camera RAW as needed.

Here are some shots of the milky way for your inspiration

How to Photograph the Milky Way

how to photograph the milky way with a dslr

how are pictures of the milky way taken
how do we photograph the milky way

All the best ! Happy clicking !

Related Reading


  1. How to Photograph the Milky Way
  2. Star Trails Photography Tutorial
  3. How to Photograph the Sun
  4. Night Photography Tips
  5. How to Photograph the Moon

How To Photograph Christmas Trees


Now that everyone has their Christmas trees decorated and have piled up presents underneath it, let’s see how best to capture the beauty of the Christmas tree in our photographs.


How To Photograph Christmas Trees
Photo by: Stephen Vance


Here are some tips to photograph Christmas Trees.


1. Use a Tripod


Shooting Christmas trees means shooting indoors mostly in low light situations (often times the main lighting in the room is turned off or reduced in strength to reveal the beauty of the Christmas tree and to make it stand out in the scene) using a solid tripod gives you the ability to get sharp pictures even with very slow shutter speeds.  This also helps you shoot in low ISO’s for better image quality.

2. Cable Release / Remote or Self Timer


To further improve the sharpness of our pictures we can use a cable release or camera remote to release the shutter, if you don’t have a cable release or a remote you can simply set your camera to self timer and get sharp images.

3. Use White Balance Creatively


christmas tree photography technique
Photo by: Andy Castro


You can play with white balance settings of your camera to get creative effects. Set white balance to warmer settings and give your Christmas images a Cozy feel alternatively set your white balance to cooler settings and give your Christmas images a wintery feel. Do also try shooting in black and white, Christmas images look great without all those colors detracting attention of the viewers from the subjects.

4. Shoot RAW


christmas tree photography tips
Photo by: Trey Ratcliff


The previous tip was about creative use of white balance to enhance the feel of your shots, one could either experiment while shooting or shoot in RAW and choose the settings that work best later while post processing. Shooting in RAW format also gives you more control over exposure in post processing.

5. Use Evaluative or Matrix Metering Mode


Photographing Christmas lights could prove tricky to your camera’s meter, it is better to use Evaluative or Matrix metering modes rather than spot metering mode.  If you use spot metering mode, depending upon where you get your meter readings from (it could be from a bright light source or a shadow) your exposure could be way off.

6. Meter from a Neutral Subject


While taking a meter reading it is recommended to meter off a neutral subject in the scene, and not with the camera pointed directly at a light source or a shadow area consider some area that is somewhere in between.

7. Use Your Camera’s Histogram to Correct Exposures


christmas tree bokeh
Photo by: Jack


Consult your camera’s histogram regularly to determine correct exposures, in such tricky situations your cameras metering system could fail and will give you incorrect exposures. Do not rely just the LCD display to check your exposure but use the histogram feature (use both RGB and Luminosity histograms) to make sure your exposure is correct and you are not clipping highlights or shadows.

8. Play with Depth of Field


Try experimenting with depth of field to get different effects, if you have an uninteresting background or if you wish to make your Christmas tree stand out in your picture use wide apertures (f/2.8, f/4 etc). if you wish to include the features in the background also reasonably sharp use narrow aperture (f/11, f/16 etc).


Christmas Light Photography


Shooting light sources with narrow apertures in lowlight has a very nice side effect; all the lights in your picture will look like starbursts (similar to the effect you get using a starburst filter). This could make your picture stand out from the rest, but remember shooting in low light conditions with narrow aperture will require either a very high ISO setting or very low shutter speeds or a combination of both.

9. Shutter Speeds and How it affects the lights


The shutter speed used to capture the scene also affects the way the lights are rendered in the picture. Slower shutter speeds capture movement in the lights and faster shutter speeds freeze them completely.


Christmas lights and shutter speeds


Lights appear larger and a bit blurred when shot using slower shutter speeds whereas they appear smaller (like points of light) when shot with faster shutter speeds.

10. Capture Details


how to photograph christmas tree
Photo by: Flood G


You have taken a lot of care to make sure your Christmas tree look great and have decorated it with all sorts of items carefully chosen to match the scene. Once you have captures wide shots of the Christmas tree it’s time to move in close, use a macro lens if you have one and capture details like branches, presents and lights.

11. Mind the Reflections


christmas tree photography
Photo by: Mohammadali F


When shooting up close, shiny objects could reflect the world around them and that could mean you and your camera could also get reflected. Sometimes it creates a very interesting picture and sometimes it appears as a detail which the photographer forgot to notice while photographing the object. Keep this in mind and if you choose to keep reflections it should appear intentional and make it artistic else it is better to avoid it entirely by changing shooting angles.

12. Take Christmas Portraits with Your Christmas Tree Included


christmas portraits
Photo by: Jeff Meyer


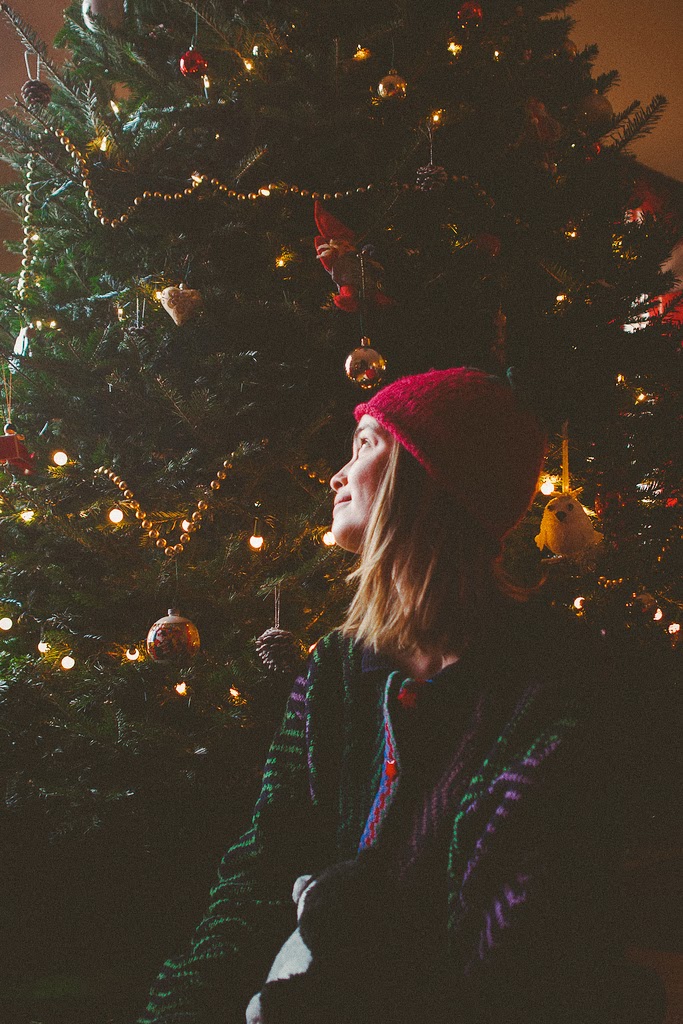
Take pictures of your friends and family and try to include your Christmas tree also in the shot, to get best results, turn on every light on the Christmas tree, adjust ambient light (light in the room) to match the brightness of the lights in the Christmas tree. It is better to keep the ambient light a bit lower than the lights on the Christmas tree to create a mood. Remember when photographing people in such conditions it is better to get shutter speeds a bit faster even if you are shooting on a tripod as chances are your subjects could move slightly and cause blur. Raising the ISO is many times the only option to get the required shutter speed.

13. Add Light to the Scene


photographing christmas trees
Photo by: Lulu Lovering


To get a sparkly feel to your Christmas pictures you will need an additional light source (other than the lights on the Christmas tree) this is even more important when shooting with narrow apertures. It could either be a continuous light source or your camera flash.

14. Using Flash to Add Light


tips for photographing christmas trees
Photo by: Jason Mrachina


When using flash to capture Christmas pictures make sure you only use it as a fill light source and never as the main light. Also never use flash front on, use it bounced off the walls or the ceiling. Control the brightness of the flash or use adequate flash exposure combination to get the balance between the ambient and the flash right. It is also advisable to set your flash to rear curtain (second curtain) sync and drag the shutter to expose the scene. If you room is lit predominantly with tungsten lights then gel your flash yellow to match the colour temperature of the room lights.

Have fun, use the tips, take lots of pictures and do share it with us in comments… Merry Christmas.

Related Reading


  1. Best Camera Settings for Photographing Christmas Lights
  2. 12 Photography Tips for Better Party Photos
  3. Shaped Bokeh Tutorial
  4. 20 Digital Photography Tips for Better Christmas Pictures
  5. How to Photograph Christmas Lights

How to Photograph Light Streaks


This post is in response to some e-mails we received lately, although the question was framed differently like:

  1. How to photograph light through trees?
  2. Light bursts coming through the trees?
  3. How to Photograph Rays of Light?
  4. How to shoot "ray of light" effectively?
  5. How can I get photos showing the "shaft of light" effect?
  6. How to take a picture with light streaks?
  7. How do people get those light streaks on their pictures?

We are sure what they all wanted to know was how to take a picture like the one given below.


lightstreaks
Photo by: Raghu Ram
Exif data of this shot:

Camera : NIKON D7000
Lens : Nikon 18-105 f/3.5-5.6G ED VR
Focal Length : 18mm
Shutter Speed : 1/320 secs
Aperture : :f/8
ISO: 800Time
Time : 08.18 AM
Location : Neyyar WIldlife Sanctuary, Kerala, India.

To capture a picture like this you need to get several things right, some that you can control (eg. Camera settings) and some that you cannot. To capture light streaks the primary requirement is a light source. It could be natural (sunlight) or artificial. Secondly you need something in between the light source and the camera to model the light (trees and branches work really well). And finally you need mist, smoke or dust in the atmosphere to reflect the light (only then will you be able to see the streaks).


photographing rays of light
Photo by: Romain Guy


The most important factor when photographing rays of light is the amount of pollution present in the air. It could be mist or fog (moisture will reflect light) smoke or dust; the type of pollution does not matter, what matters most is the amount. Too much and you will not be able to see the light rays and too little will not reflect enough light to show the rays clearly. Getting just the right amount is the key to great light streaks.

Tips for Photographing Light Streaks


1. Choose the right time of the day to shoot light streaks


Early mornings is the best time to photograph rays of light shining through the trees, second best option is late evening.

2. Hide the light source


Try to hide the light source (if it’s the sun hide it behind a tree) to avoid highlight clipping. If you include the light source in your composition, chances are more that the contrast range becomes too much for your camera sensor to handle.

3. Choose the Right Location


Light sreaks work well when shot in a high contrast location where the light is falling on to a high contrast (dark) background.

4. Metering


Metering is the trickiest part, to make matters easy use automatic exposure bracketing feature and remember not to take meter reading either directly from the light rays or from the darkest shadows, choose something in between.

5. Dealing With Lens Flare


When trying to capture rays of light, on many occasions you will be shooting directly into the light source and this could cause lens flare. While on certain occasions lens flare actually add to the aesthetic quality of the photograph on certain others it actually takes away from the picture. So be aware of possibility of lens flare. You can control lens flare to an extent by using a lens hood,  keeping  your filters and the front element of your lens clean etc.

Here are a few more for your inspiration.

How to Photograph Light Streaks
Photo by: Morbcn


tips for photographing light streaks
Photo by: ManImMac


How to Photograph Rays of Light
Photo by: Chris Smith

How to take a picture with light streaks
Photo by: mcmamauri

Light Streaks
Photo by: Daniela Hartmann

light streak photography
Photo by: Remi Lanvin

Related Reading


How to Photograph Cats - 21 Tips for Getting Great Photos of Your Favorite Pet


how to photograph cats
Photo by: Kerri Lee Smith


With the change of time a family has got reduced just one or two members; leaving no one to hug or love, to communicate or even to talk. Those who own good cats are a happy lot; these pets always walk gracefully all through the house as if kitchen or bedroom all is same to them. They rub their back to the owner’s legs as a mark of affection; jump in to the lady’s lap, play with children; occasionally catch a mouse or lizard and win accolades and what not! ward of blues from lonely hearts.

Even during night cat does not let its owner alone; the ‘cat-owner’ may be awakened hearing mew and purrrrrrrs of her pet cat who has succeeded in jumping in side her quilt! It mews to say “dear lady; you are not alone; I am around”. All these make a cat its owner’s darling. To get a good photograph of their cats is anybody’s wish; so that they can proudly present it to friends and relatives who are far away.


cat photography
Photo by: Gatto Mimmo


In spite of all these; in an attempt to photograph their favorite pet-cat many ‘masters’ have miserably failed, tried again and again, got frustrated and quit the job altogether! It always seems like the cat moves right before you snap. Cats are notoriously skittish animals and photographing them can be a real challenge. In order to capture interesting pictures of cats you need time, patience, the right technique and some creativity. In this tutorial we discuss some tips that would help capturing amazing photographs of your beloved pet.

1. Photograph Cats in Natural Light


cat photography tips
Photo by: ♥ . little . but ! loud . ♥


Using natural light over artificial ones has many advantages when it comes to photographing pets. Cats have sensitive eyes and using high powered flashes would easily annoy them. Photographing using natural light also allows the use of much higher shutter speeds required to freeze action.

2. Shoot Outdoors Preferably during Early Morning or Late Afternoon


tips for photographing cats
Photo by: Pablo Carrascosa


Take your cat outside; to a park or your backyard, during early morning and later after noon, nature yields the soft light that is ideal for capturing details. Moreover shooting outdoors allows you to observe and shoot the cat from a distance without them being aware that they are being photographed.

3. Make More Light


photography cat
Photo by: Gatto Mimmo


When shooting indoors, open the windows, remove the blinds, turn on those extra lights, if required add a few more to ensure there is enough light to achieve faster shutter speeds without having to increase you ISO beyond acceptable limits.

4. Use Long Lenses


cat photography how to
Photo by: Viola


A long focal length lens allows photographing cats in a more candid way. You could stand at a distance, observe the cat and capture great photographs without attracting its attention.

5. Shoot from your Cat’s Eye Level


cat photography ideas
Photo by: Corrado Alisonno


Shooting a cat standing will make them look very tiny and unimpressive as this is the way we always see cats. Try to capture the world from the cat’s perspective, lie down low, shoot from the cat’s eye level and let the viewers see how a cat sees the world around it.

6. Focus on the Cats Eyes

Always focus on the cat’s eyes, if the eyes are not sharp the picture is not worth as it loses all character. On the other hand, using selective focus (focusing on the eyes) and shallow depth of field, will allow you to capture your cat with only its eyes and a small part of its face in sharp focus and the rest of the body blurred could create an interesting effect.

7. Fill the Frame With Your Subject


cat photography techniques
Photo by: Doug Wheller


Majority of cat photographs we come across appear as if taken from too far away. Move in closer or zoom in to fill your frame with your cat, this will make the picture much more interesting visually.

8. Incorporate People into Your Shots

Incorporating people into your shots can vastly improve the interestingness of your cat photographs. Try to capture the interaction between the person and the cat.

9. The Treat Trick

When trying to photograph cats, bring some treats along, give some to the cat when it does something in the right direction, don’t give it all away freely as the cat might soon lose interest and decide to go its way. It’s a mental game, the trick is to let the cat know that you have the treats and behaving well is the key to get them.

10. Bring props and other accessories


cat photography tutorial
Photo by: rene de paula jr


Bring props and other accessories required for the shoot. Props could be anything from cat toys, cardboard boxes, brown paper bags, a colourful blanket or anything that the cat might be interested to play with. Also if needed use backdrops to get the perfect background that matches your cat’s colour and character.

11. Don’t Try To Pose the Cat


pet photography tips
Photo by: Barb Henry


Don’t try to intentionally pose the cat, it never works, instead watch the cat, try to lure it to do something that you want using props and treats. The cat will probably groom, stretch, yawn or even fall asleep, be alert, be ready and keep shooting; by the end of the shoot you will have many interesting shots.

12. Catch your Kitty in Action - Set up something that you know your cat can't resist


photographing cats
Photo by: Sean Molin


Unraveling toilet paper rolls, playing with empty cardboard boxes, shoes, you know what is it that your cat cannot resist, set up such accessories to lure your kitty for some cute action shots.

13. Have someone handle your cat


cats photography tips
Photo by: Jean Pierre


Having another person to handle the cat will make the job easy and let you to concentrate on the picture taking part. Supply the cat handler with cat toys, treats etc. to help them retain the attention of cats and to make them behave.

14. Know when to Quit


cat photography ideas
Photo by: Tina


Once you sense that the cat is becoming restless and increasingly un-cooperative it is time to postpone the job. Cats aren't the most co-operative subjects and it is very difficult to make them do something that they don’t wish to. Tomorrow is a whole new game; try shooting the next day.

15. Capture a smiling face - Avoid sad faces


cat photography tutorial
Photo by: Merlijn Hoek


Try to capture a smiling face, it conveys a happy feeling to the viewer, avoid photographing sad faces.

16. Try to capture the Character of the Cat, Highlight its unique features


cat photography tips
Photo by: Paolo Margari


Every cat has its own unique character, try to highlight your cat’s unique features in your photographs so as to convey a sense of character.

Cat Photography Don'ts


Now it’s time to see the things we should avoid while photographing cats.

17. Don’t start shooting immediately, take your time; give the cat a chance to get used to you and your camera, hand over some treats and only take out your camera when you know that the cat is relaxed and comfortable.

18. Don’t make them do things they hate. (putting on clothes, go places, posing etc.)

19. Don’t prolong your session, give them a break, mix play in.

20. Don’t be too strict, give them some leeway.

21. Don’t use too much flash.

In walking, looking and sitting and in every posture cats exude grace and confidence whereas a kitten is so lovely and playful that its images can steal anybody’s heart. Cats can interact with ease to the master, mistress, children or servants with ease. Capturing the image of such a pet so versatile should do justice to the pet; give no reason to explain “though photo looks like this, our cat is cuter to look at!”; let cats have their day too!

How to Photograph Textures

texture
Photo By: Evan Leeson


Texture means the feel appearance or consistency; rather all the three combined to create a real life experience. Almost everyone might have fascinatedly watched images of a fresh rose blossom with two or three dew drops resting on its petals; while those petals look simply great; those dewdrops glow like real gems. The beauty of rose petal  is in their texture; if this so called texture is that wonderful; can we too add this ‘magical ingredient’ in our images?  Oh yes; go through these tips to find out how.

Capturing texture can convey a sense of touch to a photograph. A good photograph will reveal the texture of the image in such a way that information about its surface will be fully conveyed without any loss in transmission. Information like how soft or rough to touch, glossy or matt, a sense of its dimensionality, the subject's weight and bulk, appearing fresh or worn out, young or aged etc. In a sense the whole concepts regarding beauty or ugliness are contained in texture; telling to the viewer most part of your story in a single feature.

texture on sand
Photo By: Edgar Barany


The trick to capture texture effectively in a photograph is to accentuate any surface undulations or lack of them. There are four major factors that reveal texture; details, patterns, color and depth; all contributing equally making your image rather sensual.

Finding Interesting Textures


Texture can be found on all objects if you look closely. Everything from a simple brick wall, surfaces of fruits and vegetables, grass in your backyard, rocks or even the wrinkled face of an aged person has lots of captivating textures. 

texture on the face of an old woman


The hard part is not in finding interesting textures, but catching the eyeballs of the viewer and getting them stuck to your image. Once you take it seriously and start looking for patterns and details and textures, you will get better at it; and will see many textures which you haven't noticed before and very soon will start recognizing great textures at the first sight.

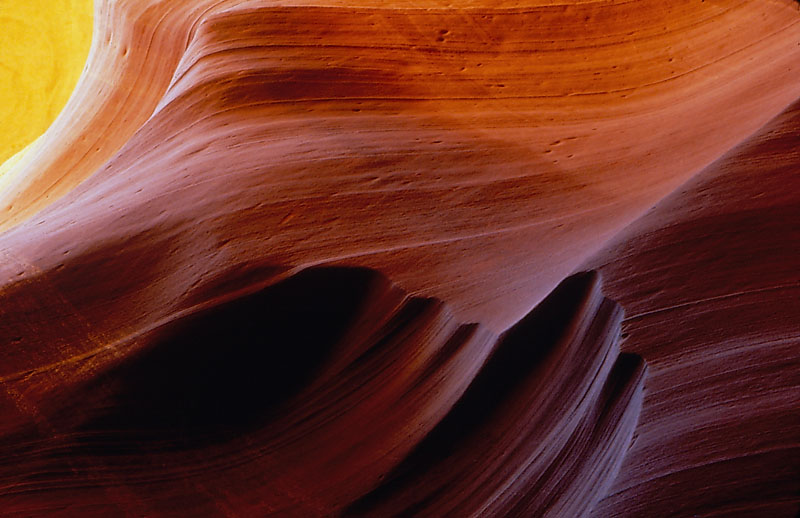
By moving in closer using a macro lens you will find that surfaces are like the moon; not as smooth as they appeared from a distance; think of a close-up of our dear moon with full of pimples! One way to photograph texture is to create abstract images by concentrating alone the texture completely eliminating clues about shape and form.

Tips for Photographing Textures


Capture Depth and Details


how to photograph texture
Photo By Melanie


Enough sharpness and depth of field is a must for capturing texture at its best. Blur and texture do not go well together; make your photos real sharp, devoid of camera and subject blur and also make sure it has enough depth of field to have most of the frame in acceptable focus.

Angle of View


metal texture
Photo By: Romany WG


Align your subject and camera so that the subject is parallel to the sensor and make sure that most of the texture falls on the plane of focus. This serves two purposes one is that it ensures maximum use of depth of field and secondly it renders undistorted texture.

Avoid Low light Conditions to Shoot Texture


Textures are better revealed in bright light; it also makes colors more vibrant and renders crisp images. On the other hand photographs taken in low light situations show subdued colors and blur making them uninteresting.

Turn off Your On Camera Flash


cloth texture
Photo By: Daniel Kulinski


The worst thing to do when trying to photograph textures is to turn on your on camera flash, light from the on camera flash is very harsh and it also comes at the same angle as that of the lens and this will render the image flat and devoid of colors.

Perfect Lighting to Shoot Textures


texture flower
Photo By: Nicole


The flattering, soft light used for photographing people is not appropriate for photographing texture. To maximize the visibility of texture, light needs to cast shadows into the furrows and dips in the surface, and highlights on the ridges so the light source should be direct, not diffused.

When the surface is reasonably flat, the light rays just need to rake across the surface at an acute angle. In any case side lighting the subject is the best method to capture texture.

Mix and match


Textures of the same color and pattern can sometimes be boring. Try to mix your texture with either matching or contrasting colors and patterns.

Watch out for Lens Distortion


Wide angle lenses are prone to distortion, especially barrel distortion; it may create an effect that works well for certain themes, but seldom with textures. Avoid distortions whenever possible; do it by either zooming in or using a longer focal length lens.

Shadows, Glare, and Reflection; a No No;


Textures look great when they are evenly lit across the frame, avoid any kind of shadows across the surface. Using a diffuser in between the subject and the light source could work well to achieve this. The other guys are glare and reflection; a lens-hood will manage the former. The second one- reflection- can be managed by a polarizing filter or by changing the angle of the camera or position of the subject in relation to the light.

Work with Contrast


leaf texture
Photo By: Evan Leeson


Contrast both tonal and color works well for texture photography, it helps reveal the details in texture even more.

Composition Tips


texture rock
Photo By QQ Li


Textures can be composed in many ways first and the most commonly used method is to move in close to magnify the surface irregularities of the object. Second method is to capture texture on a grand scale when it is part of a broader scene, as with the rippling surface of sand at a beach, it's often better to back off and show the expanse of the subject.

 Like patterns, many texture photos work well when they appear to extend beyond the frame of the picture. Always remember to keep the composition simple by excluding anything that may break the pattern or spoil the rhythm. Have a good day!
 
Support : Creating Website | Johny Template | Mas Template
Copyright © 2011. Technology Share - All Rights Reserved
Template Created by Creating Website Published by Mas Template
Proudly powered by Blogger