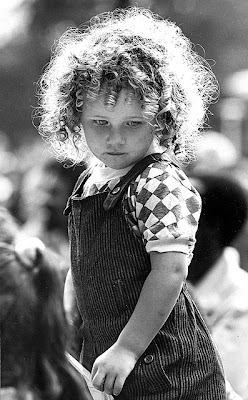
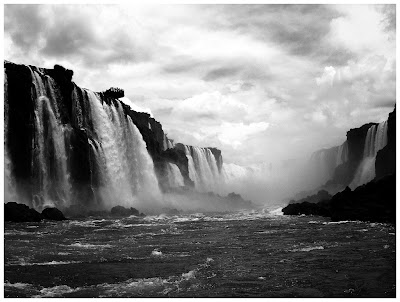
Why shoot in Black and White when you have the capability to record the entire colour spectrum? This is the first question that comes to the mind of most beginner photographers when they hear someone talking about shooting in Black and White.
In the earlier days of photography, cameras could only capture images in black and white. The ability to record colour came much later. With the advent of colour photography, many people actually look down on black and white imagery as being second grade. But it is not so, depending upon the subject, lighting and the photographic technique used, a good black and white picture could look even more stunning than its colour equivalent. They give images a timeless feel, simplicity that helps focus the viewers’ attention straight towards the subject; they also tend to have a romantic feel with a lot of emotion s being conveyed to the viewer. Not convinced yet, try changing your seemingly unattractive colour shots to black and white and watch magic happening.
Here are a few Tips to get you started with Black and White Photography
In order to make a black and white image, you have the option to either shoot in colour or black and white, when you use the first method you actually shoot in colour and later turn the image into black and white in post production. In the second method you set your camera to shoot in black and white and produce black and white images straight out of the camera. I recommend the first method that is to shoot in colour; don’t ask why just go through the next tip to find out.
In the earlier days of photography, cameras could only capture images in black and white. The ability to record colour came much later. With the advent of colour photography, many people actually look down on black and white imagery as being second grade. But it is not so, depending upon the subject, lighting and the photographic technique used, a good black and white picture could look even more stunning than its colour equivalent. They give images a timeless feel, simplicity that helps focus the viewers’ attention straight towards the subject; they also tend to have a romantic feel with a lot of emotion s being conveyed to the viewer. Not convinced yet, try changing your seemingly unattractive colour shots to black and white and watch magic happening.
Here are a few Tips to get you started with Black and White Photography
1. Shoot in Colour
In order to make a black and white image, you have the option to either shoot in colour or black and white, when you use the first method you actually shoot in colour and later turn the image into black and white in post production. In the second method you set your camera to shoot in black and white and produce black and white images straight out of the camera. I recommend the first method that is to shoot in colour; don’t ask why just go through the next tip to find out.
 |
| Photo By Emanuele Tagliaferri |
2. Difference between a Colour Image and a Black and White Image
The digital image sensor in your camera is made up of trillions of pixels which are sensitive to the three main components of light Red, Green and Blue. Each pixel in the sensor records the intensities of these three in a scale of 000 – 255. 000 represents pure black and 255 represents pure white. Depending upon the values of each, the image processor interprets the final colour as a combination (mix) of the three in the respective ratio.
For example colour values of Red 100, Green 100 and Blue 200 produces the colour shown here
 |
| Red 100, Green 100 and Blue 200 |
If all three values were 000 - Red 000, Green 000 and Blue 000 it would have been pure black
 |
| Black |
And if all three values were 255 - Red 255, Green 255, Blue 255 it would have been pure white
 |
| White |
So with three colours and 256 values of each there is more than 16 million colour values per pixel (256 x 256 x 256 = 16,777,216). Multiply that number by the number of pixels in your digital camera sensor and you will get a fair idea of what constitutes the 16 or 21 or so mega bytes of data in a picture file.
Let’s just see what happens when we set the camera to capture images in black and white.
When shooting in black and white the digital camera instructs each pixel to discard values for colour and just record light intensity at each pixel on the 000 – 255 scale. Where 000 represents pure black, 255 represents pure white and all values in between are interpreted as grey. You could just imagine how much less data the image file has.
3. Shoot in RAW
Always shoot in RAW you will have much more control when doing your post processing and when it comes to black and white photography there is one hidden benefit. When the file format used is RAW, even though you see the image in the LCD as black and white, the camera actually captures all information including colour (that’s right) so if at any later stage you wish you had the colour file as well, well……
 |
| Photo By Funky 64 |
4. Use Low ISO
Noise is even bigger a problem for black and white photography than it is for colour photography. When an image is converted to black and white any noise it contains is amplified and shows more. So use the lowest ISO setting possible so as to get clean images with as little noise as possible. I admit that modern DSLR cameras do a very good job at reducing noise, but when you can capture the scene in low ISO then why take chances.
 |
| Photo By Sylvain Latouche |
5. Use Contrast
When doing black and white photography you do not have the option of using colour to illustrate the tonal differences in the various parts of your image, so the technique is to use contrast instead. With the right kind of lighting you will be able to control the shadows and highlights thus bringing about details in your image which were otherwise unnoticeable.
 |
| Photo By Rcvnl |
6. What to Shoot?
There are many subjects which suits the black and white format well including Portraits, Landscapes, Architecture, Patterns, Textures etc.
 |
| Photo By Mrpunto |
7. Situations when Black and White works better than Colour
Try shooting in black and white when you have an overcast day with not much detail in the sky to record. Such sky will be rendered unattractive in a colour photograph but will not be that noticeable in black and white and will actually help to focus the viewer’s attention on to the main subject.
 |
| Photo By Saad Akhtar |
Similarly black and white is more suited to enhance the shape and form of your subject. Compose your image so as to emphasize its shape and without the distraction of colour it will get the full attention of the viewer. Same is the case for patterns, textures, lines, shadows etc; with no colour to distract these elements assume a whole lot more significance in the picture. So when you confront a scene with strong shapes, shadows, lines, patterns, textures etc try black and white.
8. Use a Polarizing Filter
A polarizing filter is very helpful to reduce the reflections of sunlight from the surface of water, leaves or other shiny surfaces. Such reflections are more problematic in black and white photography as when the colour is removed from the picture these reflections become much more distracting, trying to grab the viewer’s attention from the main subject.
 |
| Photo By Schoeband |
9. Shoot Long Exposures in Black and White
If you have not tried it yet, now is a good time to do it, yes long exposure shots look s great in black and white, waterfalls, the pier, the movement of clouds etc all are probable candidates for a terrific long exposure shot.
 |
| Photo By Stewartayrey |
10. Shoot Black and White HDR’s
You could create wonderful HDR pictures in black and white, with the increased dynamic range bringing out details in each portion it will make for a fantastic picture. You actually need to see the results to believe the potential of black and white HDR.
 |
| Photo By Matthew Paulson |
Post a Comment