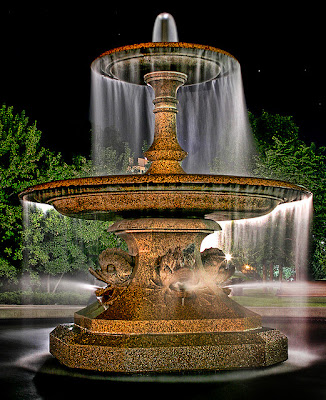
1. Shoot in RAW
Shooting in RAW gives you much control over white balance settings when post processing your images. Also you have more leverage when trying to enhance details in the shadow areas.
 |
| Photo By Jeff |
2. Use the lowest ISO setting on your camera
The lowest ISO setting is where the camera produces its finest results with minimum amount of noise, which is especially critical in the case of night photography. So stick to the lowest ISO setting that your camera has.
 |
| Photo By Joe Penniston |
3. Use the Daylight White Balance
Using Auto White Balance feature is not recommended for Night Photography as they will try to correct light to pure white and hence will devoid your pictures of the vivid colours in the scene. Daylight white balance will work fine; also do experiment with shade, cloudy and tungsten white balance settings. If you need more precise colour control set your white balance manually using the Kelvin scale.
 |
| Photo By Sp8254 |
4. Shoot in Aperture Priority Mode
The easiest shooting mode for Night Photography is the Aperture Priority mode. Set your camera to Aperture priority, select the desired Aperture (use narrow apertures like f/11,f/16 for depth of field) and you are ready to shoot, the camera will come up with the appropriate shutter speed based on the lighting available in the scene. Once you take a test shot, fine tune your exposure using Exposure Compensation.
 |
| Photo By Viamoi |
5. Use a Tripod
Night photography involves long exposures that could even extent up to multi minutes and keeping your camera steady through the exposure time is of utmost importance. Although you could make do by placing your camera on a level surface or so it is recommended to use a sturdy professional tripod , as it simply makes your job easier and much enjoyable.
 |
| Photo By Joe Penniston |
6. Use a Cable Release / Remote Trigger / Self Timer
Using a tripod is the first step in reducing shake, however the very act of pressing the trigger could induce minute disturbances that could cause camera shake and so it is highly recommended that you either use a cable release or a remote trigger to operate the shutter. If you do not have these then you could use the self timer feature of your camera instead.
 |
| Photo By Joe Penniston |
7. Enable Mirror Lock up
The mirror situated in front of the sensor which allows you to see through the viewfinder actually flips up when the shutter is pressed to enable light to fall on the sensor. This act of flipping the mirror up which is located so close to the sensor could cause camera shake. So if your camera has a mirror lock up function make sure you enable it when doing photography at night.
 |
| Photo By Joe Penniston |
8. Use Manual Focus
Auto focus systems require light to work efficiently, in low light situations they simply do not attain focus or takes a long time trying to attain it, so in night photography it is better to shift your focus mode to manual and focus manually.
 |
| Photo By Kah Wai Lin |
9. Shoot during Magic Hours
Night photography does not mean that you should shoot in the dead of the night. Actually the best time for night photography is during the magic hours (time after sunset and before the sky turns completely dark) your pictures will have the dramatic clouds, and vivid colours of the sky and also if there is any reflective elements like water it will reflect the colourful sky making it all the more beautiful.
 |
| Photo By Dave |
10. Use Histograms to Check Exposure
When doing night photography do not depend on your LCD preview to determine your exposure, the LCD is calibrated to work well in bright daylight and may often mislead you when viewing images at night. Best way is to use a combination of LCD preview and an analysis of your image’s Histogram to check for clipped highlights and shadows. It is to be remembered that in Night Photography it is normal for your histograms to display most of the values towards the left of the histogram.
 |
| Photo By Harmrbebergen |
In the next article we will discuss about Photography - How To Photograph - How to Photograph Fireworks
Post a Comment