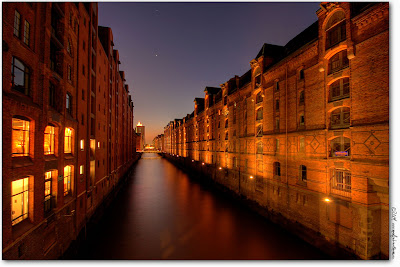
HDR is the acronym for High Dynamic Range and is the technique used by photographers to capture scenes which has extremes of contrast in them. Due to the limitations of our cameras they are not capable to capture images as our eye sees them. Our eyes have far more dynamic range than our digital cameras. HDR solves this issue by taking multiple shots of the same scene with different exposures (to capture details in both the highlights and shadows) and then combining them all together to create a single image in post processing using various image editing programs.
 |
| Photo By Bartku |
Without HDR it is impossible to capture a wide range of contrast in a single picture. HDR images handles high contrast situations really well by revealing details in both the highlight and shadow regions, they are also good at revealing texture.
The amount of contrast in a scene (how bright the brightest areas are and how dark the darkest areas are) is the important factor that decides the number of exposures needed to create an HDR image. If there is only limited contrast in a scene it is even possible to render and HDR image out of a single RAW file. Else Depending upon the contrast level the number of exposures needed could be anywhere from 2 to as much as 9 or more. Usually 7 exposures bracketed in 1 stop increments should be enough to cover most situations.
 |
| Photo By Skynet_04 |
Equipment Requirements for HDR Photography
- A digital camera – either a DSLR or a point and shoot which allows you to manually set exposures or one which allows exposure compensation settings.
- A sturdy tripod – although it is possible to shoot handled using automatic exposure bracketing and continuous shooting mode and then auto aligning in Photoshop; using a tripod greatly helps.
 |
| Photo By Joshunter |
Camera Settings for HDR Photography
- Shoot in RAW format
- White balance – manually set white balance or use any of the preset modes that match the scene like shade or cloudy, it is better not to use auto white balance.
- ISO sensitivity – set your camera to its lowest ISO settings to get clean images.
- Manual Mode – put your camera into fully manual mode if you are planning to manually bracket the shots.
- Aperture Priority (AV) Mode– if you are planning to use Automatic exposure bracketing use this mode. When using A.E.B it is better to use continuous shooting mode so as to shoot fast.
- Focus – Focus in the right area and then shift to manual focus so as not to change focus between exposures.
 |
| Photo By Aybalaostia |
Bracketing Your Shots
Bracketing is the starting point of HDR. While bracketing always remember that it is the shutterspeed that changes with every exposure and the aperture remains the same. For most situations you will need to capture the correct exposure that the camera meter calculates. Then capture exposures from -2ev to +2 ev.
So in effect you will have the dynamic range from -2ev, -1ev 0 +1 ev, +2 ev that makes it a total of 5 pictures. This should do for most scenes but if you find your particular subject or scene requires more feel free.
 |
| Photo By Petergorges |
Post Processing – Combining your shots
For creating HDR you have many software options but the most commonly used ones and the ones that give high quality output consistently are Photomatrix and Photoshop. Let us discuss the process of creating HDR with Adobe Photoshop.
- Open Adobe Photoshop
- Click File > Automate > Merge to HDR pro
- Click browse and select your files. If you have put all your raw images needed to make the HDR in one folder you could simple select the folder.
- Click ok and wait while photoshop automatically runs the script, aligning all pictures, selecting the correctly exposed areas from each, render a final out put etc.
- Once photoshop is done with your pictures you will get the dialogue box where in you could control, contrast, gamma, detail and a host of other settings to create your desired image.
 |
| Photo By Wennekath |
We will discuss about the various functions of the sliders in photomatrix and photoshop and their effect on the image in detail in another article. Remember, to do a good HDR shot you need to have good lighting to start with. Just because you know how to do HDR does not mean that you need to apply it to every image that you click. There are situations that demand HDR and situations in which using HDR actually spoils the shot. So use your judgement and be wise so as not to overdo this effect as overdoing HDR will cause the image to lose its sense of realism.
Post a Comment