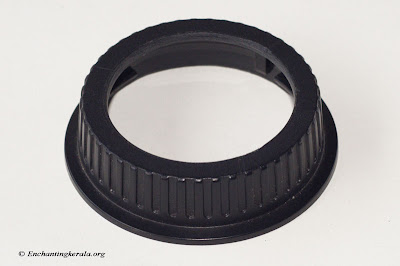
In one of our earlier posts we had discussed reverse mounting lenses for macro photography, however you may have noticed than when reverse mounted the exposed side of the lens is vulnerable to dust and in worst case scratches, here in this post we will discuss how to build a diy lens reversal cap which will even work as a UV filter for your reverse mounted lens.
Things you might need for this project
- One lens back cap
- One UV filter (preferably 52mm)
- Glue
Get a 52mm lens UV filter as the glass size will fit easily inside of the rear lens cap.
 |
| DIY Lens Reversal Cap / UV Filter for Macro Photography |
Disassemble the lens UV filter and take out the glass.
 |
| DIY Lens Reversal Cap / UV Filter for Macro Photography |
Cut out the middle portion of the rear lens cap, once you are satisfied with the finish i recommend washing it and drying before proceeding as it will remove any dust accumulated while grinding.
 |
| DIY Lens Reversal Cap / UV Filter for Macro Photography |
Take some quick setting glue and fix the UV filter glass on the inside of the rear lens cap.
 |
| DIY Lens Reversal Cap / UV Filter for Macro Photography |
Our diy lens reversal filter / cap is now ready for use.
 |
| DIY Lens Reversal Cap / UV Filter for Macro Photography |
Here is a picture of our diy lens reversal filter mounted on to my canon 50mm f 1.8 reverse mounted on my canon EOS 350D.
 |
| DIY Lens Reversal Cap / UV Filter for Macro Photography |
In the next article we will discuss about Photography - DIY - DIY Macro Ring Light for Macro Photography - Macro in a budget series part IV
Related Reading
- DIY Flash Diffuser for Macro Photography Made from Coco Cola Cans
- DIY Flash Extender for Macro Photography
- How to Make a DIY Ring Flash Video Tutorial
- DIY Extension Tube using PVC Pipe
- Turn Your Kit Lens into an Extreme Macro Lens with Full Aperture Control
Post a Comment